


Creating your own viking axe head can be a fascinating and rewarding project. The viking axe, with its characteristic shape and formidable strength, was an essential tool and weapon for the warriors of old. By following a few steps and having the right tools and materials, you can craft your very own viking axe head.
To start, you’ll need a suitable piece of steel that will serve as the foundation of your axe head. Look for a steel bar that is about 1-2 inches thick and at least 8 inches in length. This will ensure you have enough material to shape the axe head to your desired design. The steel should be of good quality, such as high carbon steel, to ensure durability and the ability to hold a sharp edge.
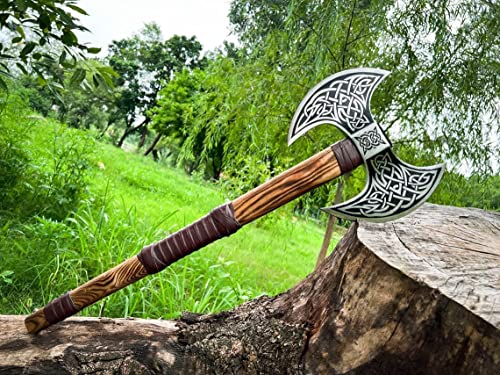
Next, you’ll need to mark out the shape of the axe head on the steel bar. This can be done using a permanent marker or by scoring the outline with a metal scribe. Be sure to include the desired shape of the cutting edge, as well as any decorative patterns or designs you wish to incorporate. Keep in mind that viking axe heads typically have a broad, curved cutting edge with a symmetrical design.
Once you have marked out the shape, it’s time to start removing the excess steel and shaping the axe head. This can be done using various tools, such as a hacksaw, angle grinder, or file. Start by roughing out the shape and then gradually refine it, paying close attention to the curves and angles. Take your time and make sure to constantly check the progress against your desired design.
After shaping the axe head, you can further refine the edges and smooth out any rough surfaces using a file or sandpaper. This will help create a clean and polished finish. Once you are satisfied with the shape and finish, it’s important to heat treat the axe head to ensure its strength and durability. This involves heating the steel to a specific temperature and then rapidly cooling it to harden the metal.
Lastly, it’s time to add the finishing touches to your viking axe head. You can choose to polish the metal for a shiny finish or leave it with a more rustic appearance. Additionally, you can carve or engrave decorative patterns or symbols onto the axe head for a personalized touch. Finally, attach the axe head to a suitable handle, securely fastening it with epoxy or pins.
By following these steps and putting in some time and effort, you can create a beautiful and functional viking axe head that will be a testament to your craftsmanship and appreciation for the historical art of axe making.

Choosing the Right Materials for a Viking Axe Head
When it comes to making a Viking axe head, choosing the right materials is crucial for both the functionality and authenticity of the weapon. In the ancient times, the Vikings used robust and durable materials to craft their axe heads, ensuring they could withstand the challenges of battle.
High Carbon Steel
One of the most popular choices for a Viking axe head material is high carbon steel. This material offers exceptional strength and durability, making it suitable for heavy-duty tasks like chopping wood or battle. High carbon steel can hold a sharp edge for a long time, allowing for better performance and precision during use.
Iron
Iron is another commonly used material for Viking axe heads. Although not as strong as high carbon steel, iron offers its own advantages. It is easier to shape and work with, making it a popular choice for those who prefer to forge their own axe heads. Additionally, iron can provide a more authentic look and feel for those aiming for historical accuracy.
Pattern-Welded Steel
For those looking for a combination of strength and beauty, pattern-welded steel is an excellent choice. This material is made by layering and twisting different types of steel, resulting in a visually striking pattern. Pattern-welded steel axe heads not only offer impressive performance but also serve as works of art, reflecting the craftsmanship and versatility of the Vikings.
Ultimately, the choice of material for a Viking axe head depends on personal preference, intended use, and desired level of authenticity. Whether you opt for high carbon steel, iron, or pattern-welded steel, selecting a suitable material will ensure your Viking axe head is both functional and visually appealing.
Step-by-Step Guide on Making a Viking Axe Head
Creating a Viking axe head can be a challenging yet rewarding experience. Follow this step-by-step guide to make your own authentic and powerful Viking weapon.
Materials You Will Need
Before you begin, gather the following materials:
| Material | Quantity |
| High carbon steel | 1 piece |
| Forge | 1 |
| Hammer | 1 |
| Anvil | 1 |
| Grinder | 1 |
| Eye and ear protection | As needed |
Step 1: Heating and Forging
Begin by heating the high carbon steel in the forge until it reaches a bright orange color. Once heated, carefully remove it from the forge and place it on the anvil. Use the hammer to start shaping the steel into the desired axe head shape. Repeat this process until the axe head begins to take form.
Step 2: Tempering
After shaping the axe head, it’s time to temper it for strength. Heat the head in the forge again, but this time bring it to a dull red color. Once heated, quickly quench it in water to cool it down rapidly. This process will increase the hardness and durability of the axe head.
Step 3: Grinding and Polishing
Using a grinder, carefully remove any rough edges and imperfections from the axe head. Start with a coarse grinding wheel and gradually switch to finer grits for a smooth finish. Pay attention to the blade edge and ensure it is sharpened properly. Once grinding is complete, polish the axe head to enhance its appearance.
Step 4: Handle Attachment
Once the axe head is complete, it’s time to attach the handle. Select a sturdy and durable wooden handle that fits the dimensions of the eye of the axe head. Insert the handle into the eye firmly and secure it with wooden or metal wedges. Make sure the handle is tightly fastened to ensure a solid grip.
Step 5: Finishing Touches
Inspect the axe head for any remaining imperfections or blemishes. Use sandpaper or a file to smooth out any rough spots. Apply a protective coating, such as linseed oil or varnish, to prevent rust and enhance longevity. Finally, give your Viking axe head a final polish to make it shine.
By following these steps, you can create a beautifully crafted Viking axe head that is not only an impressive weapon but also a testament to the skilled craftsmanship of the Vikings.
Techniques for Shaping and Hardening the Axe Head
Once you have obtained a suitable blank for your viking axe head, the next step is to shape it properly. Shaping the axe head involves using various techniques to achieve the desired design and balance.
Forging: Traditional viking axe heads were forged by heating the blank in a fire and then shaping it using a hammer and anvil. This process requires skill and precision to ensure the axe head has the correct shape and thickness.
Grinding: After the initial shaping, the axe head is smoothed and refined using grinding tools. This helps remove any rough edges and imperfections, resulting in a more polished and streamlined appearance.
Hardening: To make the axe head strong and durable, it must undergo a hardening process. This is typically done through heat treating, where the axe head is heated to a specific temperature and then quenched in water or oil. The rapid cooling during quenching helps to increase the hardness of the metal.
| Shaping Technique | Description |
|---|---|
| Fullering | This technique involves creating grooves or channels along the blade to reduce weight and improve balance. |
| Beveling | A bevel is created on the edge of the axe head to sharpen it for cutting and chopping. |
| Drifting | Drifting is used to create the eye of the axe, where the handle will be inserted. This involves punching a hole in the blank and then shaping it to the desired size and shape. |
| Annealing | After shaping and hardening, the axe head may be annealed to relieve any stress and improve its overall strength. |
Once the shaping and hardening processes are complete, the viking axe head is ready for the final steps, which involve attaching the handle and giving the axe a sharp edge. These techniques require their own set of skills and tools, and should be done carefully to ensure a functional and well-crafted axe.
Finishing Touches and Maintenance for Your Viking Axe Head
Once you have crafted your Viking axe head, it’s important to give it the finishing touches necessary to complete the look and ensure its longevity. Proper maintenance is also crucial to keep your axe head in top condition. Here are some tips for adding those final details and caring for your Viking axe head:
Final Polishing
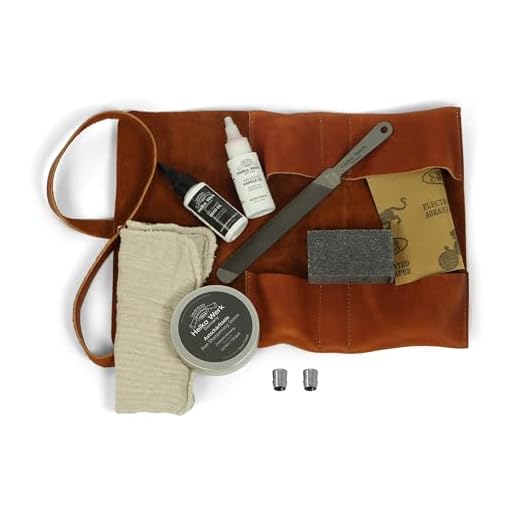
After you have shaped and sharpened your axe head, you can give it a final polishing to enhance its appearance and protect it from rust. Use a fine-grit sandpaper or a metal file to remove any rough edges or imperfections. Next, apply a metal polish or wax using a soft cloth. This will give your axe head a beautiful sheen and provide a layer of protection against corrosion.

Handle Attachment
When it comes to attaching the handle to your Viking axe head, there are a few options to consider. Traditionally, Viking axes were affixed to the handle with wooden wedges and glue. This method provides a strong and secure connection. However, modern alternatives such as epoxy resin or metal fasteners can also be used depending on personal preference. Whichever method you choose, make sure the handle is securely attached to the axe head to ensure safe and effective use.
Regular Cleaning
Regular cleaning is important to remove any dirt, debris, or moisture that may accumulate on your Viking axe head. Use a soft cloth or brush to gently wipe away any particles, and make sure to dry it thoroughly after each use. If you notice any signs of rust, carefully remove it using a rust remover or a mixture of vinegar and water. Remember to reapply a protective coating, such as wax or oil, to prevent future corrosion.
Additionally, it’s essential to store your Viking axe head in a dry and secure location when not in use. This will help prevent moisture and humidity from causing damage or rusting.
By following these finishing touches and maintenance tips, you can ensure that your Viking axe head remains in excellent condition and ready for use in historical reenactments, woodworking, or any other activity where a Viking axe may come in handy.