


Are you an outdoor enthusiast who loves camping, hiking, or surviving in the wild? If so, then you know the importance of having the right tools with you. One essential tool for any outdoor adventure is an axe. However, standard axes may not always meet your specific needs and preferences. That’s where axe modification comes in.
Modifying an axe allows you to customize it according to your requirements. Whether you want to make it more lightweight, increase its cutting power, or add additional features, modifying an axe can take your outdoor experience to the next level. In this article, we will guide you through the steps to modify an axe and help you unleash its full potential.
Before we begin, it’s important to note that modifying an axe requires some knowledge of tools and woodworking. If you’re not confident in your skills, it’s always a good idea to seek professional assistance.
Let’s explore the different aspects of axe modification, including choosing the right axe, selecting the modifications, and executing them properly. By the end of this article, you’ll have the knowledge and confidence to transform your ordinary axe into a customized tool that perfectly suits your needs.
Tools needed to modify an axe
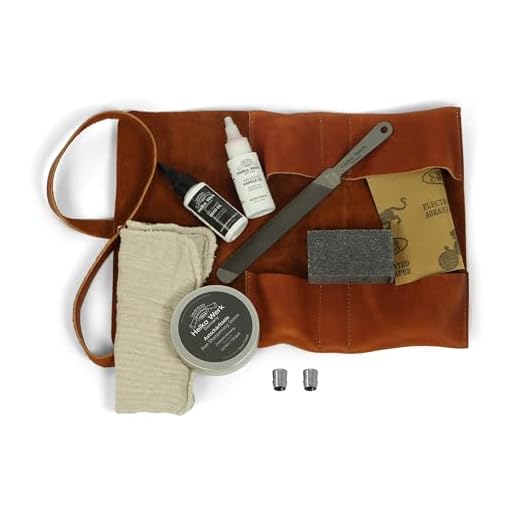
Modifying an axe requires a few essential tools to ensure the job is done correctly. Here are some tools you will need:

Axe
The primary tool you’ll be modifying is the axe itself. Make sure you have a sturdy and reliable axe that is suitable for modification. Consider the weight, handle length, and overall quality of the axe.
Sharpening stone
To improve the cutting ability of your axe, you’ll need a sharpening stone. Choose a high-quality sharpening stone that is appropriate for axes. It should be able to remove any nicks or dullness from the blade and create a sharp edge.
File
A file is necessary to reshape the cutting edge of the axe. It helps remove any irregularities and create a more efficient cutting surface. Use a file with appropriate coarseness for your needs.
Sanding paper
Sanding paper is useful for smoothing out any rough surfaces on the axe handle after modification. It helps create a better grip and reduces the chances of splinters.
Clamps
Clamps are essential for holding the axe securely in place while you work on it. They prevent any movement that could lead to accidents and ensure precise modification.
Protective gear
Don’t forget to protect yourself during the modification process. Safety goggles, gloves, and a sturdy apron are necessary to keep you safe from flying debris and any potential accidents.
| Tool | Purpose |
|---|---|
| Axe | The tool being modified |
| Sharpening stone | To sharpen the blade |
| File | To reshape the cutting edge |
| Sanding paper | To smooth out the handle |
| Clamps | To hold the axe securely |
| Protective gear | To ensure safety during modification |
Choosing the right axe handle for modification
When it comes to modifying an axe, selecting the right handle is crucial for the overall performance and durability of the tool. The handle plays a significant role in providing a secure grip, absorbing shock, and transmitting force efficiently.
When choosing an axe handle for modification, consider the following factors:
Material: The material of the handle plays a vital role in determining its strength, weight, and durability. Common materials include wood, fiberglass, and metal. Wood handles are traditional and offer excellent shock absorption, while fiberglass handles are lightweight and resistant to weathering. Metal handles are more durable but can be heavier.
Length: The length of the handle determines the swing arc and impact force of the axe. Longer handles allow for more powerful swings but may be more challenging to control. Shorter handles offer better control but may sacrifice power. Consider your intended use and personal preference when selecting the length of the handle.
Grip: The handle’s grip is critical for safe and effective use. Look for handles with ergonomic shapes that provide a comfortable and secure grip. Consider the texture and shape of the handle to ensure it fits your hand well and minimizes slipping during use.
Modification compatibility: Some axe handles are designed specifically for modification, with pre-drilled holes or other features. These handles can make the modification process easier and more precise. If you plan on making significant modifications to your axe, consider choosing a handle that is compatible with your intended modifications.
Price: Finally, consider your budget when selecting an axe handle for modification. Prices can vary depending on the material, brand, and features of the handle. While it’s important to invest in a high-quality handle, it’s also essential to find one that fits within your budget.
By considering these factors and choosing the right axe handle for modification, you can ensure that your modified axe will be both functional and durable, providing you with a tool that meets your specific needs and preferences.
Removing the old axe head
Before you can modify your axe, you will need to remove the old axe head. Here are the steps you can follow:
- Secure the axe in a vise or clamp to prevent it from moving during the removal process.
- Inspect the axe head for any screws, bolts, or pins that may be holding it in place. If there are any, use the appropriate tools to remove them.
- If the axe head is held in place with adhesive or epoxy, apply heat using a heat gun or blowtorch to loosen the bond. Be careful not to overheat the axe handle or cause any damage to it.
- Once any fasteners or adhesive have been removed, use a wooden or rubber mallet to gently tap the axe head, freeing it from the handle. Tap the head from different angles to evenly distribute the force.
- If the axe head is still stuck, you can use a penetrating oil such as WD-40 to help loosen it. Apply the oil to the joint between the head and handle and let it sit for a few minutes before attempting to remove the head again.
- Continue tapping and applying oil as needed until the axe head is successfully removed from the handle.
Once you have successfully removed the old axe head, you can proceed with modifying or replacing it to suit your needs.
Preparing the axe handle for modification
Before you can start modifying your axe, it is important to properly prepare the handle. This will ensure that the modifications you make are secure and will not cause any damage to the axe. Follow these steps to prepare the axe handle:
Clean the handle
Begin by cleaning the handle of the axe. Use a damp cloth or sponge to remove any dirt or debris that may be on the surface. This will help the modifications adhere properly and ensure a clean finished product.
Sand the handle
Next, take a piece of sandpaper with a medium grit and sand the handle of the axe. This will roughen up the surface and create a better bonding surface for any modifications. Be sure to sand the entire handle, including any curves or angles, to ensure an even finish.
After sanding, wipe away any excess dust with a clean, dry cloth.
Apply a coat of primer
Once the handle is clean and sanded, it is important to apply a coat of primer. This will help the modifications adhere better and create a stronger bond. Choose a primer that is suitable for the material of the axe handle and apply a thin, even coat. Allow the primer to dry completely before moving on to the next step.
| TIP: | It is recommended to use a spray-on primer for easier application and a more even finish. |
By properly preparing the axe handle, you will ensure that any modifications you make are secure and long-lasting. Take your time during this stage to achieve the best results.
Modifying the axe head
Modifying the axe head is an important step in customizing your axe for specific tasks. Here are some key considerations when modifying the axe head:
1. Sharpening the blade
One of the first modifications you might want to make is sharpening the blade of the axe head. A sharp blade will improve the efficiency and effectiveness of your axe when cutting or chopping. To sharpen the blade, use a file or grindstone and carefully work on the edge of the blade to remove any dullness or imperfections.
2. Adjusting the bevel angle
The bevel angle determines the cutting performance of the axe. Modifying the bevel angle can help optimize the axe for specific tasks. A lower bevel angle, typically around 25-30 degrees, is ideal for cutting through softwood like pine. A higher bevel angle, around 35-40 degrees, is better for hardwood and more heavy-duty chopping tasks. To adjust the bevel angle, use a bench grinder or file and carefully reshape the bevel to the desired angle.
Remember to always wear safety goggles and gloves when modifying the axe head. Take the necessary precautions to ensure your safety and the longevity of your axe. Happy modifying!
Attaching the modified axe head to the handle
Once you have finished modifying the axe head to your desired specifications, it is time to attach it to the handle to create a functional and efficient tool. Follow these steps to securely attach the modified axe head:
Step 1: Prepare the handle
Start by ensuring that the handle has been properly cleaned and sanded to create a smooth surface. This will allow for a better grip and prevent any slippage when using the axe. You can also apply a sealant or protective finish to prolong the lifespan of the handle.
Step 2: Align the axe head
Place the modified axe head on top of the handle, aligning it so that the cutting edge is parallel to the handle. Make sure to position it in a way that feels comfortable for you to wield. Use a pencil or marker to mark the location of the screw holes on the handle.
Step 3: Drill pilot holes
Using a drill and a drill bit that matches the size of the screw holes on the axe head, carefully drill pilot holes into the marked locations on the handle. Be sure to drill straight and deep enough to allow the screws to securely fasten the axe head to the handle.

Step 4: Attach the axe head
Line up the screw holes on the axe head with the pilot holes on the handle. Insert the screws into the holes and use a screwdriver to tighten them, ensuring a firm and secure connection. Be careful not to overtighten the screws, as this may damage the handle or axe head.
Once the axe head is securely attached to the handle, give it a few test swings to ensure that it feels balanced and comfortable to use. If necessary, make any adjustments or tighten the screws further to achieve the desired result.
Remember to always exercise caution when using a modified axe. Wear appropriate protective gear and adhere to safety guidelines to prevent any accidents or injuries.


