If you are an avid outdoorsman or a fan of woodworking, you may find yourself in need of replacing a wooden axe handle at some point. Over time, axe handles can become worn, cracked, or broken, making them unsafe and ineffective to use. Fortunately, with a few basic tools and some simple instructions, replacing a wooden axe handle can be a relatively straightforward task that you can easily do yourself.
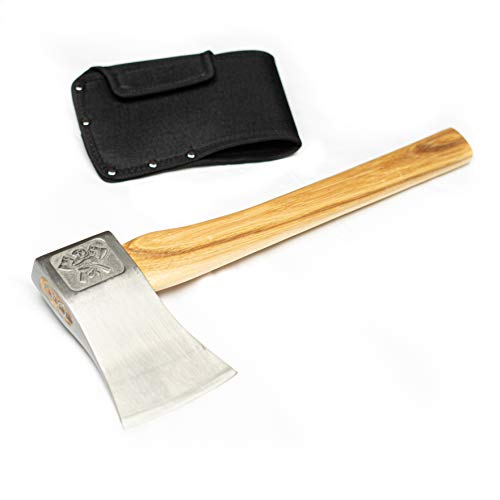
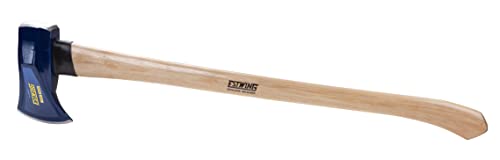
Firstly, it is important to select a suitable replacement handle for your axe. Axes come in various sizes and weights, so make sure to choose a handle that matches the specifications of your axe head. The handle should also be made of durable wood, such as hickory or ash, which can withstand the impact and pressure of chopping. Additionally, consider the length and grip of the handle, as these factors can affect the balance and comfort of using the axe.
Once you have chosen the appropriate handle, you can begin the process of replacing the old one. Start by removing the axe head from the old handle. This can usually be done by driving out the wedge or metal pins that hold the head in place. Once the head is detached, carefully inspect it for any damage or wear and clean it if necessary. Next, prepare the new handle by sanding down any rough edges or imperfections. You can also apply a protective finish, such as linseed oil, to help seal and strengthen the wood.
Why replace a wooden axe handle?
A wooden axe handle can become damaged or worn out over time, especially with regular use. There are several reasons why you might need to replace a wooden axe handle:
- Damage: If the wooden handle of your axe has cracks, splinters, or is broken, it can affect the performance and safety of the tool.
- Wear and tear: Continuous use of the axe can lead to wear and tear on the wooden handle, making it less effective and comfortable to use.
- Loose or damaged head: If the head of the axe is loose or damaged, it can be difficult to use effectively and can pose a safety risk.
- Personal preference: Some people may prefer the feel or performance of a different type of handle material, such as fiberglass or metal, and choose to replace a wooden handle for this reason.
Regardless of the reason, replacing a wooden axe handle is a relatively simple process that can be done with a few basic tools and some patience. By replacing a worn or damaged handle, you can ensure the longevity and effectiveness of your axe for years to come.

When to replace a wooden axe handle?
Knowing when to replace a wooden axe handle is essential for maintaining safety and effectiveness while using the tool. Regular inspection and awareness of certain signs can help determine if a replacement is necessary.
1. Cracks and splits
One of the most significant signs that a wooden axe handle needs replacement is the presence of cracks and splits. Over time, the wood may deteriorate due to exposure to moisture, sunlight, and general wear and tear. If you notice any visible cracking or splitting, it is time to replace the handle.
2. Deformation or warping
Another indication that a wooden axe handle needs replacing is if it becomes deformed or warped. This can happen due to excessive use, improper storage, or exposure to extreme temperatures. A deformed or warped handle can affect the balance and efficiency of the axe, making it necessary to replace it.
Note: Minor superficial cracks and cosmetic damages can often be repaired, but it is best to consult a professional or experienced individual to assess the severity and feasibility of the repair.
Replacing a wooden axe handle is an important step in maintaining the tool’s functionality and preventing accidents. It is essential to always prioritize safety and to regularly inspect the axe handle for signs of damage or wear. By doing so, you can ensure the optimal performance and longevity of your axe.

Steps to Replace a Wooden Axe Handle
Replacing the handle of a wooden axe can be a simple process if you have the right tools and follow the necessary steps. Here is a step-by-step guide on how to replace a wooden axe handle:
Step 1: Gather the necessary materials
Before you begin, make sure you have all the materials you’ll need for this project. This includes a new wooden handle, a saw, sandpaper, a hammer, and nails.
Step 2: Remove the old handle
Start by removing the old handle from the axe head. Use a hammer to tap the end of the axe handle firmly until it loosens from the head. Once the handle is loose, pull it out of the axe head.

Step 3: Measure and cut the new handle
Take your new wooden handle and measure it against the old handle. Use a saw to cut the new handle to the same length as the old one. Make sure to cut the handle straight and evenly.
Step 4: Shape the new handle
Using sandpaper or a file, smooth out any rough edges or imperfections on the new handle. Be sure to sand it down evenly and make it comfortable to hold.
Step 5: Insert the new handle

Insert the new handle into the axe head, making sure it fits snugly. You may need to use a hammer to tap it in firmly. Keep tapping until the handle is fully inserted and secure in the axe head.
Step 6: Secure the new handle
Once the new handle is in place, secure it by hammering nails through the pre-drilled holes in the axe head and into the handle. Make sure the nails go all the way through the handle and into the axe head for a tight connection.
Step 7: Finishing touches
Inspect the new handle to make sure it is securely attached to the axe head. Give it a few test swings to ensure it feels comfortable and solid. If necessary, make any final adjustments or sand down any rough spots.
Now that you have replaced the wooden handle on your axe, you are ready to get back to work with a reliable and sturdy tool.
Gather necessary tools and materials
Before you begin replacing a wooden axe handle, it’s important to gather all the necessary tools and materials. Having everything in place will make the process smoother and more efficient.
Tools:
- Axe
- Handsaw
- Chisel
- Vice grip or clamp
- Drill with various drill bits
- Hammer
- File or sandpaper
- Measuring tape
- Pencil or marker
- Safety goggles
- Gloves
Materials:
For replacing a wooden axe handle, you will need the following materials:
- New wooden axe handle
- Rivet or screw
- Epoxy adhesive
- Wood glue
Make sure all the tools are in good working condition and the materials are of high quality. This will ensure a durable and long-lasting replacement for your wooden axe handle.
Remove the old axe handle
Replacing a wooden axe handle begins with removing the old handle. This process can require some effort, but with the right tools and technique, it can be done effectively.
Here are the steps to follow:
- Start by placing your axe in a vise grip or securing it in another sturdy holding tool. This will ensure that the axe is stable during the handle removal process.
- Use a chisel and a wooden mallet to carefully remove any wedges or pins that are securing the old handle. Insert the chisel into the wedges or pins and gently tap the handle to loosen and remove them. Be cautious not to damage the axe head during this step.
- Once the wedges or pins are removed, grasp the axe head firmly with one hand and the handle with the other. Twist and pull the handle in opposite directions to loosen it from the axe head.
- If the handle is still not separating from the axe head, you can use a heat source such as a heat gun or torch to heat the area where the handle meets the head. The heat will expand the wood and make it easier to remove.
- Continue twisting and pulling the handle until it is completely removed from the axe head. Inspect the axe head for any remaining debris or bits of wood that may need to be removed before installing the new handle.
- Once the old handle is removed, clean the axe head using steel wool or a wire brush to remove any rust or residue. This will ensure a clean surface for attaching the new handle.
Removing the old axe handle is an important first step in the process of replacing it. Take your time and be cautious during this step to avoid any damage to the axe head or injury to yourself.
Prepare the new axe handle
Before replacing the wooden axe handle, you will need to prepare the new handle:
- Choose a high-quality wooden handle that is suitable for your axe. Look for a handle that is the correct length and thickness for your particular axe.
- Inspect the new handle for any defects or cracks. Ensure that it is smooth and free from any signs of damage.
- Measure and mark the appropriate length for your handle by using the old handle as a guide. You can use a pencil or marker to make the marks on the new handle.
- Use a saw to cut the new handle to the desired length. Take your time and make sure to cut the handle straight and even.
- Sand down the cut end of the handle to ensure that it is smooth and will fit properly into the axe head.
- If necessary, shape the handle to match the contours of the axe head. Use a rasp or file to carefully shape the handle so that it fits snugly into the axe head.
- Apply a protective finish to the handle to help prevent it from cracking or splitting in the future. You can use linseed oil or a wood sealant to protect the wood.
By properly preparing the new handle, you can ensure that it will fit correctly and provide a secure grip for your axe.