


Reshafting an axe is an essential skill for any outdoors enthusiast or professional woodsman. Over time, the wooden handle of an axe can become worn, damaged, or even broken, compromising the efficiency and safety of the tool. By reshafting the axe, you can restore its functionality and extend its lifespan.
In this guide, we will walk you through the steps of reshafting an axe, from choosing the right replacement handle to properly securing and finishing the assembly.
Before you begin, it is important to gather all the necessary tools and materials. You will need a replacement handle that matches the size and shape of the original handle, a saw or axe to remove the old handle, sandpaper or a file to shape the replacement handle, epoxy adhesive, and clamps or rope to secure the new handle during the drying process.
The first step in reshafting an axe is to remove the old handle. This can be done by cutting off the old handle close to the axe head, using a saw or the blade of another axe. Be careful not to damage the axe head during this process. Once the old handle is removed, clean any debris or adhesive residue from the eye of the axe head.
Why Reshafting an Axe is Important: Step-by-Step Guide
Reshafting an axe is an important maintenance task that ensures the axe remains functional and safe to use. Over time, the shaft of an axe can become worn, splintered, or damaged, making it necessary to replace it. If not addressed, a damaged shaft can compromise the functionality and safety of the axe.
The Benefits of Reshafting
There are several benefits to reshafting an axe:
- Improved Durability: By replacing a damaged shaft with a new one, you ensure that your axe remains durable and reliable.
- Better Performance: A new shaft can enhance the performance of your axe, allowing for more accurate and efficient chopping.
- Increased Safety: Cracks or splinters in the shaft can result in unpredictable behavior when using the axe, which can lead to accidents. Reshafting eliminates these risks.
- Extended Lifespan: Regular reshafting can help prolong the lifespan of your axe, allowing you to continue using it for years to come.
Step-by-Step Guide to Reshafting an Axe
Follow these steps to reshaft your axe:
| Step 1: | Choose a suitable replacement shaft. Ensure that it matches the dimensions and material of the original shaft. |
| Step 2: | Remove the old shaft by using a hammer and chisel to carefully cut away the wood around the metal head. |
| Step 3: | Clean the metal head and ensure there are no remaining wood fragments or debris. |
| Step 4: | Apply a thin layer of epoxy adhesive to the top of the replacement shaft. |
| Step 5: | Insert the replacement shaft into the metal head, ensuring a tight fit. |
| Step 6: | Allow the epoxy adhesive to cure according to the manufacturer’s instructions. |
| Step 7: | Once the adhesive has fully cured, test the axe by performing a few light strikes to ensure stability. |
Reshafting an axe may require some skill and caution, especially when working with sharp tools and adhesives. If you’re unsure about the process, it’s recommended to seek guidance from a professional or experienced individual.
Understanding the Importance of Reshafting an Axe
Reshafting an axe is a vital maintenance task that should not be neglected. The axe shaft, also known as the handle, plays a crucial role in the performance and durability of the axe. Over time, the shaft can wear out, become loose, or even break, leading to a diminished and unsafe chopping experience.
Enhanced Performance
Reshafting an axe can significantly improve its performance. A worn-out or damaged shaft can negatively impact the power and control you have while using the axe. By replacing the shaft, you can restore the balance and stability of the axe, allowing for more precise and efficient chopping.
Improved Safety
A loose or cracked axe shaft poses a serious safety risk. When the shaft is compromised, the axe head may wobble, making it difficult to control and increasing the chances of accidents. By reshafting the axe, you ensure that the handle is securely attached to the head, reducing the risk of injury during use.
Furthermore, a new shaft can prevent splinters and cracks from forming, ensuring a smooth and comfortable grip. This minimizes the risk of blisters and hand injuries caused by a worn-out handle.
Longevity
Reshafting an axe can significantly extend its lifespan. By replacing the old, worn-out shaft with a new one, you can restore the axe to its original strength and durability. This reduces the likelihood of the axe head becoming loose or the shaft breaking, which can render the axe unusable or lead to costly repairs.
Regularly reshafting your axe can also prevent further damage to the head and overall structure of the tool. By addressing shaft issues promptly, you can avoid more extensive repairs or replacements in the future.
Overall, understanding the importance of reshafting an axe is crucial for maintaining its performance, safety, and longevity. By regularly inspecting the shaft and replacing it when necessary, you can ensure that your axe remains a reliable and effective tool for years to come.
Gathering the Necessary Tools and Materials
Before you begin the process of reshafting an axe, it’s important to gather all the necessary tools and materials. Having everything on hand will make the process smoother and more efficient.
Tools:
- Axe head vise or clamp
- Axe handle puller
- Hammer
- Chisel
- Sandpaper or file
- Drill or screwdriver
- Hacksaw or handsaw
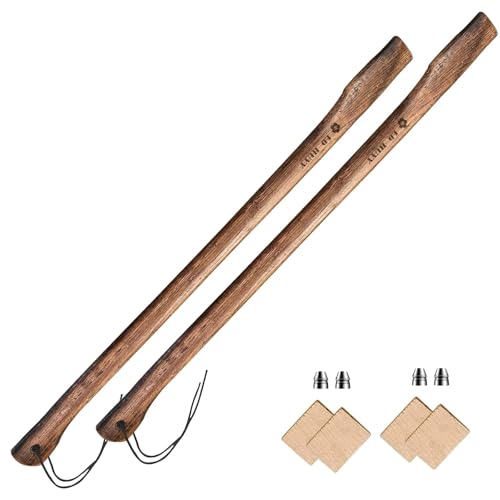
- New axe handle
- Epoxy or wood glue
- Axe wedge
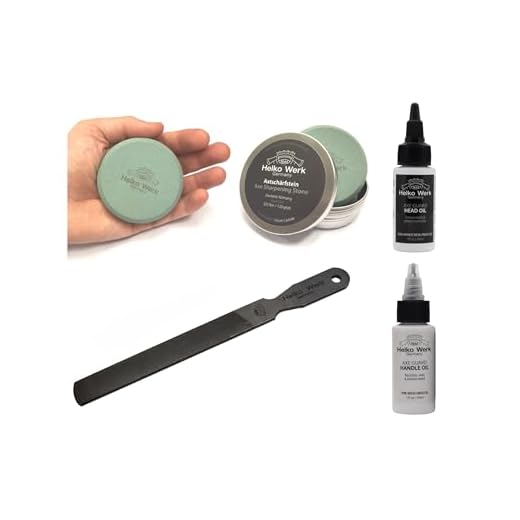
- Axe oil or varnish
- Protective gloves
Materials:
Make sure to have a sturdy workbench or table where you can safely secure the axe head. This will provide a stable surface for working and prevent any accidents.
Additionally, it’s a good idea to have protective goggles and a dust mask, especially when removing the old handle or sanding the new handle. This will protect your eyes and lungs from any debris or dust that may be generated during the process.
By gathering all the necessary tools and materials beforehand, you’ll be well-prepared to tackle the task of reshafting an axe and ensure its longevity and usability.
Removing the Old Shaft from the Axe Head
Before you can reshaft your axe, you’ll need to remove the old shaft from the axe head. Here are the steps to follow:
1. Secure the axe head
Start by finding a workbench or other sturdy surface to secure your axe head. You want to make sure it won’t move around while you’re working on it.
2. Remove any wedges or pins
Check your axe head for any wedges or pins that may be holding the old shaft in place. Use pliers or a drift punch to remove them carefully.
3. Apply heat
If the old shaft is stuck in the axe head, you may need to apply heat to loosen it. Use a heat gun or propane torch to heat the area around the eye of the axe head. Be careful not to overheat the metal.
4. Tap out the old shaft
Next, use a wooden dowel or a metal drift punch and a hammer to tap out the old shaft. Gently tap around the edge of the eye, gradually working the shaft out of the head. Be patient and work slowly to avoid damaging the axe head.
5. Clean the axe head
Once the old shaft is removed, take the time to clean the axe head. Use a wire brush or steel wool to remove any rust or debris. This will help ensure a smooth fit when you install the new shaft.
Remember to wear safety goggles and gloves while performing these steps to protect yourself from potential injury.
Choosing a New Shaft for your Axe
When it comes to reshafting an axe, choosing a suitable replacement shaft is crucial to ensure the axe performs optimally. The right shaft will provide the necessary strength, stability, and balance for efficient cutting and chopping. Here are some factors to consider when selecting a new shaft for your axe:
Type of Wood
The type of wood used for the shaft can greatly impact the performance of your axe. Common options include hickory, ash, and fiberglass. Hickory is known for its durability and strength, making it a popular choice for axes. Ash is also a reliable option, offering flexibility and shock absorption. Fiberglass shafts provide additional strength and are resistant to weathering.
Length and Diameter
The length and diameter of the shaft should be compatible with the axe head and your personal preference. A longer shaft provides more leverage and is ideal for heavy-duty chopping tasks. However, it may be less maneuverable. The diameter should be comfortable to grip and allow for efficient handling of the axe.
Weight
The weight of the shaft will affect the overall balance of the axe. A lighter shaft can make the axe easier to handle and control, but it may reduce the power of each swing. Consider the intended use of the axe and your own physical strength when selecting the weight of the new shaft.
It is recommended to consult with a knowledgeable professional or refer to the manufacturer’s guidelines when choosing a new shaft for your axe. Properly selecting and installing a high-quality replacement shaft will ensure your axe remains a reliable tool for years to come.
Attaching the New Shaft to the Axe Head
Once you have prepared the new shaft and removed the old one, it is time to attach the new shaft to the axe head. Follow these steps to correctly attach the new shaft:
Step 1: Clean the Axe Head
Before attaching the new shaft, it is important to clean the axe head thoroughly. Use a wire brush or sandpaper to remove any rust, dirt, or debris from the area where the new shaft will be attached. Clean both the inside of the eye and the surface of the axe head to ensure a secure fit.
Step 2: Apply Epoxy Resin
Apply a generous amount of epoxy resin to the inside of the axe head’s eye. Ensure that the resin covers the entire inner surface of the eye. This will help create a strong bond between the new shaft and the axe head.
Step 3: Insert the New Shaft
Insert the prepared end of the new shaft into the eye of the axe head. Ensure that the shaft is centered and fits snugly into the eye. Use a twisting motion as you insert the shaft to help distribute the epoxy resin evenly and create a solid connection.
Note: It is essential to apply even pressure and avoid using excessive force, as it may cause the new shaft to split or crack.
Step 4: Secure with Wedges
To provide additional strength and stability, insert wooden wedges into the top of the eye. Gently tap the wedges into place until they sit firmly against the new shaft. Make sure the wedges are evenly spaced and that they do not protrude from the eye’s top surface.
Step 5: Allow Time for the Epoxy Resin to Cure
Once the shaft is securely attached and the wedges are in place, allow the epoxy resin to cure according to the manufacturer’s instructions. This typically takes several hours or even overnight. Avoid using the axe until the epoxy resin has fully cured to ensure a strong and durable bond.

Following these steps will help you successfully attach the new shaft to your axe head. Remember to exercise caution and take your time to ensure a proper and secure attachment.
Testing and Maintaining your Reshafted Axe
After reshafting your axe, it’s important to test it to ensure it is safe and functions properly. Additionally, regular maintenance will help prolong the life of your newly reshafted axe. Here are some tips on how to test and maintain your axe:
1. Inspection
Before using your reshafted axe, carefully inspect the new shaft and head for any defects or damage. Look for cracks, splintering, or loose connections. If you notice any issues, make the necessary repairs or contact a professional for assistance.
2. Balance
Check the balance of your axe by holding it near the head and at the end of the shaft. The axe should feel evenly balanced, with neither the head nor the handle feeling too heavy. Adjustments can be made by adding or removing material from the head or handle as necessary.
3. Sharpness
A sharp axe is essential for effective cutting. Use a sharpening stone or file to sharpen the blade of your axe. Start from the inner side of the blade and work your way outward, maintaining a consistent angle. Test the sharpness by making a few light cuts. If the blade easily bites into the wood, it is sharp; otherwise, continue sharpening.
4. Handle Grip
Ensure that the grip on the handle is secure and comfortable. Reapply any grip tape or rubber coating as needed. A good grip is important for control and safety during use.
5. Protective Coating
Apply a protective coating to the wooden handle to prevent moisture damage and increase its lifespan. Tung oil or linseed oil can be applied with a cloth or brush. Allow the oil to soak in for a few hours before wiping off any excess. Repeat this process periodically to maintain the handle’s durability.
6. Storage
Proper storage is crucial for maintaining the condition of your axe. Store it in a cool, dry place to prevent rust and damage. Hang the axe on a peg or mount it on a wall to keep it off the ground and away from other tools.
By following these testing and maintenance tips, you can ensure that your newly reshafted axe remains in optimal condition, providing you with years of reliable use.