
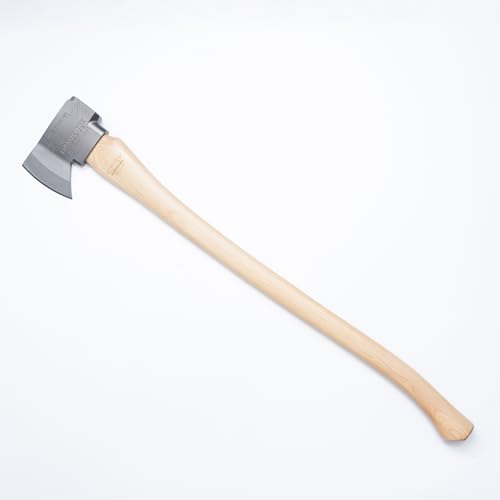


Restoring old axe heads can be a satisfying and rewarding project for any DIY enthusiast or outdoor enthusiast. Whether you found an old axe at a flea market or have a beloved axe that has seen better days, restoring the axe head can bring new life to this essential tool. In this article, we will guide you through the steps to restore an axe head and bring back its sharp edge and functional beauty.
Step 1: Safety First
Before you begin any restoration project, it is important to prioritize safety. Make sure to wear protective gloves, safety goggles, and a sturdy work apron to avoid any accidents or injuries. You may also need to use tools such as a hammer, chisel, and files, so be sure to handle them with care and follow proper safety precautions.
Step 2: Cleaning the Axe Head
The first step in restoring an axe head is to remove any rust, dirt, or debris that may have accumulated over time. Start by using a wire brush to scrub the axe head and remove loose rust and dirt. For stubborn rust or dirt, you can soak the axe head in a rust-removal solution or vinegar overnight. After soaking, use a scrub brush to remove the remaining debris, and rinse the axe head thoroughly.

Step 3: Removing Rust
If there are still rust spots on the axe head after cleaning, you can use sandpaper or a wire wheel brush attached to a drill to remove the remaining rust. Start with a coarse grit sandpaper or brush and gradually move to a finer grit until the axe head is rust-free. Make sure to remove all rust, as any remaining rust can continue to spread and damage the axe head over time.
Step 4: Sharpening the Axe Head
Once the axe head is clean and free of rust, it is time to sharpen the blade to restore its cutting edge. Start by securing the axe head in a vice to hold it steady. Use a sharpening stone or a file to sharpen the blade in long, smooth strokes, following the original bevel angle. Take your time and regularly check the sharpness of the blade with a touch or visual inspection.
Step 5: Protecting the Axe Head
Finally, to prevent future rust and corrosion, it is important to protect the axe head. You can apply a coat of protective oil or wax to the axe head, ensuring that all surfaces are well coated. This will create a barrier against moisture and help maintain the beautiful finish of the axe head. Additionally, store the axe in a dry location and avoid exposing it to extreme temperatures or prolonged periods of moisture.
By following these steps, you can restore an old or worn-out axe head to its former glory. Remember, patience and attention to detail are essential for a successful restoration. With a sharp and well-maintained axe head, you can tackle any outdoor task with ease and confidence.
Why Restore Axe Heads
Restoring old axe heads can be a rewarding and practical task for several reasons.
Preserve Antique Value
One of the main reasons to restore axe heads is to preserve their antique value. Many antique or vintage axe heads have historical significance or are sought after by collectors. By restoring the axe head, you can preserve its original craftsmanship and value.
Extend the Life of the Axe
Old axe heads are often made of high-quality steel that can withstand years of heavy use. By restoring the head, you can remove rust, sharpen the blade, and strengthen the handle connection, thus extending the life of the axe.
Restoring the axe head not only improves its usability but also helps maintain its structural integrity, ensuring it is safe to use for many more years.
Additionally, when you restore an axe head, you can customize its handle to fit your hand size and preferences, further enhancing its usefulness.
By restoring and using an old axe head, you can also contribute to sustainability efforts by reducing waste and recycling materials.
Overall, restoring axe heads allows you to preserve history, extend the life of a valuable tool, and customize it to your liking, making it a worthwhile and gratifying endeavor.
Benefits of Restoring Axe Heads
Restoring axe heads is not only a rewarding and satisfying task, but it also offers various benefits. Whether you are a professional woodworker or simply enjoy doing DIY projects, bringing an old axe head back to life can significantly improve its performance and functionality.
1. Extended Lifespan
Restoring axe heads involves cleaning, sharpening, and polishing the blade, which helps remove rust, dirt, and other impurities that may have accumulated over time. By removing these elements, you can prevent further corrosion and deterioration, thus prolonging the lifespan of the axe head.
2. Enhanced Cutting Efficiency
Over time, axe heads can become dull due to frequent use, which reduces the cutting efficiency. By restoring the axe head, you can sharpen the blade, allowing it to cut through wood more effortlessly and efficiently. This can save you time and energy during woodcutting tasks.
Note: When sharpening an axe head, it’s crucial to maintain the correct angle to ensure optimal cutting performance.
3. Cost Savings
Instead of purchasing a new axe, restoring the axe head can be a more cost-effective alternative. With the right tools and materials, you can revive an old, discarded axe head and make it usable again. This not only saves you money but also reduces waste and promotes sustainability.
Restoring axe heads can be a worthwhile endeavor, offering benefits such as extended lifespan, enhanced cutting efficiency, and cost savings. So why not give it a try and bring your old axe head back to its former glory?
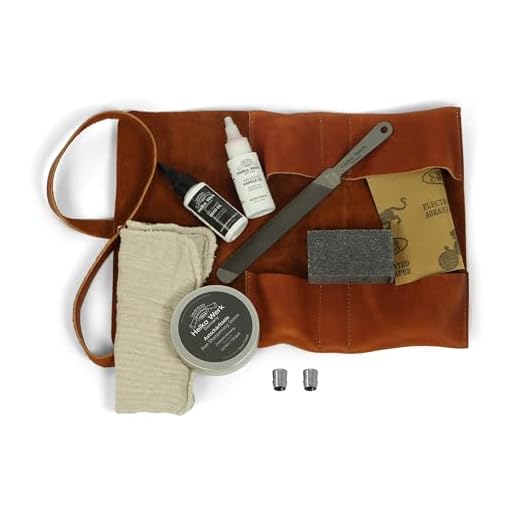
Tools and Materials Needed
To restore axe heads, you will need the following tools and materials:
- Safety goggles: Protect your eyes from flying debris and sharp edges while working on the axe head.
- Gloves: Wear gloves to protect your hands from cuts and ensure a better grip on the tools.
- Wire brush: Use a wire brush to remove rust, dirt, and other debris from the axe head.
- Sandpaper: Use sandpaper of varying grits (coarse, medium, and fine) to smooth the surfaces and remove any remaining rust.
- Rust remover: Apply a rust remover to help remove stubborn rust spots.
- Steel wool: Use steel wool to further smooth and polish the metal surface.
- File: Use a file to shape and sharpen the blade of the axe.
- Bench vise: Secure the axe head in a bench vise to keep it steady during the restoration process.
- Oil or wax: Apply a protective coating of oil or wax to prevent future rusting.
Make sure to have all these tools and materials ready before you start the restoration process. It’s important to work in a well-ventilated area and follow safety precautions to avoid any accidents.
Step-by-Step Process
To restore the axe head, follow these steps:
- Clean the surface: Start by removing any dirt, rust, or debris from the axe head using a wire brush or sandpaper.
- Remove stubborn rust: If the axe head has severe rust, you can soak it in a solution of vinegar or rust remover overnight. Scrub off the remaining rust with a wire brush.
- Sharpen the cutting edge: Use a sharpening stone or file to restore the sharpness of the axe’s cutting edge. Maintain a consistent angle while sharpening.
- Protect the metal: Apply a thin layer of rust-preventive oil or boiled linseed oil to protect the metal from future rust formation. Let it dry before moving on to the next step.
- Handle replacement: If the axe handle is damaged or worn out, remove the old handle by cutting or drilling it out. Choose a suitable replacement handle and attach it securely using a wooden wedge and epoxy glue.
- Finishing touches: Sand the handle to achieve a smooth finish. Consider applying a wood finish or varnish to protect and enhance the appearance of the handle.
Note: It’s important to wear protective gloves and eye goggles while restoring an axe head, as the process involves sharp edges and potentially harmful chemicals.

Tips and Tricks for a Successful Restoration
Restoring an axe head can be a rewarding project, but it requires patience and careful attention to detail. Here are some tips and tricks to help ensure a successful restoration:

1. Clean the Head Thoroughly
Before starting the restoration process, it’s important to clean the axe head thoroughly. Use a wire brush to remove any rust, dirt, or debris. If the rust is severe, you may need to soak the head in vinegar or a rust remover solution overnight to loosen the rust.
2. Remove the Handle
If the axe head has a handle, remove it before proceeding with the restoration. This will make it easier to clean and work on the head. Use a hammer and chisel to carefully remove the handle, being cautious not to damage the wood or the head.
3. Sand the Head
Once the head is clean, use sandpaper or a wire brush to remove any remaining rust or rough spots. Start with a coarse grit sandpaper and gradually work your way up to a finer grit to achieve a smooth surface. This will help to prevent any future rusting.
4. Polish the Head
After sanding, polish the axe head using a metal polish or a rust inhibitor. This will help to protect the metal and give it a shiny finish. Apply the polish with a cloth or a steel wool pad, following the manufacturer’s instructions.
5. Reattach the Handle
If you removed the handle, now is the time to reattach it. Secure the handle tightly using a wooden or metal wedge. Make sure the handle is straight and centered before securing it in place.
6. Maintain the Axe Head
After restoring the axe head, it’s important to maintain it properly. Keep the head clean and dry to prevent rusting. Apply a thin coat of oil or a rust inhibitor regularly to protect the metal. Store the axe head in a dry place away from moisture to prolong its lifespan.
By following these tips and tricks, you can successfully restore your axe head and enjoy its functionality for years to come.


