


Carving with an axe can be a rewarding and enjoyable skill to develop. However, to achieve the best results, it is important to keep your axe sharp. A dull axe not only makes carving more difficult, but it can also be dangerous. Properly sharpening your axe is essential for maintaining a clean and precise cut.
Firstly, you will need a few tools to get started. Gather a file, a sharpening stone, and some oil. It is recommended to use a file with a fine grit to remove any major nicks or chips on the blade. The sharpening stone should have a coarse side for initial sharpening and a finer side for honing the edge further. The oil will be used to lubricate the stone and prevent metal shavings from clogging it up.
Before you begin, make sure to secure the axe head firmly in a vise or clamp. This will prevent any accidental slips and ensure a safe sharpening process. Now, take the file and run it across the bevel of the axe edge, maintaining a consistent angle of around 25 degrees. Focus on removing any rough or damaged areas, working from the base of the blade towards the tip. Be sure to apply even pressure and make smooth, controlled strokes.
Why Sharpening Your Axe for Carving is Important
When it comes to carving, having a sharp axe is of utmost importance. Sharpening your axe not only makes your carving task easier but also ensures safety and precision in your work. Here are some reasons why you should consider sharpening your axe for carving:
1. Enhanced Cutting Efficiency
A sharp axe has a keen cutting edge that slices through wood effortlessly. It allows you to make precise and clean cuts, resulting in smoother carvings. With a dull axe, you will have to exert more force, and the cuts might be uneven or jagged, compromising the final outcome of your carving.
2. Improved Safety
A dull axe can be dangerous to work with. When the axe is not sharp enough, it tends to bounce off the wood or get stuck halfway, leading to accidents. On the other hand, a sharp axe reduces the chances of accidents by providing better control and minimizing the risk of the axe slipping or rebounding unexpectedly.
3. Time-Saving
Sharpening your axe before carving can save you a significant amount of time. A sharp axe cuts through the wood effortlessly, allowing you to work faster and complete your carvings in less time. On the other hand, using a dull axe will slow you down as you struggle to make each cut, resulting in a longer carving process.
4. Prolonged Axe Lifespan
Regularly sharpening your axe not only improves its performance but also extends its lifespan. By removing any nicks or burrs on the blade and maintaining a sharp edge, you prevent unnecessary wear and tear on the axe head. This means that you won’t have to invest in a new axe as frequently, saving you money in the long run.
In conclusion, sharpening your axe for carving is essential for optimal cutting efficiency, safety, time-saving, and prolonging the lifespan of your axe. Make it a habit to sharpen your axe regularly to ensure that you enjoy the best possible results in your carving projects.
Basic Steps to Sharpen an Axe for Carving
Carving with an axe requires a sharp blade in order to achieve clean and precise cuts. Here are some basic steps to help you sharpen your axe for carving:
Step 1: Safety First
Before you begin, make sure you have the necessary safety equipment, such as gloves and protective eyewear. Safety should always be your top priority when working with sharp tools.
Step 2: Clean the Axe
Start by cleaning the axe head to remove any dirt or debris. You can use a wire brush or steel wool to scrub away any rust or corrosion. This will ensure that you have a clean surface to work with.
Step 3: Angle the Axe
To properly sharpen the axe, you need to angle the blade to create a sharp edge. Use a sharpening guide or hold the axe at a consistent angle of around 25-30 degrees. This will help maintain consistency when sharpening.
Step 4: Start with Coarse Grit
Begin the sharpening process by using a coarse grit sharpening stone or file. Start at the edge of the blade and move towards the center, making sure to maintain the same angle throughout. This will help remove any nicks or dull spots.
Step 5: Switch to Fine Grit
After you have sharpened the blade with coarse grit, switch to a fine grit sharpening stone or file. Repeat the same motion from step 4, gradually working towards the finer grit. This will help create a smooth and polished edge.
Step 6: Test the Sharpness
Once you have finished sharpening, carefully test the sharpness of the axe. You can do this by gently running your finger along the edge (not touching the blade directly) or by making a few test cuts on a piece of wood. If the axe cuts cleanly and effortlessly, then it is properly sharpened.
Step 7: Maintain the Sharpness
To keep your axe sharp for carving, it is important to regularly maintain it. After each use, clean off any debris or sap from the blade and store it in a dry place. You can also touch up the edge with a sharpening stone or file as needed.
Remember, sharpening an axe requires practice and patience. Take your time and follow these basic steps to achieve the desired sharpness for carving. Stay safe and happy carving!
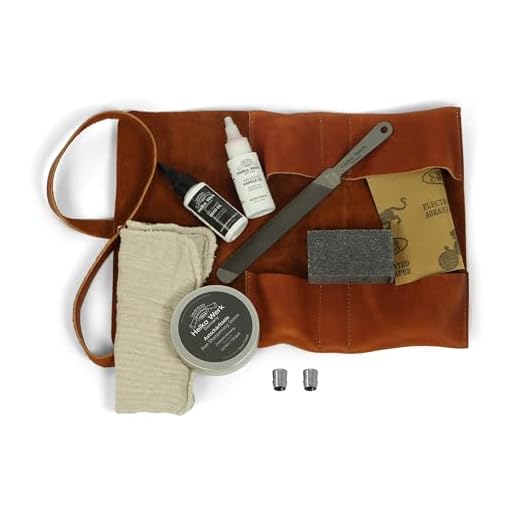
Tools and Materials Needed for Sharpening
Sharpening an axe for carving requires specific tools and materials to ensure a proper and effective result. Here are the essential items you’ll need:
Axe Sharpening Stone
To sharpen an axe, you will need an axe sharpening stone. This can be either a natural stone or a synthetic stone designed specifically for sharpening blades. The stone should have a fine grit to achieve a precise and sharp edge on your axe.
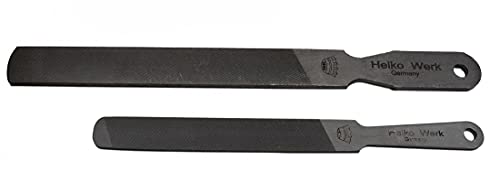
Axe File
An axe file is another essential tool for sharpening. It is used to remove any nicks or burrs on the cutting edge of the axe blade. Choose a file that matches the size and shape of your axe blade for optimal results.
Protective Gloves
When sharpening an axe, it is important to protect your hands with a pair of protective gloves. These gloves will prevent any potential injuries from accidental slips or mishandling of the sharpening tools.
Sharpening Jig
A sharpening jig can be helpful, especially for beginners. It provides support and keeps the axe blade at the correct angle for sharpening. There are various types of sharpening jigs available, so choose one that is compatible with your axe.
Flat Surface
Having a flat surface to work on is crucial for sharpening an axe effectively. This can be a workbench or any other sturdy and stable surface. Ensure that the surface is clean and free from any debris that may interfere with the sharpening process.
In conclusion, these are the essential tools and materials needed for sharpening an axe for carving. With the right equipment and proper technique, you can achieve a sharp and precise edge on your axe, enhancing your carving experience.
Tips for Achieving a Razor-Sharp Edge
When it comes to carving, having a sharp edge on your axe is a necessity. Here are some tips to help you achieve a razor-sharp edge:
- Select the right sharpening tool: There are various tools available for sharpening an axe, such as a file, a honing stone, or a grinder. Choose the tool that you are most comfortable with and that suits your needs.
- Start with a clean axe: Before sharpening, make sure to clean your axe thoroughly. Remove any rust or debris using a wire brush or sandpaper. A clean surface will allow you to achieve a better edge.
- Find the right angle: The angle at which you sharpen your axe is crucial. For carving, a bevel angle of around 25 to 30 degrees is recommended. Use a protractor or angle guide to ensure consistency.
- Use consistent strokes: When sharpening, always maintain the same angle and apply even pressure with each stroke. This will help you achieve an even and uniform edge.
- Sharpen both sides: It is important to sharpen both sides of the axe blade to maintain balance and symmetry. Alternate sides after a few strokes to ensure an even edge.
- Check for sharpness: After sharpening, carefully run your finger along the blade’s edge to check for sharpness. Be cautious and avoid cutting yourself. If the edge feels smooth and can easily catch on your thumbnail, it is sharp.
- Strop the edge: To further refine the edge and remove any burrs or imperfections, use a leather strop. Stroke the blade along the strop in a controlled manner, alternating sides, to achieve maximum sharpness.
- Maintain the edge: After carving, remember to maintain the sharp edge of your axe. Regularly touch up the blade with a honing stone or strop to keep it in optimal condition.
By following these tips, you can achieve a razor-sharp edge on your carving axe, enabling you to create intricate and precise designs effortlessly.
Common Mistakes to Avoid When Sharpening an Axe
When sharpening an axe for carving, there are several common mistakes that beginners often make. These mistakes can result in an ineffective and dangerous tool. To ensure that you get the best performance out of your axe and maintain safety while carving, here are some mistakes to avoid:
1. Using the Wrong Sharpening Angle
One of the most common mistakes is using the wrong sharpening angle. Each axe has a specific bevel angle that determines its cutting ability. Using the wrong angle can result in a dull edge or an edge that is poorly suited for carving. Make sure to research the correct bevel angle for your specific axe and adjust your sharpening technique accordingly.
2. Neglecting to Remove Burrs
Another mistake is neglecting to remove burrs from the blade after sharpening. Burrs are tiny metal flakes that can form on the edge of the axe during the sharpening process. If not removed, they can interfere with the axe’s cutting ability and cause it to perform poorly. After sharpening, use a honing stone or a strop to remove any burrs and refine the blade edge.
3. Overlooking the Importance of Consistency
Consistency is key when sharpening an axe for carving. Many beginners make the mistake of not maintaining a consistent sharpening angle, stroke length, or pressure. This can result in an uneven edge or a blade that is not optimized for carving. Practice maintaining consistent movements and pressures throughout the sharpening process to ensure a uniform and effective edge.
4. Rushing the Sharpening Process
Sharpening an axe requires time and patience. Many beginners make the mistake of rushing through the process, resulting in a subpar edge. Take your time when sharpening, ensuring that each stroke is deliberate and precise. Rushing can also increase the risk of accidents, as improper technique can lead to slips or injuries.
5. Not Regularly Honing the Edge
Honing the edge of your axe blade is essential for maintaining its sharpness over time. However, many people neglect this step and only focus on sharpening. Honing helps refine the edge and remove any micro-irregularities that can affect the axe’s performance. Make sure to regularly hone your axe to keep it in optimal condition for carving.
| Mistake | Consequence |
|---|---|
| Using the wrong sharpening angle | Results in a dull or poorly suited edge for carving |
| Neglecting to remove burrs | Interferes with the axe’s cutting ability |
| Overlooking the importance of consistency | Results in an uneven or poorly optimized edge |
| Rushing the sharpening process | Leads to a subpar edge and increases the risk of accidents |
| Not regularly honing the edge | Reduces the axe’s sharpness and overall performance |
How Often Should You Sharpen Your Axe for Carving?
Knowing how often to sharpen your axe for carving is crucial to maintaining its cutting efficiency and ensuring optimal carving performance. The frequency at which you should sharpen your axe depends on several factors, including the intensity and duration of your carving sessions, as well as the type of wood you are carving.
As a general rule of thumb, it is recommended to sharpen your axe for carving every 3-5 hours of carving time. However, this time frame can vary depending on the condition of the axe blade and the type of wood you are working with.
If you notice that your axe is no longer cutting through the wood easily or is leaving jagged or rough edges, it is a clear indication that it needs sharpening. Dull blades not only make carving more difficult, but they can also increase the risk of accidents and injuries.
Regular maintenance and sharpening of your axe blade will not only improve the quality of your carvings but also prolong the life of your axe. It is important to use the appropriate sharpening tools and techniques to ensure a sharp and durable edge.
Remember that each carver has their own preferred sharpening schedule based on their carving habits and preferences. Experiment with different sharpening intervals to find what works best for you and your carving style.