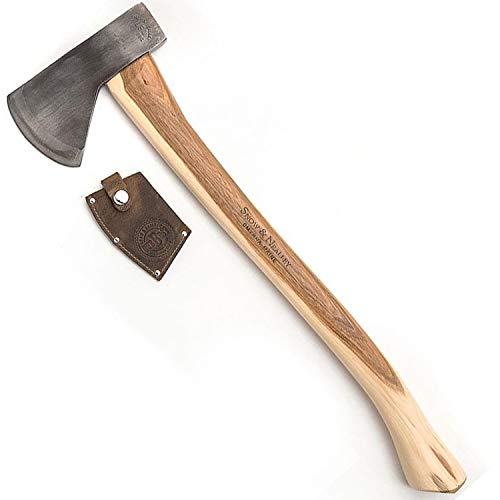
The axe is an essential tool for many outdoor enthusiasts, from campers to lumberjacks. However, over time, the axe blade can become dull and less effective. To maintain the axe’s cutting power, it’s important to regularly sharpen the blade.
One of the best tools for sharpening your axe is the Lansky Puck. This compact and versatile sharpening stone is designed to restore the edge of your axe quickly and easily. Whether you’re a beginner or an experienced axe user, using the Lansky Puck can help you achieve a razor-sharp edge.
To sharpen your axe with the Lansky Puck, start by securing the axe head firmly in place. You can use a vise or clamp to hold the axe steady. Make sure the cutting edge is facing up and accessible. Safety is paramount, so be cautious and wear protective gloves.
Next, take the Lansky Puck and wet it with water to create a sharpening slurry. The coarse side of the puck should be used first to remove any nicks or damage from the blade. Hold the puck at a 20-degree angle and move it in a circular motion along the entire length of the blade. Repeat this process several times on both sides of the blade until you achieve the desired edge.
Why is axe sharpening important
Sharpening is an essential part of axe maintenance and it plays a crucial role in the overall performance of the tool. Here are several reasons why axe sharpening is important:

|
1. Enhanced Cutting Efficiency |
|
Regular sharpening ensures that the blade of the axe maintains its optimal cutting edge. As the blade dulls over time, the cutting efficiency decreases, making it more difficult and time-consuming to use the axe effectively. Sharpening the axe blade restores its sharpness, allowing for improved cutting efficiency and making your cutting tasks easier and more efficient. |
|
2. Improved Safety |
|
A dull axe is not only less efficient, but it can also be dangerous to use. When the blade is dull, it may require more force to make the cut, increasing the risk of accidents. By regularly sharpening your axe, you maintain a sharp cutting edge, reducing the amount of force required to make cuts and minimizing the risk of accidental slips or injury. |
|
3. Prolonged Axe Lifespan |
|
Properly maintaining and sharpening your axe helps to prolong its overall lifespan. Dull blades can cause unnecessary wear and tear on the axe head, handle, and other components. When the blade is sharp, it cuts more smoothly and efficiently, putting less strain on the axe and increasing its durability. Regular sharpening can help prevent the need for premature replacement and save you money in the long run. |
|
4. Versatility in Different Work Conditions |
|
Having a sharp axe allows you to tackle various cutting tasks in different work conditions. Whether you are chopping firewood, clearing brush, or shaping wood, a sharp blade gives you the versatility to work efficiently and effectively. By sharpening your axe regularly, you ensure that it is always ready for any cutting task you may encounter. |
Overall, axe sharpening is not just a simple maintenance task, but a crucial aspect of keeping your axe in optimal condition. Regular sharpening enhances cutting efficiency, improves safety, prolongs the axe’s lifespan, and allows for versatility in different work conditions. Make sure to prioritize axe sharpening as part of your tool maintenance routine to enjoy the full benefits of a sharp and efficient axe.
Step 1: Gather the necessary materials
Before you begin sharpening your axe with a Lansky puck, make sure you have all the necessary materials. Here’s what you’ll need:
Materials:
- A Lansky puck
- An axe to sharpen
- A lubricant (such as water or honing oil)
- A clean cloth or towel
- A pair of gloves (optional but recommended for safety)
Once you have gathered all the materials, you are ready to move on to the next step.
Choosing the right axe sharpening tool
When it comes to sharpening an axe, having the right tool is crucial. There are many options available on the market, but not all of them are suitable for every type of axe. Here are some factors to consider when choosing an axe sharpening tool:
Type of axe
First and foremost, you need to consider the type of axe you have. Different axes have different blade angles and cutting edges, which require specific sharpening tools. For example, a double-bit axe may need a different sharpener compared to a single-bit axe. Make sure to choose a tool that is designed for your specific type of axe to ensure the best sharpening results.
Sharpening method
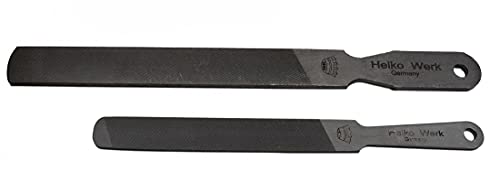
There are various methods for sharpening an axe, such as using a file, a grinding wheel, or a sharpening stone. Each method has its own advantages and drawbacks. A file is great for correcting major blade damage, but it may not be suitable for fine sharpening. A grinding wheel can quickly remove a lot of material, but it requires skill and caution to avoid overheating the blade. A sharpening stone allows for precise and controlled sharpening, but it takes more time and effort.
Consider your sharpening preferences and skills when choosing a sharpening method. If you are a beginner, it’s best to start with a sharpening stone, as it offers more control and is less likely to damage the blade.
Quality and durability
Investing in a high-quality sharpening tool is essential for achieving consistent and long-lasting results. Look for tools made from durable materials such as high-carbon steel or diamond, as they can withstand repeated use without losing their effectiveness. It’s also a good idea to read reviews and get recommendations from experienced axe users to ensure you’re choosing a reliable and durable tool.
Remember, a dull axe is not only less effective, but it can also be dangerous to use. By choosing the right axe sharpening tool, you can maintain the sharpness and functionality of your axe, making your tasks easier and safer.
Step 2: Preparing the Axe Lansky Puck
Before you begin sharpening your axe with the Lansky Puck, it’s important to prepare the puck properly to achieve the best results. Here’s how:
1. Clean the Puck
Start by cleaning the puck to remove any dirt, debris, or metal shavings that may be present on its surface. You can simply use a damp cloth or sponge to wipe it clean.
2. Lubricate the Puck
To ensure smooth sharpening, it’s recommended to lubricate the puck with a honing oil or water. Apply a few drops of oil or wet the puck with water to create a thin film on its surface.
Note: If you’re using water, make sure to keep the puck wet throughout the sharpening process to prevent overheating.
3. Secure the Puck
Place the lansky puck on a stable surface, such as a workbench or table, with the rough grit side facing up. It’s important to have a secure and steady surface to prevent any accidents or injuries.
Once the axe puck is properly prepared, you’re ready to move on to the next step in the sharpening process.
Preparing the axe for sharpening
Before you begin sharpening your axe using the Lansky Puck, it is important to properly prepare the axe. This will ensure that you achieve the best possible sharpening result. Here are the steps you should follow:
1. Clean the axe: Start by cleaning the axe to remove any dirt, debris, or rust that may be present. Use a wire brush or sandpaper to scrub the axe head thoroughly. Wipe it clean with a cloth to ensure a smooth surface.
2. Secure the axe: Find a stable surface or workbench where you can securely place the axe for sharpening. Make sure the axe head is well-supported and won’t move around during the sharpening process. This will help to prevent accidents or injuries.
3. Protect yourself: Sharpening an axe can create metal shavings and sparks. To protect yourself, wear safety glasses and work gloves. This will minimize the risk of any eye injuries or cuts.
4. Determine the bevel angle: Take a look at the axe and determine the bevel angle it already has. This will help you in determining the angle at which you should sharpen the blade. Most axes have a bevel angle between 25 to 30 degrees.
5. Lubricate the Lansky Puck: To ensure smooth sharpening, apply a small amount of honing oil or water to the surface of the Lansky Puck. This will help prevent excessive friction and prolong the life of the sharpening stone.
Once you have prepared your axe, you are ready to start sharpening using the Lansky Puck. Following these steps will ensure that you have a clean and well-prepared axe for sharpening, leading to optimal results.
Step 3: Starting the Sharpening Process
Now that you have prepared your axe and gathered the necessary tools, it’s time to start the sharpening process. Follow these steps to effectively sharpen your axe using the Lansky Puck:
1. Hold the Puck Properly
Take the Lansky Puck and make sure you have a good grip on it. The puck has two sides: a coarse grit and a fine grit. Decide which side you will start with based on the condition of your axe’s blade.
2. Position the Axe Blade
Hold the axe firmly with one hand, positioning the blade against the puck’s surface. Make sure the blade is at the proper angle for sharpening. A 25 to 30-degree angle is ideal for most axes, but you can adjust it based on your preference and the type of axe you have.
| Coarse Grit Side | Fine Grit Side |
|---|---|
|
The coarse grit side of the Lansky Puck is used for initial sharpening or re-profiling of the blade. Apply light pressure and slide the axe blade across the puck, moving from the base towards the tip in a smooth motion. Maintain consistent pressure and angle while sharpening. Repeat this process several times until you notice a slight burr forming on the opposite side of the blade. |
Once you have established a burr on the edge using the coarse grit, it’s time to switch to the fine grit side. Flip the puck and repeat the same sharpening process as before. The fine grit side is used for honing and refining the edge. Glide the axe blade across the puck in the same manner, ensuring a consistent angle and pressure. Repeat this process until you achieve a sharp edge. |
Remember to regularly clean the puck’s surface to remove any metal shavings or debris that might hinder the sharpening process. You can use a brush or wipe it clean with a cloth.
Continue sharpening until you are satisfied with the edge. Take breaks as needed and periodically check the sharpness by carefully running your finger across the blade. Be cautious to avoid any accidents or injuries during this process.
Once you have sharpened your axe to your desired level, you can move on to the next step, which is testing the sharpness and making any final adjustments.
Using the Lansky puck for sharpening
The Lansky puck is a versatile tool that can be used for sharpening various types of cutting tools, including axes. With its dual-sided design, it offers a coarse grit for initial shaping and a finer grit for polishing and refining the edge.
Step 1: Prepare the axe
Before using the Lansky puck, ensure that the axe is clean and free from any debris or rust. It’s also a good idea to secure the axe in a vise to provide stability during the sharpening process.
Step 2: Starting with the coarse side
Begin sharpening by using the coarse side of the Lansky puck. Hold the puck firmly and apply moderate pressure as you move it back and forth along the blade’s edge. Maintain a consistent angle and work in sections to ensure even sharpening.
Step 3: Switch to the fine side
Once you have achieved the desired level of sharpness with the coarse side, flip the puck to the fine side. Repeat the same sharpening process, again maintaining a consistent angle and working in sections.
Remember to periodically wipe away any metal shavings or debris that may accumulate on the puck and the axe blade during sharpening.
Step 4: Test the sharpness
After sharpening, carefully remove the axe from the vise and test the sharpness by making a few light cuts. If necessary, you can repeat the sharpening process on specific areas to further refine the edge.
With the Lansky puck, you can easily and effectively sharpen your axe to ensure optimal cutting performance. Regular maintenance and sharpening will keep your axe in excellent condition for years to come.
Step 4: Finish the Sharpening Process
After completing the initial sharpening with the coarse side of the Lansky Puck, it’s time to refine and hone the axe’s blade.
Switch to the fine-grit side of the Lansky Puck. This side is used to create a smooth and polished edge.
Hold the axe in one hand and the puck in the other hand. Place the puck against the blade at a 20-degree angle.
Starting from the base of the blade, move the puck in a circular motion along the edge. Apply gentle pressure and maintain a consistent angle.
Continue this motion along the entire length of the blade, making sure to sharpen both sides evenly.
Periodically check the sharpness of the blade by lightly running your finger across it. If it feels smooth and sharp, you are finished.
Remember to always exercise caution when handling sharp objects and wear appropriate safety gear.
Once you have finished sharpening your axe with the Lansky Puck, it will be ready for use and you can enjoy the benefits of a sharp and efficient tool.
Regular maintenance and sharpening will help prolong the life of your axe and ensure optimal performance.
Tip: It’s a good idea to clean the blade after sharpening to remove any metal shavings and debris. Use a clean cloth or brush dipped in water to wipe away the residue.