

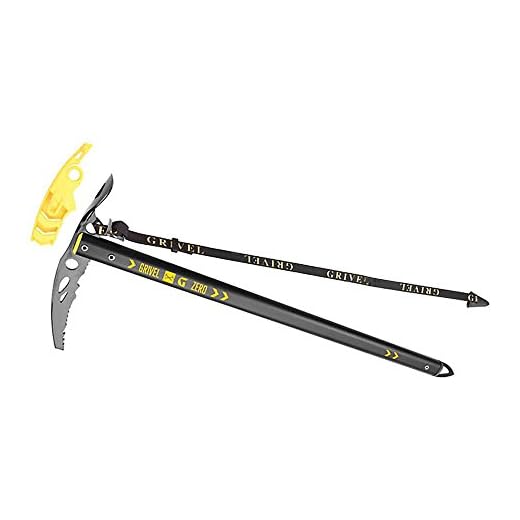


When it comes to ice climbing and mountaineering, having a properly taped ice axe is essential for safety and efficiency. Taping your ice axe not only provides a better grip, but it also protects your hands from the sharp edges and provides insulation in cold weather. In this article, we will guide you through the step-by-step process of taping an ice axe, ensuring a secure and comfortable grip for your next icy adventure.
Before we dive into the process, let’s talk about the benefits of taping your ice axe. First and foremost, taping your ice axe improves your grip, especially in wet or snowy conditions. The tape provides texture and friction, allowing you to maintain a secure hold on the axe. Additionally, the tape acts as a protective layer, safeguarding your hands from any sharp edges or potentially harmful protrusions.
To start taping your ice axe, you will need a few materials. You will obviously need an ice axe, preferably one with a smooth shaft. Next, you will need athletic tape or hockey stick tape, as they both provide good grip and durability. It’s best to have a tape that is between 1 to 1.5 inches wide and about 2.5 to 3 yards long, depending on the size of your axe.
Now that you have gathered your materials, it’s time to begin the taping process. Start by laying down a small piece of tape at the base of the shaft, ensuring it sticks firmly. Then, wrap the tape around the handle of the ice axe, making sure to overlap the tape slightly with each wrap. You can either wrap the tape tightly or leave a little room for extra cushioning, depending on your preference.
Continue wrapping the tape until you reach the top of the handle. Once you have wrapped the entire handle, cut the tape and secure the end by pressing it firmly against the shaft. To ensure a long-lasting tape job, you can use a small amount of adhesive to secure the end. Finally, give the taped handle a firm grip and test it out. If it feels comfortable and secure, you’re ready to go!
Remember, taping your ice axe is not only a matter of personal preference but also an essential safety measure. Make sure to check your tape regularly for any signs of wear and tear. If it starts to peel or become loose, it’s time to re-tape your ice axe. With a properly taped ice axe, you can confidently conquer icy conditions and enjoy your mountaineering adventures to the fullest.
Choosing the Right Tape for Your Ice Axe
When it comes to taping your ice axe, choosing the right tape is crucial. The tape not only provides grip and insulation, but it also protects your hands from sharp edges and adds visibility to your tool. Here are some factors to consider when selecting tape for your ice axe:
1. Grip and Durability
The primary purpose of taping your ice axe is to improve your grip. Look for a tape that ensures a firm hold even in wet conditions. It should provide a texture that enhances your grip, making it easier to handle the axe. Additionally, durability is essential as you need a tape that can withstand the rigors of ice climbing and last for multiple outings.
2. Insulation
Climbing in icy conditions can be extremely cold, so insulation is another crucial factor to consider when choosing tape for your ice axe. Look for a tape that has insulating properties to help keep your hands warm during your climbs. This will prevent your hands from becoming numb and improve your overall comfort and performance.
3. Visibility
In certain situations, visibility is vital for safety reasons. You want your ice axe to be easily visible to your climbing partners in case of an emergency. Opt for a tape that is brightly colored or has reflective properties to increase the visibility of your ice axe in low light conditions or when it is partially buried in snow.
Ultimately, finding the right tape for your ice axe can significantly enhance your climbing experience. Consider the grip, durability, insulation, and visibility of the tape before making your choice. Remember to regularly check the condition of the tape and replace it when necessary to ensure optimal performance and safety during your ice climbing adventures.
Assessing the Condition of Your Ice Axe
Before you head out on your next ice climbing adventure, it is important to assess the condition of your ice axe. This crucial piece of equipment can mean the difference between a successful climb and a dangerous situation. Here are some steps to help you evaluate the state of your ice axe:
Inspect the Shaft
Start by examining the shaft of your ice axe. Look for any signs of cracks, dents, or bends. These can weaken the structural integrity of the axe and make it less effective for gripping the ice. If you notice any damage to the shaft, it may be necessary to replace your ice axe.
Check the Pick
The pick is the pointed end of the ice axe that is used to penetrate the ice. Inspect the pick for any signs of wear or damage. If the pick is dull or has any chips or cracks, it will be less effective at biting into the ice. Consider sharpening or replacing the pick if necessary.
Note: Be careful when inspecting the pick, as it can be very sharp. Use caution and avoid touching the pick directly.
Examine the Adze
The adze is the flat area on one side of the ice axe head. It is used for chopping steps or clearing ice. Look for any signs of wear or damage on the adze. If the adze is worn down or has any cracks or chips, it may not perform as intended. Consider replacing the ice axe if the adze is in poor condition.
Note: As with the pick, be cautious when examining the adze, as it can also be sharp. Handle with care.
By regularly assessing the condition of your ice axe, you can ensure that it remains in optimal working condition and can be relied upon for your climbing adventures. Remember to always prioritize safety and replace any damaged or worn-out equipment. Stay safe and enjoy your ice climbing!
Selecting the Appropriate Tape Material
When it comes to taping your ice axe, selecting the right tape material is crucial for ensuring a secure and reliable grip. There are several factors to consider when choosing the appropriate tape material for your ice axe, including:
Durability: The tape material should be durable enough to withstand the harsh conditions and rough handling that come with ice climbing. Look for tape that is made of high-quality materials and has a strong adhesive backing.
Grip: One of the main purposes of taping your ice axe is to improve your grip. Choose tape that provides a good amount of friction and traction, ensuring that your hand stays firmly on the axe handle.
Water resistance: Ice climbing often involves exposure to moisture and wet conditions. Therefore, it is important to select tape material that is water-resistant, preventing it from becoming slippery or losing its grip when wet.
Flexibility: The tape material should offer enough flexibility to conform to the shape of the ice axe handle, providing a comfortable and ergonomic grip. Avoid tapes that are too rigid or stiff, as they may cause discomfort or interfere with your handling of the axe.
Keep in mind that personal preference also plays a role in material selection. Some climbers may prefer a certain tape material based on their own experiences and comfort level.
In conclusion, choosing the appropriate tape material for your ice axe is essential in ensuring a secure and reliable grip. Consider factors such as durability, grip, water resistance, and flexibility when making your selection. By using the right tape material, you can enhance your ice climbing experience and improve your overall performance.
Preparing Your Ice Axe for Taping
Before you begin taping your ice axe, it’s important to properly prepare it for the process. Taking the time to prepare your ice axe will ensure that the tape adheres better and provides a secure grip. Here are some steps to follow:
1. Clean your ice axe: Start by thoroughly cleaning your ice axe. Use a brush or cloth to remove any dirt, debris, or ice that may be stuck to the axe. This will help the tape adhere better.
2. Dry the surface: Make sure the surface of your ice axe is completely dry before applying the tape. Moisture can prevent the tape from sticking properly.
3. Remove any existing tape: If there is any old tape on your ice axe, make sure to remove it completely. This will ensure that your new tape job is smooth and secure.
4. Inspect the handle: Take a close look at the handle of your ice axe. Check for any cracks, splits, or damage that may affect the tape’s adhesion. it’s best to repair or replace the handle if necessary before taping.
5. Sand the handle (optional): If you want to enhance the grip on your ice axe, you can lightly sand the handle with sandpaper. This will create a rougher surface and provide better traction when using the axe.
6. Prepare the tape: Cut the tape into strips or wrap it around the handle before starting the taping process. This will make it easier and more convenient to apply the tape evenly.
By following these steps to prepare your ice axe, you’ll be ready to move on to taping. Taking the time to properly prepare your axe will ensure a better and more secure grip, and make your taping job more successful overall.
Applying the Tape to Your Ice Axe
Applying tape to your ice axe is an important step to ensure a secure grip and protect your hands from abrasive surfaces. Follow these steps to effectively tape your ice axe:
- Start by cleaning the handle of your ice axe to ensure that the tape adheres properly. Use a damp cloth to remove any dirt or residue.
- Choose a durable and weather-resistant tape that provides good grip, such as hockey stick tape or self-adhesive sports tape.
- Begin wrapping the tape near the top of the ice axe handle. Make sure to leave enough space at the end for a comfortable grip.
- Hold the end of the tape against the handle and start wrapping it tightly in a diagonal or spiral pattern. Overlap the tape by about half its width to ensure a secure hold.
- Continue wrapping the tape downwards, maintaining a tight and even tension. Smooth out any wrinkles or air bubbles as you go.
- When you reach the end of the ice axe handle, secure the tape by wrapping it a few extra times and pressing it firmly against the handle.
- If desired, you can add additional layers of tape for extra cushioning and grip. Experiment with different wrapping techniques to find what works best for you.
- Once you are satisfied with the tape job, use a sharp knife or scissors to trim off any excess tape.
- Give the tape a final inspection to ensure that it is secure and even. Make any necessary adjustments before heading out on your adventure.
By following these steps, you can effectively tape your ice axe and enhance your grip and control while climbing. Remember to periodically check the tape for any signs of wear and replace it as needed to maintain optimal safety and performance.


