When it comes to bonsai trees, one of the inevitable tasks is repotting. Repotting a bonsai tree is necessary to ensure its health and promote its growth. However, when it’s time to repot, you may find that the tree has grown its roots into the pot, making it difficult to remove.
To get trees off of a bonsai pot, it’s essential to approach the task with caution and precision. Start by carefully loosening the soil around the tree’s rootball using a chopstick or a root hook. Gently insert the tool into the soil and wiggle it around to break up the compacted roots.
Keep in mind that delicate bonsai roots can be easily damaged, so it’s vital to be patient and gentle throughout the process. Applying too much force or pulling the tree forcefully can lead to root breakage or damage, which can be detrimental to the tree’s health.
Once the roots have been loosened, gently tilt the pot to the side and tap the bottom of the pot to help loosen the tree’s rootball. If necessary, you can use a root hook or a pair of bonsai shears to carefully cut off any stubborn roots that are still attached to the pot.
After successfully removing the tree from the pot, take the opportunity to inspect the roots and prune as needed. Trim any long or tangled roots to promote healthy growth and prevent the tree from becoming root-bound.
In conclusion, getting trees off of a bonsai pot requires patience, precision, and a gentle touch. By following these steps and taking the necessary precautions, you can safely remove your bonsai tree from its pot, promote its health, and continue to enjoy its beauty for years to come.
How to Remove Trees from a Bonsai Pot
Removing trees from a bonsai pot requires careful attention and proper techniques to avoid damaging the tree’s delicate roots. Here are some steps to guide you through the process:
1. Prepare the necessary tools:
Before beginning the removal process, gather the following tools: a bonsai root hook, a pair of bonsai pruning shears, and a small pair of scissors. These tools will help you safely remove the tree from the pot without causing harm.
2. Loosen the tree from the pot:
Insert the root hook gently between the tree’s root ball and the pot’s edge. Carefully and slowly, wiggle the hook to loosen the tree from the pot. Be cautious not to apply excessive force, as this can damage the roots.
3. Prune the roots:
Once you have loosened the tree, take the bonsai out of the pot. Examine the root ball to see if any roots are circling or tangled. Use the bonsai pruning shears to trim away any damaged or excessively long roots. Be precise and avoid cutting too much, as this can hinder the tree’s health and growth.
4. Remove excess soil:
Gently shake the bonsai or use a soft brush to remove excess soil from the roots. This will help you get a clearer view of the root system and ensure that it is properly pruned.
5. Repot the tree:
After pruning the roots and removing excess soil, it’s time to repot the tree. Place a layer of fresh well-draining bonsai soil in the pot, then carefully position the tree in the desired location. Make sure the tree is centered and balanced, then fill the remaining space with bonsai soil, gently pressing it down to secure the tree.
6. Water and care for the newly repotted tree:
After repotting, give the tree a thorough watering to help settle the soil and promote root growth. Place the bonsai in a suitable environment, considering factors such as sunlight, temperature, and humidity. Regularly monitor the tree’s moisture levels and provide appropriate care, such as fertilizing and pruning, to ensure its health and development.
By following these steps, you can safely remove trees from a bonsai pot and give them the proper care they need to thrive. Remember to prioritize the tree’s well-being and handle its roots with care throughout the process.
Assessing the situation
Before attempting to remove trees from a bonsai pot, it is important to properly assess the situation to determine the best course of action. This involves considering the size and species of the trees, the condition of the roots and the pot, as well as any potential risks.
Size and species of the trees
First, evaluate the size and species of the trees in order to determine the level of difficulty involved in removing them from the pot. Bonsai trees can vary greatly in size, ranging from small and delicate to larger and more robust. The size and species will impact the method used to free the trees.
Condition of the roots and the pot
Next, carefully examine the roots of the trees and assess their condition. If the roots are tightly intertwined with each other or with the pot, it may require more effort to safely remove them. Additionally, consider the condition of the pot itself. If it is old or fragile, extra care should be taken to avoid damaging it during the removal process.
Finally, consider any potential risks that may be involved in removing the trees from the pot. If the trees have been in the pot for a long time, the roots may have grown into the drainage holes, making the removal more challenging. There is also a risk of damaging the trees or their roots during the process, so it is important to handle them with care.
By thoroughly assessing the situation, you can determine the most appropriate approach for removing the trees from the bonsai pot, ensuring the best possible outcome for both the trees and the pot.
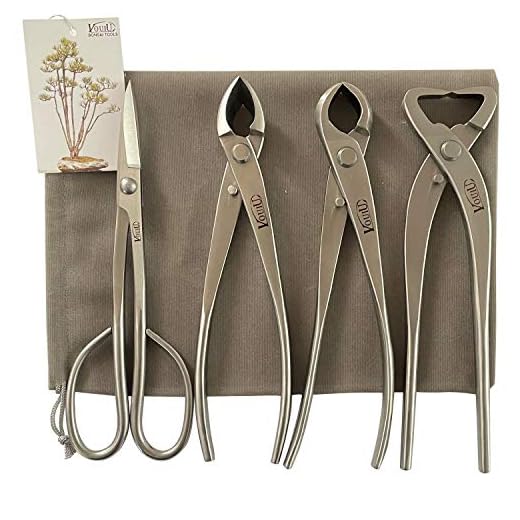
Gathering the necessary tools
Before you start removing a tree from a bonsai pot, it is important to gather all the necessary tools. Having the right tools will make the process easier and help prevent damage to the tree or pot. Here are some tools you will need:
- Bonsai root rake or root hook: This tool is used to gently loosen and untangle the roots from the potting soil.
- Concave branch cutter: This tool is used to remove thicker branches or roots.
- Bonsai shears: These small pruning shears are used to trim smaller branches and foliage.
- Wire cutters: In case the tree has any wire or training wires, you will need wire cutters to remove them without damaging the tree.
- Bonsai chopstick or bamboo skewer: This tool can be used to gently tease the roots and soil away from the pot.
- Water spray bottle: A spray bottle filled with water can be used to moisten the soil and roots, making it easier to remove the tree.
- Bonsai soil scoop or small shovel: You may need this tool to carefully scoop out the potting soil around the roots.
Make sure to clean and sterilize your tools before use to prevent the spread of any diseases or pests. Having these tools readily available will ensure a smooth and efficient process when removing a tree from a bonsai pot.
Loosening the tree roots
When it comes to getting trees off of a bonsai pot, one crucial step is to loosen the roots of the tree. This is important because it allows you to remove the tree without causing any damage to the delicate root system.
To loosen the tree roots, you can start by gently running a root rake or a bonsai root hook along the edges of the pot. This will help to dislodge any roots that may have grown into the pot’s drainage holes or have become intertwined with the pot’s walls.
Next, you can use a pair of bonsai root pruning shears to carefully cut any larger roots that are preventing the tree from being lifted out of the pot. Take care not to cut too many roots, as this can cause stress to the tree and affect its overall health.
Once you have loosened the tree roots and cut any necessary roots, you can gently wiggle the tree back and forth to further loosen it from the pot. Be patient and cautious during this process to avoid causing any harm to the tree or its roots.
Remember, proper technique and care are essential when loosening the tree roots of a bonsai. It’s important to be gentle and take your time, as rushing or applying too much force can result in damage to the tree. By following these steps, you can safely and effectively remove trees from bonsai pots with ease.
Gradually removing the tree
When it comes to removing a tree from a bonsai pot, it’s important to do so gradually and with care to avoid damaging the tree or its root system. Here are the steps you can follow:
- Start by loosening the soil around the tree’s roots. Gently rake the soil away using a small bonsai rake or a pair of chopsticks. Be careful not to disturb the roots too much.
- Once the soil is loosened, you can begin to wiggle the tree out of the pot. Hold onto the tree’s trunk or main stem, and gently tilt and twist the tree while pulling it upwards. This will help loosen the tree from the pot without causing any harm.
- If the tree is still tightly stuck in the pot, you can gently tap on the sides of the pot with a mallet or the back of a spoon. This will help loosen the tree’s root system from the pot and make it easier to remove.
- Once the tree is free from the pot, carefully examine the root system. If there are any circling roots, use a pair of bonsai shears to trim them back. This will help redirect the growth of the roots and encourage them to spread out more evenly.
- If the tree’s root system is tightly packed or pot-bound, you can also gently comb out the roots using a bonsai root rake or a small brush. Be careful not to break or damage the roots during this process.
By following these steps and being patient and gentle, you can safely remove a tree from a bonsai pot without causing harm. Remember to take your time and always prioritize the health and well-being of the tree.
Cleaning and preparing the pot
Before transferring your bonsai tree out of its pot, it’s important to clean and prepare the pot to ensure the health and longevity of your tree. Here are some steps to follow:
1. Remove any debris:
Start by removing any loose soil, fallen leaves, or twigs from the surface of the pot. Use a soft-bristle brush or a toothbrush to gently scrub away any stubborn dirt or moss.
2. Rinse the pot:
Next, rinse the pot with water to remove any remaining dirt or debris. You can use a hose or a bucket of water to do this. Make sure to rinse both the inside and outside of the pot thoroughly.
3. Disinfect the pot:
To prevent the spread of diseases or pests, it’s a good idea to disinfect the pot. You can do this by soaking the pot in a mixture of one part bleach to ten parts water for about 10 minutes. Rinse the pot thoroughly with clean water afterwards.
4. Let the pot dry:
After rinsing and disinfecting the pot, allow it to air dry completely. Placing the pot in direct sunlight can help speed up the drying process.
5. Prepare the potting mix:
While the pot is drying, prepare the potting mix for your bonsai tree. Bonsai trees require a well-draining soil mix, so you may need to mix components like sand, perlite, and organic matter to create the right blend. Consider using a mix specifically formulated for bonsai trees.
6. Line the pot with mesh:
Once the pot is dry, line it with a fine mesh to prevent the soil from falling out of the drainage holes. This will ensure proper drainage while keeping the soil in place.
Following these steps will help ensure that your bonsai tree has a clean and healthy environment to thrive in once it is transferred to its new pot.
Repotting the tree
Repotting is an important part of bonsai tree care. It is necessary to repot the tree every few years to ensure healthy growth and development. Here are some steps to repot your bonsai tree:
1. Choose the right time:
It is best to repot the tree during the spring or early summer when the tree is actively growing. Avoid repotting during the winter or when the tree is dormant, as it may put unnecessary stress on the tree.
2. Gather your tools:
Before starting the repotting process, make sure you have all the necessary tools handy. These may include a bonsai pot, bonsai soil mix, pruning shears, root rake, chopsticks, and wire cutters.
3. Remove the tree from the pot:
To remove the tree from the pot, gently tap the sides of the pot to loosen the root ball. Carefully turn the pot upside down while supporting the tree with one hand. Gently tap the bottom of the pot to release the tree from the pot.
4. Inspect the roots:
Once the tree is out of the pot, carefully remove any old soil from the roots. Use a root rake or chopsticks to gently comb through the roots and untangle them. Inspect the roots for any signs of disease or pests. Trim any damaged or overgrown roots with pruning shears.
5. Prepare the bonsai pot:
Before repotting the tree, prepare the bonsai pot by placing a layer of bonsai soil mix at the bottom. This will ensure proper drainage. Position the tree in the pot, making sure it is centered and at the desired angle. Fill the sides with bonsai soil mix, working it carefully between the roots to ensure optimal contact.
6. Secure the tree:
After filling the pot with soil, gently press down to secure the tree. If necessary, use wire cutters to trim and remove any excess wire used for training the tree. Water the tree thoroughly, making sure the soil is evenly moistened.
Remember to monitor the tree closely after repotting to ensure it adjusts well to its new pot. Provide appropriate care, including regular watering, fertilization, and sunlight to promote healthy growth.