

Growing a juniper bonsai tree from seed is a rewarding and fulfilling experience that requires patience and dedication. Juniper bonsai trees are known for their elegant and graceful appearance, making them a popular choice among bonsai enthusiasts. By starting from seed, you have the opportunity to cultivate and nurture the tree from its very beginning, creating a strong bond with your bonsai.
Step 1: Obtaining the seeds
The first step in growing a juniper bonsai tree from seed is obtaining the seeds themselves. You can try collecting seeds from an existing juniper bonsai tree or purchase them from a reputable supplier. It’s important to choose a species of juniper that is suitable for bonsai cultivation and fits your desired aesthetic.
Pro tip: Collecting seeds in the fall when they are ripe and ready to be dispersed by the tree will give you the highest chance of success.
Step 2: Preparing the seeds for germination
Before you can begin the germination process, it’s important to prepare the seeds properly. Start by soaking the seeds in water for 24 hours to help soften the outer seed coat. After soaking, gently rub the seeds with sandpaper to create small abrasions, which will help water penetrate the seed coat and promote germination.
Step-by-Step Guide to Growing a Juniper Bonsai Tree from Seed
Growing a juniper bonsai tree from seed can be a rewarding and fulfilling experience. With patience and care, you can watch your tiny seedling transform into a beautiful miniature tree. Follow these steps to successfully grow your own juniper bonsai tree from seed.
Step 1: Seed Selection
Start by selecting high-quality juniper seeds. Look for fresh, viable seeds from a reputable source. It’s important to choose the right species of juniper for bonsai cultivation. Juniperus procumbens, Juniperus chinensis, and Juniperus squamata are popular choices for bonsai.
Step 2: Seed Stratification
Juniper seeds go through a natural process called stratification, which breaks seed dormancy and prepares them for germination. To stratify the seeds, place them in a plastic bag with a moistened paper towel or sand. Seal the bag and refrigerate it for 3-4 weeks.
Step 3: Prepare the Growing Medium
While the seeds are stratifying, prepare the growing medium for planting. Junipers prefer well-draining soil with a mix of organic and inorganic components. A typical bonsai soil mixture consists of Akadama, pumice, and lava rock in equal parts.
Step 4: Sow the Seeds
After stratification, remove the seeds from the refrigerator and let them come to room temperature. Fill a bonsai pot with the prepared soil mixture, leaving some space at the top. Gently press the seeds into the soil, spacing them evenly. Cover the seeds with a thin layer of soil.
Step 5: Watering and Care
Water the newly planted seeds thoroughly, ensuring that the soil is evenly moist but not waterlogged. Place the pot in a warm location with indirect sunlight. Mist the soil surface regularly to maintain moisture. Keep a close eye on the soil’s moisture level and water when necessary.
Step 6: Germination and Growth
Be patient, as germination can take several weeks to months. Once the seeds sprout, remove any weaker seedlings to allow the strongest ones to grow. As the seedlings develop, provide them with ample sunlight and regular watering. Avoid overwatering, as junipers prefer slightly drier soil.
Step 7: Pruning and Training
Once the seedlings grow stronger and develop multiple branches, you can start pruning and training them into the desired bonsai shape. Regularly pinch or prune the tips of the branches to encourage bushy growth and shape the tree according to your vision.
Step 8: Repotting
As the juniper bonsai tree grows, it will need to be repotted periodically to provide fresh soil and root space. Repot the bonsai every 2-3 years during spring or early summer. Trim the roots carefully during repotting to maintain a healthy root system.
Following these steps will help you successfully grow a juniper bonsai tree from seed. Remember that bonsai cultivation requires patience, dedication, and ongoing care. Enjoy the journey as you watch your tiny seedling transform into a magnificent miniature tree.
Selecting the Right Juniper Bonsai Seeds
When starting a juniper bonsai tree from seed, it is important to select the right seeds for the best chances of success. Here are some factors to consider when choosing juniper bonsai seeds:
1. Species
There are several species of juniper that can be used for bonsai, including Juniperus chinensis and Juniperus procumbens. Research each species to understand its growth habits, characteristics, and suitability for bonsai cultivation. Consider factors such as leaf size, trunk thickness, and overall appearance to determine which species is the best fit for your desired bonsai style.
2. Freshness
Fresh seeds have a higher chance of germination compared to older seeds. Look for sources that provide fresh juniper bonsai seeds, as well as detailed information about the seed’s age. Fresh seeds will have a higher germination rate and are more likely to lead to healthy, vigorous trees.
3. Source
Choosing a reputable source for juniper bonsai seeds is important to ensure their quality and authenticity. Look for specialty nurseries or reputable online retailers that specialize in bonsai supplies. This will help ensure that the seeds you receive are genuine and from a reliable source.
4. Stratification
Some juniper bonsai seeds may require stratification, which is a process of simulating natural conditions to break seed dormancy. Research the specific species you are working with to determine whether stratification is necessary and for how long. This will help improve the germination rate and overall success of growing juniper bonsai from seeds.
5. Quantity
Consider the quantity of seeds you will need based on your bonsai goals and aspirations. It is always a good idea to have extras in case some seeds fail to germinate or develop into healthy seedlings. Plan accordingly and purchase an appropriate quantity of juniper bonsai seeds.
By considering these factors when selecting juniper bonsai seeds, you can increase your chances of successful germination and cultivation of a beautiful bonsai tree.
Preparing the Seeds for Germination
Before you begin the process of germinating juniper bonsai seeds, it is important to properly prepare them. Follow these steps to ensure the best chance of successful germination:
-
Selecting the seeds
Choose high-quality juniper seeds from a reputable source. Look for seeds that are fresh, plump, and without any signs of damage or disease.
-
Stratification
Juniper seeds require stratification, which is a cold period that breaks the dormancy of the seed. Place the seeds in a plastic bag with a moistened paper towel and seal it. Put the bag in the refrigerator for 6-8 weeks to mimic winter conditions.
-
Scarification
After stratification, juniper seeds often benefit from scarification, which is the process of breaking or softening the seed coat. This can be done by gently rubbing the seeds with sandpaper or nicking the seed coat with a knife. Be careful not to damage the seed inside.
-
Soaking the seeds
Before planting, soak the scarified seeds in lukewarm water overnight. This will help to further soften the seed coat and promote germination.
-
Ready for planting
Now that the seeds have been properly prepared, they are ready to be planted in the growing medium to begin the germination process. Follow the instructions for planting juniper bonsai seeds in the next section.
Creating the Perfect Growing Environment
Creating the right growing environment is crucial for the successful growth of a juniper bonsai tree from seed. Here are a few key factors to consider:
- Light: Juniper bonsai trees thrive in full sun, so it is important to provide ample light for your seedlings. Place them near a south-facing window or use grow lights to ensure they receive at least 6-8 hours of light per day.
- Temperature: Juniper bonsai trees prefer cooler temperatures, ideally around 60-70°F (15-21°C) during the day and slightly cooler at night. Avoid exposing the seedlings to extreme temperature fluctuations or drafts.
- Humidity: Juniper bonsai trees appreciate higher humidity levels, especially during the initial stages of growth. To increase humidity, place a tray filled with water near the seedlings or mist them regularly. Alternatively, you can also use a small humidifier to maintain optimal humidity levels.
- Soil: Use a well-draining bonsai soil mix to ensure proper water drainage. A mix of bonsai soil, perlite, and sphagnum moss works well for juniper bonsai trees. Avoid using regular potting soil, as it retains too much moisture and can lead to root rot.
- Watering: Water the seedlings thoroughly whenever the top inch of soil feels dry. It is important to maintain consistent moisture, but be cautious not to overwater, as juniper bonsai trees don’t like to sit in waterlogged soil. Adjust the watering frequency based on the climate and season.
- Fertilizer: Fertilize the seedlings with a balanced bonsai fertilizer during the growing season (spring to fall). Follow the instructions on the fertilizer packaging for proper application. Avoid fertilizing during the winter dormancy period.
- Pruning and Shaping: As the seedlings grow, prune and shape them regularly to maintain the desired bonsai form. Remove any weak or unwanted branches, and wire the branches to guide their growth. Pruning and shaping should be done with clean and sterile tools to prevent the spread of diseases.
By creating the perfect growing environment, you can set your juniper bonsai tree seedlings up for healthy growth and development. Remember to monitor their progress regularly, and make adjustments as needed to ensure their well-being.
Nurturing and Maintaining Your Juniper Bonsai Seedlings
Once you have successfully germinated your juniper bonsai seeds, it is crucial to provide them with the proper care and attention to ensure their healthy growth and development. Here are some essential steps to nurturing and maintaining your juniper bonsai seedlings:
1. Providing Optimal Growing Conditions:
Place your juniper bonsai seedlings in a location that receives ample sunlight, preferably at least 6 hours of direct sunlight a day. Ensure that the temperature remains between 60°F (15°C) to 75°F (24°C) for optimal growth. Adequate air circulation is also vital for healthy seedlings.
2. Watering:
Regularly check the soil moisture and water the seedlings when the top inch of soil feels dry. Use a fine mist spray or a watering can with a narrow spout to avoid overwatering and to prevent disturbing the delicate roots. It is essential to maintain consistent moisture levels without letting the soil become waterlogged.
3. Fertilizing:
Apply a balanced, slow-release bonsai fertilizer every four weeks during the growing season, from spring to early fall. Follow the instructions on the fertilizer package for the correct dosage. Avoid applying fertilizer during winter or dormancy periods.
4. Pruning and Shaping:
As your juniper bonsai seedlings grow, periodically prune and shape them to encourage a bushy, compact form. Regularly remove any dead or yellowing leaves, branches, or shoots to maintain the plant’s health and aesthetics. It is essential to use sterilized pruning shears to prevent the spread of diseases.
5. Transplanting:
As your juniper bonsai seedlings outgrow their initial container, carefully remove them and transplant them into a larger bonsai pot. Ensure that the pot has proper drainage holes and use a well-draining bonsai soil mix for the new container. Be gentle while handling the delicate roots to avoid damage.
6. Protecting from Pests:
Regularly inspect your juniper bonsai seedlings for any signs of pests, such as aphids or spider mites. If you notice any pests, promptly treat the affected plant with an organic insecticide or follow suitable pest management practices to prevent further infestation.
7. Patience and Attention:
Growing a juniper bonsai tree from seed requires patience and constant care. Monitor your seedlings regularly, observe their growth, and make necessary adjustments in their care routine. Provide them with the attention they need, and you will be rewarded with a beautiful and vibrant juniper bonsai tree.
Remember, growing a juniper bonsai tree from seed is a process that takes time and dedication. By following these nurturing and maintenance steps, you can ensure the successful growth of your juniper bonsai seedlings into stunning bonsai trees.
Pruning and Shaping Your Juniper Bonsai Tree
Pruning and shaping are essential steps in the growth of your juniper bonsai tree. Regular pruning helps maintain the desired shape of the tree and encourages new growth. Here are some important tips to keep in mind:
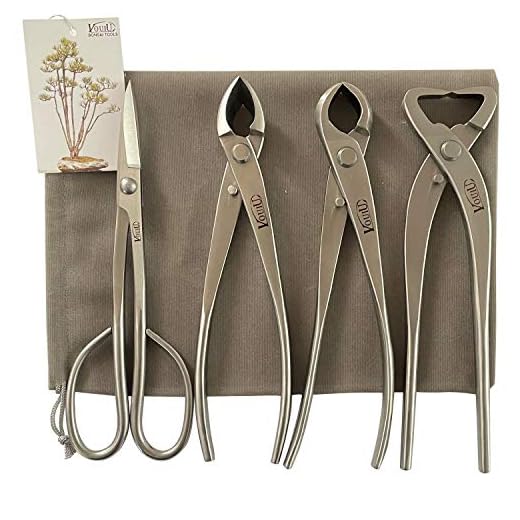
1. Pruning techniques
When pruning your juniper bonsai, it is important to use sharp and clean tools to ensure a clean cut and prevent any damage or disease. Start by removing any dead or yellowing leaves or branches. This will not only improve the aesthetic appearance but also promote new growth.
Next, look for any branches that are growing in an undesirable direction or are crossing each other. Cut these branches close to the trunk or a larger branch to create a more open and well-structured canopy.
Remember to step back and evaluate the overall shape of your tree while pruning. This will help you determine which areas need more attention and where you can improve the symmetry and balance of your bonsai.
2. Wiring and shaping
Wiring is an effective technique to guide the growth of branches and shape your juniper bonsai tree. Use soft aluminum or copper wire to gently wrap around the branches, being careful not to damage or constrict them.
To shape your bonsai, carefully bend and reposition the wired branches according to your desired design. This can help create a more graceful and natural appearance. Be patient and work slowly to avoid any sudden or harsh movements that could harm the tree.
Remember, shaping your bonsai is a continuous process that may take years to achieve the desired result. Regularly check the wiring and adjust it as needed to avoid any constriction or damage to the branches.
By following these pruning and shaping techniques, you can create a beautiful and well-maintained juniper bonsai tree. Remember to always consider the specific needs of your tree and take the time to nurture and care for it properly. Happy bonsai gardening!


