Growing a Japanese maple bonsai from a cutting is a rewarding and exciting experience. Japanese maple trees (Acer palmatum) are known for their stunning beauty and delicate leaves, making them a popular choice among bonsai enthusiasts. While growing a bonsai from a cutting requires time, patience, and skill, it is also a great way to develop a strong connection with nature and create a unique piece of living art.
When it comes to growing Japanese maple bonsai from a cutting, one of the most important factors is selecting the right cutting. It is recommended to take a cutting in early spring when the tree is dormant. Look for a healthy branch with a diameter of about 1/4 inch (0.6 cm) and make a clean cut above a pair of buds. Try to choose a cutting that has a good shape and interesting characteristics, such as a unique twist or a prominent root flare.
Once you have selected a cutting, it is time to prepare it for planting. Remove any leaves from the lower half of the cutting, leaving just a few leaves at the top. This will help the cutting conserve energy and stimulate root growth. Dip the cut end of the cutting in a rooting hormone powder to encourage root development. Then, plant the cutting in a well-draining bonsai soil mix, making sure that the soil is firmly packed around the cutting.
The Basics of Growing Japanese Maple Bonsai from Cutting
Japanese maple bonsai are known for their elegant and delicate appearance, making them a popular choice among bonsai enthusiasts. While there are various ways to grow a Japanese maple bonsai, growing it from a cutting is a rewarding and cost-effective method. Here are the basics to get you started:
- Choose a healthy branch: Look for a branch that is about pencil-thick and has plenty of healthy buds. Make sure it is disease-free and free from any signs of pests.
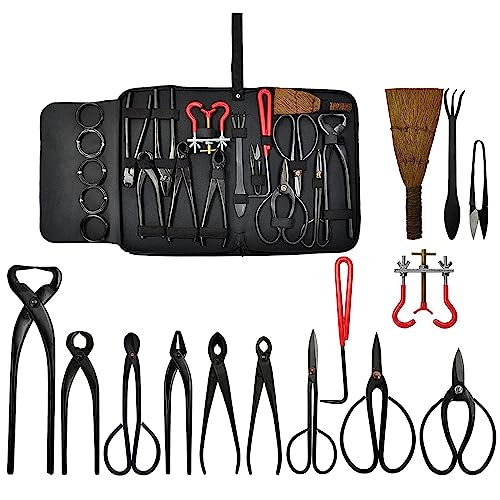
- Prepare the cutting: Using clean and sharp bonsai shears, make a clean diagonal cut just below a leaf node. The cutting should be around 6 to 8 inches long.
- Remove lower leaves: Carefully remove the lower leaves from the cutting, leaving only a few pairs of healthy leaves at the top.
- Apply rooting hormone: Dip the base of the cutting in a rooting hormone powder or gel to encourage root growth.
- Plant the cutting: Fill a small bonsai pot with a well-draining soil mix. Make a hole in the soil using a chopstick or pencil, and gently insert the cutting into the hole.
- Water thoroughly: After planting the cutting, water it thoroughly to ensure that the soil is evenly moist. Avoid overwatering, as it can lead to root rot.
- Provide the right conditions: Place the pot in a partially shaded area where it can receive dappled sunlight. Protect the cutting from extreme temperatures and strong winds.
- Monitor and care for the cutting: Regularly check the moisture level of the soil and water as needed. Prune any dead or diseased leaves and monitor for pests. Be patient and allow the cutting to establish roots, which can take several weeks.
- Transplanting: Once the cutting has developed a strong root system, typically after one to two years, it can be transplanted to a larger bonsai pot or directly into the ground.
- Maintaining the bonsai: Continue to care for your Japanese maple bonsai by providing the right amount of water, sunlight, and fertilization. Regularly prune and shape the tree to maintain its desired form.
Growing a Japanese maple bonsai from a cutting requires patience and attention to detail, but the end result is a beautiful and unique bonsai tree that you can enjoy for years to come.
Choosing the Right Cutting
When it comes to growing a Japanese maple bonsai from a cutting, choosing the right cutting is essential for success. Here are some factors to consider in selecting the best cutting for your bonsai:
1. Age of the cutting: It is best to choose a young and healthy cutting that is between one and three years old. Older cuttings may take longer to root and establish themselves as bonsai.
2. Stem thickness: Look for a cutting with a stem that is approximately pencil-thick. This thickness will provide enough support for the rooted cutting as it grows and develops as a bonsai.
3. Leaf size and shape: Japanese maple bonsai are known for their beautiful foliage, so selecting a cutting with desirable leaf size and shape is important. Look for cuttings with smaller leaves and an attractive leaf shape.
4. Branching structure: Examine the cutting for its branching structure. Ideally, choose a cutting that has a well-balanced and symmetrical branching pattern. This will help create a visually appealing bonsai as it matures.
5. Disease and pest resistance: Before taking a cutting, ensure that the parent tree is healthy and free from any disease or pest infestations. This will help prevent any potential issues when growing the bonsai from the cutting.
By considering these factors and selecting the right cutting, you will greatly increase your chances of successfully growing a Japanese maple bonsai from a cutting.
Preparing the Cutting for Planting
When propagating a Japanese maple bonsai from a cutting, the first step is to prepare the cutting for planting. Here are the steps to follow:
1. Choose the Right Cutting
Look for a healthy branch on the Japanese maple tree that is around 6-8 inches long. The cutting should have at least 4-6 pairs of leaves and be free from any diseases or pests. Make sure to cut the branch at a 45-degree angle just below a leaf node.
2. Remove Lower Leaves
Remove the lower leaves from the cutting, leaving only the top 2-3 pairs of leaves. This will help the cutting focus its energy on root development rather than maintaining leaves.
3. Trim the Cutting
Trim the cutting just above the top pair of leaves, making a clean cut with a sharp knife or pruning shears. This will promote new growth and encourage the cutting to form roots.
4. Apply Rooting Hormone
Dip the cut end of the cutting into rooting hormone powder or gel to stimulate root growth. Make sure to coat the end evenly and tap off any excess.
5. Plant the Cutting
Fill a small pot or container with well-draining bonsai soil. Make a hole in the soil using a pencil or your finger and gently insert the cutting into the hole. Press the soil around the cutting to secure it in place.
6. Water the Cutting
Water the cutting thoroughly until the excess water drains out from the bottom of the pot. Keep the soil slightly moist but not wet to avoid rotting the cutting. Place the pot in a warm and well-lit area, but avoid direct sunlight.
By following these steps, you can successfully prepare a cutting from a Japanese maple tree for planting and grow your own beautiful bonsai.
Planting and Caring for Japanese Maple Bonsai
Planting
When planting a Japanese Maple Bonsai, it is important to choose a container or pot that has proper drainage holes. The soil should be well-draining and a mix of organic matter, such as peat moss and bonsai soil, is recommended. Fill the pot with the soil mixture leaving about an inch of space at the top.
Next, carefully remove the bonsai from its nursery container or remove the plastic wrap if it is a cutting. Gently loosen the roots and place the tree in the pot, making sure it is centered. Adjust the tree’s position slightly if needed.
Once the tree is in place, backfill the pot with the soil mixture, firming it gently around the roots. Avoid compacting the soil too tightly as this can hinder drainage. Water the bonsai thoroughly to settle the soil.
Place your Japanese Maple Bonsai in a location that receives filtered sunlight. Too much direct sunlight can scorch the leaves, while too little light will result in weak growth. Protect the tree from extreme temperatures and strong winds, as they can damage the delicate leaves and branches.
Caring
Japanese Maple Bonsai require regular watering to keep the soil evenly moist. Check the soil with your finger and water when it feels slightly dry. Avoid overwatering as this can cause root rot. It is also beneficial to mist the leaves with water to provide humidity, especially during dry periods or when the tree is kept indoors.
Regular fertilization is important for the healthy growth of your bonsai. Use a balanced liquid fertilizer during the growing season, following the manufacturer’s instructions. Less frequent fertilization is required during the winter months when the tree is dormant.
Pruning and shaping your Japanese Maple Bonsai is essential for achieving the desired form. Regularly remove any dead or damaged branches using sharp, clean bonsai shears. Additionally, you can selectively prune to shape the tree and encourage branching. Pruning should be done during the dormant season to minimize stress on the tree.
Lastly, repotting your bonsai is necessary every few years to maintain its health. Repot in early spring before the new growth starts. Gently remove the tree from its pot, trim the roots, and replant in fresh bonsai soil. This promotes new root growth and prevents the tree from becoming root-bound.
By following these guidelines for planting and caring for your Japanese Maple Bonsai, you can enjoy a beautiful and thriving bonsai tree for years to come.
Planting the Cutting
Once you have prepared your cutting and prepared your pot with well-draining soil mixture, it’s time to plant the cutting.
1. Start by making a small hole in the soil mixture with your finger or a pencil.
2. Gently place the cutting into the hole, making sure that the bottom end of the stem is completely covered by soil.
3. Firmly press the soil around the cutting to ensure it is secure in the pot.
4. Water the cutting thoroughly, making sure the soil is evenly moist.
5. Place the pot in a warm and bright location, but avoid direct sunlight as it can scorch the cutting.
6. To maintain humidity around the cutting, you can cover the pot with a plastic bag or place it in a mini greenhouse.
7. Check the soil moisture regularly and water as needed. Be careful not to overwater, as excessive moisture can cause root rot.
8. Within a few weeks, you should start to see new growth from the cutting. Once it has developed a strong root system and several new leaves, you can start to gradually acclimate it to more sunlight.
9. After the cutting has established itself and grown significantly, you can start to shape it into a bonsai using pruning and wiring techniques.
By following these steps, you can successfully plant a Japanese maple bonsai from a cutting and begin your bonsai journey.