Creating a bonsai tree from a root clipping can be a rewarding and enjoyable experience for bonsai enthusiasts. Bonsai, which is derived from the Japanese words “bon” (tray) and “sai” (plant), is an art form that involves cultivating miniature trees in containers. Root cuttings are an ideal starting point for bonsai because they already have an established root system, making it easier for the tree to take root and grow.
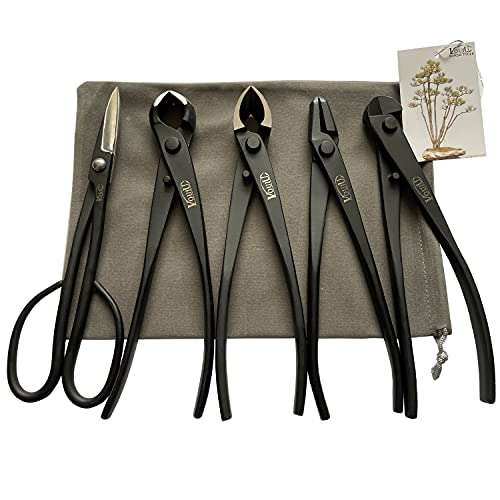
Before you start, it’s important to gather all the necessary materials. You’ll need a root cutting from a desired tree, a bonsai pot, bonsai soil, wire for training, and pruning tools. Begin by selecting a healthy root cutting that has a good balance of thick and thin roots. It’s also essential to choose a root cutting with an interesting and appealing shape, as this will help determine the final design of your bonsai.
Next, prepare the bonsai pot by covering the drainage holes with mesh to prevent soil from escaping. Fill the pot with bonsai soil, making sure to leave enough space for the root cutting. Gently place the root cutting on top of the soil, making sure the roots are spread out evenly. It may be necessary to trim some of the longer roots to fit within the pot.
Once the root cutting is in place, it’s time to secure it using wire. Carefully wrap the wire around the base of the trunk and attach it to the edges of the pot. This will help train the tree’s shape and encourage it to grow in the desired direction. In addition to wire, pruning tools can be used to shape the tree by trimming branches and foliage. Remember to remove any dead or unhealthy roots to promote new growth.
After potting and shaping, it’s important to place the bonsai in a suitable location. Bonsai trees thrive in bright, indirect sunlight, so choose a spot that receives a few hours of sunlight each day. Avoid placing the bonsai near heating or cooling vents, as extreme temperature changes can be harmful to the tree. Regular watering is essential to keep the soil damp but not soggy, and fertilizing every few weeks will provide the necessary nutrients for healthy growth.
With proper care and attention, your bonsai root cutting will gradually develop into a beautiful and unique tree that reflects your artistic vision. Remember to be patient, as bonsai is a long-term project that requires dedication and nurturing. Enjoy the process and embrace the art of bonsai as you watch your root cutting transform into a stunning miniature tree.
The Benefits and Techniques
Creating a bonsai from a root clipping offers a unique set of benefits and techniques. With proper care and attention, this method can yield stunning results.
One of the main benefits of using a root clipping is that it allows you to start with a well-established root system. This gives the bonsai a head start in its growth and development. Additionally, by using a root clipping, you can ensure that the bonsai will have a strong and healthy foundation for future growth.
When it comes to the techniques involved in making a bonsai root clipping, there are a few key steps to follow. First, select a suitable plant with a healthy root system. Make sure to choose a plant that is compatible with your climate and growing conditions. Once you have selected the plant, carefully remove it from its container and trim away any excess roots. Next, choose a suitable container for planting the root clipping, making sure it has sufficient drainage holes. Fill the container with a well-draining bonsai soil mix. Place the root clipping into the container, making sure to position it at a slight angle for visual interest. Finally, water the root clipping thoroughly and place it in a location with adequate sunlight.
It is important to note that creating a bonsai from a root clipping requires patience and careful attention to detail. It may take several years for the bonsai to develop into the desired shape and size. Regular pruning and shaping will be necessary to maintain its form. However, the end result is a beautiful and visually striking bonsai tree that has been crafted from a root clipping.
Overall, using a root clipping to create a bonsai offers many benefits and allows for unique techniques. By following the proper steps and giving the bonsai the care it needs, you can create a stunning and captivating bonsai tree.
Choosing the Right Tree
In order to make a successful bonsai root clipping, it is essential to choose the right tree. Here are a few important factors to consider when selecting a tree for your bonsai:

Species: There are a wide variety of tree species that can be used for bonsai, such as pine, maple, juniper, and elm. Each species has its own unique characteristics and requirements, so it is important to choose a species that suits your preferences and the environment in which you plan to grow the bonsai.
Size: Consider the size of the tree you want to create. Bonsai trees can range in size from just a few inches tall to several feet tall. Think about the available space you have and the style of bonsai you want to achieve.
Health and Condition: Choose a tree that is healthy and in good condition. Look for a tree with strong, vibrant leaves or needles, and avoid trees with signs of disease or pest infestation. It is also important to consider the age of the tree, as younger trees tend to be more adaptable to shaping and training.
Trunk and Branch Structure: Examine the trunk and branches of the tree to ensure they have interesting and desirable shapes. Look for a trunk with good taper, which means it gradually narrows as it goes up, and branches that have a natural and pleasing flow. These characteristics will contribute to the overall visual appeal of the bonsai.
Personal Preference: Ultimately, the choice of tree should be based on your personal preference. Select a tree that you find visually appealing and that you will enjoy working with and caring for. Bonsai is a long-term commitment, so it is important to choose a tree that you have a genuine connection with.
By considering these factors and carefully choosing the right tree, you can set yourself up for success when making a bonsai root clipping.
Preparing the Root Clipping
Before starting the process of creating a bonsai from a root clipping, it is important to gather all the necessary materials. You will need a clean and sterile pair of pruning shears, a container with well-draining soil, a rooting hormone powder, and a spray bottle filled with water.
Once you have your materials ready, follow these steps:
1. Selecting the Root Clipping
Look for a healthy and strong root in the desired plant. It is recommended to choose a root that is thick and has several smaller root branches attached to it. Ensure that the root is free from any diseases or signs of decay.
2. Cutting the Root Clipping
Using the pruning shears, make a clean cut on the selected root. It is important to make a straight cut without any jagged edges. The length of the root clipping should be around 4-6 inches.
Note: Avoid taking too many root clippings from the same plant, as this may harm the overall health of the plant.
3. Applying Rooting Hormone
Dip the cut end of the root clipping into the rooting hormone powder. Make sure to cover the entire cut end with the powder, as this will help stimulate root growth.
4. Planting the Root Clipping
Prepare the container with well-draining soil. Make a small hole in the soil using your finger or a pencil, and gently place the root clipping into the hole. Press the soil around the root clipping to secure it in place.
Tip: It is important to ensure that the soil is slightly moist but not too wet, as excessive moisture can cause root rot.
5. Watering the Root Clipping
Using the spray bottle filled with water, mist the soil around the root clipping. Be careful not to over-water the plant, as this may lead to fungal diseases.
Now that you have successfully prepared the root clipping, it’s time to provide the proper care and maintenance to encourage its growth and development into a beautiful bonsai tree.
Caring for the Bonsai Root Clipping
Once you have successfully created a bonsai root clipping, it is important to provide proper care to ensure its healthy growth and development. Here are some guidelines for caring for your bonsai root clipping:
1. Watering
The key to successful bonsai root clipping care is proper watering. It is important to keep the soil moist, but not waterlogged. Check the moisture level of the soil regularly by inserting your finger into the soil up to your knuckle. If it feels dry at this depth, it is time to water the bonsai. Water the plant thoroughly until the water comes out of the drainage holes at the bottom of the pot. Allow excess water to drain away and never let the bonsai sit in standing water.
2. Light
Bonsai root clippings require bright, indirect light for optimal growth. Place the bonsai in a location with good natural light, but avoid direct sunlight, as it can damage the delicate roots and foliage. If necessary, you can provide artificial light using fluorescent grow lights. Keep in mind that the light needs may vary depending on the specific species of bonsai root clipping you have.
Note: Be sure to rotate the bonsai periodically to ensure even distribution of light and promote balanced growth.
3. Temperature and Humidity
Most bonsai root clippings thrive in temperatures between 60-75 degrees Fahrenheit (15-24 degrees Celsius). Avoid exposing the bonsai to extreme temperature fluctuations, drafts, or air conditioning vents. Maintaining a consistent temperature will help promote healthy growth. Additionally, bonsai root clippings prefer moderate to high humidity. You can increase humidity levels by placing the bonsai pot on a humidity tray filled with water or regularly misting the foliage.
4. Pruning and Shaping
Regular pruning is essential for maintaining the desired shape of your bonsai root clipping. Remove any dead, damaged, or diseased branches using clean, sharp pruning shears. Additionally, you may need to carefully trim any excessive growth to maintain the desired size and proportions of your bonsai. Pruning should be done with caution and precision to avoid harming the delicate roots and foliage of the bonsai root clipping.

Remember: Pruning and shaping should be done during the appropriate seasons for your specific species of bonsai root clipping.
By following these guidelines for caring for your bonsai root clipping, you can enjoy the beauty and tranquility of this ancient art form for years to come. With patience, dedication, and proper care, your bonsai root clipping will flourish and bring joy to your space.