Repotting is an essential part of bonsai care, and it’s something that every beginner bonsai enthusiast should learn how to do. Repotting a bonsai tree not only helps to refresh the soil, but it also promotes healthy root growth and provides your bonsai with the necessary space to thrive. However, repotting a bonsai can be intimidating for beginners, as it requires a delicate touch and a good understanding of the tree’s needs. In this article, we will guide you through the process of repotting a bonsai, providing you with helpful tips and step-by-step instructions.
Step 1: Know when to repot
Before jumping into the repotting process, it’s important to know when it’s the right time to repot your bonsai tree. Generally, bonsai trees should be repotted every 1-2 years, depending on the species and the tree’s growth rate. Signs that indicate it’s time to repot include the tree outgrowing its current pot, roots circling around the pot, or the soil becoming compacted and draining poorly. Spring is usually the best time to repot a bonsai, as the tree is just starting to wake up from its winter dormancy.

Remember: Not all bonsai trees thrive with the same repotting schedule, so it’s important to research and understand the specific needs of your bonsai species.
Choosing the Right Pot for Your Bonsai
When it comes to repotting your bonsai, choosing the right pot is crucial for the health and aesthetic appeal of your tree. Here are some factors to consider when selecting a pot:
Size and Proportions
First and foremost, the size of the pot should match the size of your bonsai. A pot that is too small will restrict the root growth, while a pot that is too large may cause the roots to rot. The general rule is to choose a pot that allows for about two-thirds of the tree’s height, including the roots, above the rim of the pot.
In addition to size, consider the proportions of the pot. The pot should complement the tree’s shape and style. For example, a slimmer and taller pot would suit a cascade-style bonsai, while a wider pot would work better for a more upright tree.
Material
Bonsai pots are typically made of plastic, ceramic, or clay. Each material has its advantages and considerations. Plastic pots are lightweight, durable, and affordable, but they may not provide the same aesthetic appeal as ceramic or clay pots. Ceramic and clay pots are more traditional and visually appealing but can be heavier and more fragile. Consider the climate and environment in which your bonsai will be placed when choosing the material for your pot.
Furthermore, the color of the pot should complement the tree’s foliage and bark. Earth tones like brown, beige, and green are popular choices that accentuate the natural beauty of bonsai trees.
Drainage
Proper drainage is essential for the health of your bonsai. Look for pots that have drainage holes to prevent waterlogging and ensure that excess water can drain effectively. Additionally, consider using a layer of mesh or bonsai soil screens to keep the soil from clogging the drainage holes.
It’s also important to choose a pot with good airflow. Pots with feet or raised bottoms can help improve airflow to the roots and prevent them from becoming waterlogged.
Conclusion
Choosing the right pot for your bonsai is a crucial step in the repotting process. Consider the size and proportions, material, and drainage of the pot to promote the health and overall aesthetic appeal of your tree. With careful consideration and selection, you can find the perfect pot to complement and enhance the beauty of your bonsai.
Understanding the Importance of Proper Pot Selection
When it comes to repotting a bonsai tree, one of the most critical factors to consider is the pot selection. Choosing the right pot is not just about aesthetics; it plays a vital role in the overall health and development of the bonsai. Here are a few reasons why proper pot selection is crucial:
1. Size and Space: The pot should provide adequate space for the bonsai roots to grow and spread. If the pot is too small, the roots will become cramped and hinder the tree’s development. On the other hand, an excessively large pot can lead to overgrowth of roots, resulting in poor nutrient absorption and stability.
2. Drainage and Aeration: Bonsai trees require well-drained soil to prevent waterlogging, which can lead to root rot and other diseases. A pot with drainage holes allows excess water to escape, ensuring a healthy root system. Additionally, proper aeration is essential for root respiration, and a well-designed pot can enhance airflow.
3. Stability and Balance: The pot should provide stability to the bonsai tree, preventing it from toppling over due to wind or accidental bumps. A well-balanced pot will also distribute the tree’s weight evenly, reducing stress on certain areas and promoting healthy growth.
4. Aesthetics: While not the primary concern, the pot’s visual appeal is also important. It should complement the bonsai tree’s style and enhance its beauty. A properly selected pot can highlight the tree’s unique features and create a harmonious overall appearance.
Overall, choosing the right pot for repotting your bonsai tree is essential for ensuring its health, longevity, and aesthetic appeal. Proper pot selection takes into account factors such as size, drainage, stability, and aesthetics, ensuring optimal growing conditions for your bonsai tree.
Gathering the Necessary Tools and Materials
Before repotting your bonsai, it’s important to gather all the necessary tools and materials to ensure a successful repotting process. Here is a list of essential items you’ll need:
- Bonsai pot or container – Choose a pot that is slightly larger than the current one, allowing room for the bonsai’s roots to spread and grow.
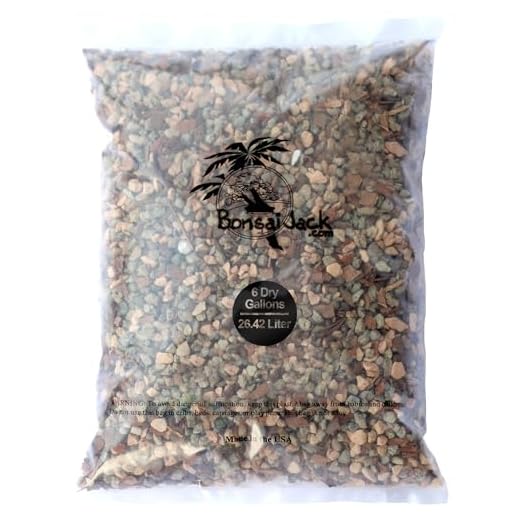
- Bonsai soil – Use a well-draining soil mixture specifically designed for bonsai trees to provide adequate moisture and nutrients.
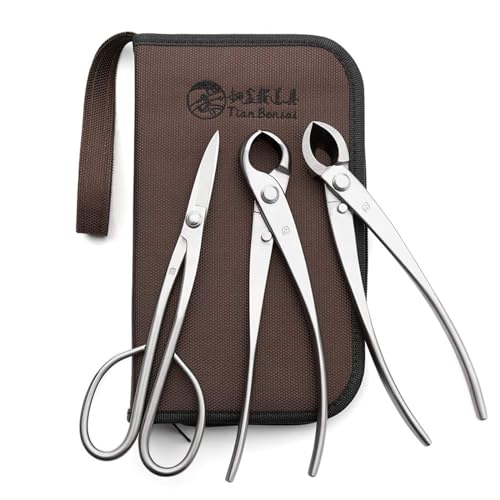
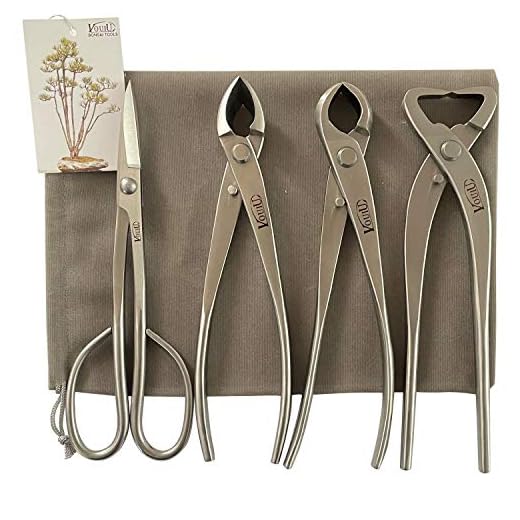
- Pruning shears – A sharp pair of pruning shears is essential for trimming and shaping the bonsai’s roots and branches.
- Bonsai wire – This thin, flexible wire is used to train and shape the bonsai by gently bending the branches and trunk into desired positions.
- Root hook or rake – A root hook or rake helps to gently tease out and untangle the bonsai’s roots during the repotting process.
- Watering can – A watering can with a fine nozzle or misting spray bottle is ideal for watering the bonsai without disturbing the soil or roots.
- Bonsai fertilizer – To promote healthy growth, provide your bonsai with a specially formulated bonsai fertilizer to supply essential nutrients.
By gathering these tools and materials beforehand, you’ll be well-prepared to repot your bonsai and provide it with the care it needs to thrive.
Preparing for the Repotting Process
Before you begin the repotting process for your bonsai, it’s important to gather all the necessary tools and materials. This will ensure that you have everything you need and make the process much smoother.
Here is a checklist of the items you will need:
- Bonsai pot: Select a pot that is slightly larger than the current pot your bonsai is in, as this will allow room for growth.
- Bonsai soil: You will need well-draining soil specifically designed for bonsai trees.
- Bonsai scissors: These specialized scissors will be used to trim the roots and branches of your bonsai.
- Bonsai wire: This wire will assist in repositioning and shaping the branches of your bonsai.
- Plastic sheet or towel: This will help protect your workspace from any mess during the repotting process.
- Watering can: Have a watering can filled with water nearby to hydrate your bonsai after repotting.
Once you have gathered all of these items, you can proceed with the repotting process by following these steps:
- Choose the right time: It’s best to repot your bonsai during the spring or early summer, when the tree is actively growing.
- Prepare the new pot: Place a plastic mesh or screen over the drainage holes in the new pot to keep the soil from escaping.
- Loosen the roots: Gently remove the bonsai from its current pot, being careful not to damage the delicate roots. Use the bonsai scissors to trim any long or tangled roots.
- Repot the bonsai: Place a layer of bonsai soil in the new pot and position your bonsai on top. Fill the rest of the pot with bonsai soil, ensuring that the roots are completely covered.
- Water the bonsai: After repotting, thoroughly water your bonsai to settle the soil and hydrate the roots.
- Monitor and care for your bonsai: Keep a close eye on your repotted bonsai and ensure it gets the proper amount of sunlight, water, and nutrients for healthy growth.
Following these steps and being prepared with the right tools and materials will help ensure a successful repotting process for your bonsai. Remember to be patient and gentle with your tree, as it may take some time for it to adjust to its new pot and soil.
Preparing the Bonsai for Repotting
Before repotting your bonsai, it’s essential to properly prepare it to ensure its health and successful transplantation.
1. Choose the Right Time to Repot
Timing is crucial when it comes to repotting bonsai. For most species, the best time is early spring before the buds start to swell. This allows the bonsai to recover quickly and adjust to its new pot.
2. Gather the Necessary Tools
To repot your bonsai, you’ll need the following tools:
- Bonsai pruning shears or scissors to trim the roots
- A bonsai soil scoop or wooden stick to carefully remove the bonsai from its current pot
- A bonsai pot with drainage holes
- Bonsai soil mix suitable for your bonsai species
- A watering can or sprayer to moisten the soil after repotting
3. Trim the Roots
Remove the bonsai from its pot and gently shake off any loose soil. Use the pruning shears or scissors to trim one-third of the root mass, paying attention to remove any damaged or tangled roots. This root pruning will promote new growth and keep the bonsai in a smaller pot.
4. Check for Pests and Diseases
Inspect the roots and the entire bonsai tree for any signs of pests or diseases. If you notice any, treat them accordingly before repotting to prevent further damage.
5. Prepare the New Pot and Soil Mix
Thoroughly clean the new pot and make sure it has drainage holes. Mix the bonsai soil according to the requirements of your bonsai species.
6. Repotting the Bonsai
Place a layer of bonsai soil in the bottom of the pot and position the bonsai tree on top, ensuring that it sits slightly to one side for visual interest. Gently backfill the remaining space with the bonsai soil, making sure to fill any gaps around the roots. Tamp the soil lightly to remove air pockets.
7. Properly Water the Bonsai
After repotting, thoroughly water the bonsai until water drains out of the pot’s drainage holes. This ensures that the soil settles around the roots and removes any remaining air pockets.
Following these steps will help you properly prepare your bonsai for repotting, ensuring its health and continued growth.
Pruning and Removing Old Soil
Once you have removed your bonsai from its current pot, it’s important to prune the roots before repotting it. Carefully inspect the roots and trim away any dead or damaged ones using sharp, clean scissors or pruning shears. This will promote healthy growth and prevent any potential diseases or pests from spreading.
Next, gently shake off the old soil from the root ball. Be careful not to damage the fragile roots in the process. You can use a chopstick or a root hook to carefully tease out the old soil and untangle any root twists or knots.
While removing the old soil, take the opportunity to examine the roots closely. Look out for any circling roots that may constrict and stunt growth. If you notice any, gently prune or unwind them to ensure the roots can spread out freely in the new pot.
After removing the old soil, you can soak the roots briefly in water to ensure they are clean and free from any remaining dirt. This will also help them absorb water more effectively once placed back in the new pot.
Once the pruning and root cleaning process is complete, you can now proceed to repot your bonsai in fresh, well-draining soil. Remember to choose a pot that is appropriate in size and shape for the specific type of bonsai tree you are growing.
Repotting Your Bonsai
Repotting is an essential process in bonsai care that helps maintain the health and growth of your tree. Here are some steps to follow when repotting your bonsai:
1. Timing
It’s important to repot your bonsai tree at the right time, typically during the early spring or late winter when the tree is dormant. This allows the tree to recover quickly from the repotting process.
2. Selecting the Right Pot and Soil
Choose a pot that is slightly larger than the current pot, allowing room for future growth. The pot should have drainage holes to prevent waterlogging. Use a well-draining bonsai soil mix that consists of components like akadama, pumice, and lava rock.
3. Pruning the Roots
Before repotting, carefully remove the tree from its current pot. Gently comb through the roots with a root rake or chopstick to remove old soil and prune any excessively long or tangled roots. Be careful not to damage the delicate roots.
4. Placing the Tree in the New Pot
Place a layer of fresh bonsai soil at the bottom of the new pot, creating a mound in the center. Position the tree on the mound, spreading the roots evenly. Add more soil around the roots, firming it gently to avoid air pockets.
Note: Ensure that the tree is positioned at the desired height in the pot.
5. Watering and Care after Repotting
After repotting, water the bonsai thoroughly to settle the soil around the roots. Keep the tree in a shaded area for a few weeks to allow the roots to recover. Observe the moisture levels in the soil and water accordingly, taking care not to overwater.
Remember: Repotting should be done every 1-3 years depending on the growth of your bonsai tree. Repotting too frequently or using incorrect soil can lead to root rot and other issues. Always research the specific needs of your bonsai species for best results.
Carefully Transferring the Bonsai into the New Pot
Once you have prepared the new pot with fresh soil mix, it’s time to carefully transfer the bonsai into its new home. This step is crucial in ensuring the bonsai’s health and growth.
1. Gently remove the bonsai from its current pot: Carefully slide a bonsai fork or a blunt stick around the edges of the pot to loosen the roots. Be gentle and avoid damaging the delicate roots.
2. Inspect the roots: Once the bonsai is loosened from the pot, gently shake off the old soil mix to expose the roots. Inspect the roots carefully, looking for any signs of disease or damage. If there are any dead or damaged roots, trim them off with sharp and clean bonsai scissors or shears.
3. Positioning the bonsai in the new pot: With the old soil mix removed, carefully position the bonsai in the new pot. Make sure that the trunk is centered and upright, and adjust the bonsai’s position accordingly.
4. Adding fresh soil mix: Slowly add the fresh soil mix around the roots, taking care to fill in any gaps. Gently press the soil mix down with your fingers or a chopstick to ensure it is compact and evenly distributed.
5. Watering the bonsai: Once the bonsai is securely in the new pot with fresh soil mix, give it a good watering. Ensure that the soil is evenly moist, but not waterlogged, by pouring water slowly over the soil surface.
6. Care after repotting: Place the bonsai in a location with appropriate lighting and temperature conditions. Avoid direct sunlight for a few weeks to prevent stress on the bonsai’s delicate roots. Water the bonsai regularly, keeping the soil evenly moist but not saturated.
By following these steps, you can successfully transfer your bonsai into a new pot, providing it with the right environment to thrive and grow. Remember to be patient and monitor the bonsai’s health closely in the weeks following repotting.