


Welcome to our guide on how to repot bonsai plants. Bonsai is an ancient art form that involves nurturing miniature trees in small pots, creating a sense of tranquility and beauty. Repotting is an essential step in the care of bonsai plants, as it allows for proper root growth and provides fresh nutrients to sustain their health and vitality. In this article, we will walk you through the process of repotting bonsai plants, including when to repot, the necessary tools, and the step-by-step instructions for a successful repotting.
When to Repot Bonsai Plants
Repotting is recommended every two to five years, depending on the age and health of your bonsai plant. Spring is the ideal time for repotting, just before the growth season begins. Look for signs that indicate your bonsai needs repotting, such as roots growing out of the drainage holes, stunted growth, or the soil becoming compacted. Remember, repotting too frequently can cause stress to the plant, so it’s important to assess the condition of your bonsai before deciding to repot.
Tools You’ll Need
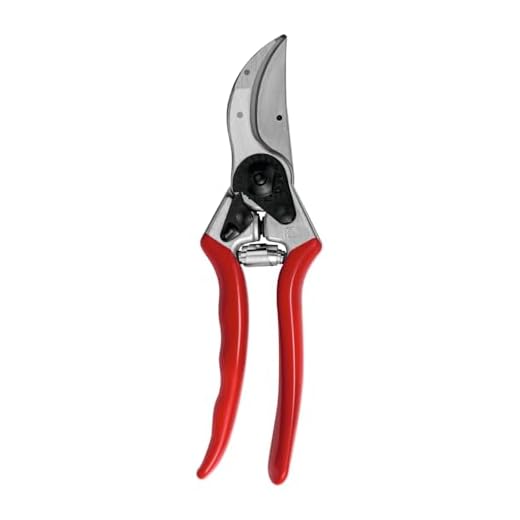
Before you begin repotting your bonsai plant, gather the necessary tools. These include a sharp pair of bonsai scissors or pruning shears, a root rake or comb, a bonsai soil sieve, bonsai wire, and a watering can. Having these tools on hand will make the repotting process much smoother and efficient.
Step-by-Step Instructions for Repotting
1. Carefully remove the bonsai from its current pot by gently loosening the soil around the edges and using the root rake or comb to untangle the roots.
2. Trim any dead or damaged roots using sharp bonsai scissors or pruning shears. Be careful not to cut too much, as this can harm the plant.
3. Prepare the new bonsai pot by covering the drainage holes with mesh or a layer of small rocks to prevent soil from escaping.
4. Place a layer of fresh bonsai soil at the bottom of the pot, making sure it is evenly spread.
5. Position the bonsai in the new pot, arranging the roots gently over the soil layer.
6. Fill the remaining space in the pot with fresh bonsai soil, making sure to work it carefully around the roots.
7. Use a root rake or comb to remove any air pockets and ensure the soil is properly packed.
8. If necessary, use bonsai wire to secure the tree in the pot and provide stability.
9. Water the repotted bonsai thoroughly, allowing the water to flow through the drainage holes to ensure proper hydration.
By following these step-by-step instructions and taking the time to repot your bonsai plants, you are providing them with the care and nourishment they need to thrive. Remember to observe and monitor your bonsai regularly to ensure its continued health and well-being. Happy repotting!
Step-by-step guide on repotting bonsai plants
Repotting is an essential part of bonsai plant care, as it helps promote healthy growth and allows you to refresh the soil and root system. Follow these step-by-step instructions to repot your bonsai plant:

1. Choose the right time
Repotting should be done during the early spring or late winter, when the plant is still dormant. This allows the plant to recover quickly without being stressed by active growth.
2. Gather your materials
Before you start repotting, gather all the necessary materials such as a bonsai pot, bonsai soil, pruners, a root hook, and a watering can.
3. Prepare the new pot
Carefully remove the bonsai plant from its current pot and assess its root system. Clean the new pot and make sure it has drainage holes to prevent waterlogging.
4. Prune the roots
Trim the bonsai plant’s roots using sharp pruners, removing any dead, damaged, or excessively long roots. Be careful not to remove too much of the root system, as it may stress the plant.
5. Loosen the root ball
Gently use a root hook to loosen the root ball, ensuring that the roots are no longer cramped and tangled. This will help the plant grow freely in its new pot.
6. Place the plant in the new pot
Position the bonsai plant in the new pot, making sure it is centered and at the desired height. Add bonsai soil around the roots, being careful not to leave any air gaps.
7. Water thoroughly
Once the plant is securely positioned in the new pot, water it thoroughly to settle the soil and eliminate any air pockets. Be sure to water until the water drains from the bottom of the pot.
8. Provide necessary aftercare
After repotting, place the bonsai plant in a location with the appropriate light and temperature conditions for its species. Monitor the plant closely for signs of stress and adjust watering and care accordingly.
Following these step-by-step instructions will ensure a successful repotting of your bonsai plant, promoting its health and vitality for years to come.
Why repotting bonsai plants is essential
Repotting bonsai plants is an essential practice that every bonsai enthusiast should undertake regularly. It not only helps to maintain the health and vitality of the plant but also promotes its overall growth and development.
One of the primary reasons for repotting bonsai plants is to provide them with fresh soil and nutrients. Over time, the soil in the bonsai pot can become compacted and depleted of essential nutrients. By repotting, you can remove the old soil and replace it with a fresh, nutrient-rich substrate. This improves the plant’s ability to absorb water and nutrients, ensuring its optimal growth.
Another reason to repot bonsai plants is to prune and trim their root systems. As bonsai plants grow, their roots can become bound and tangled within the pot. Repotting allows you to carefully trim and prune the roots, removing any circling or girdling roots that can potentially harm the plant’s health. It also promotes the development of a healthy, well-distributed root system, which is crucial for the bonsai’s overall stability and longevity.
Repotting bonsai plants also helps to prevent stagnation and root rot. Over time, organic matter and debris can accumulate in the soil, creating a breeding ground for harmful bacteria and fungi. By repotting, you can remove any potential sources of infection and ensure proper drainage within the pot. This, in turn, helps to prevent waterlogged conditions and root rot, which can severely damage or even kill a bonsai plant.
Additionally, repotting offers an opportunity to assess and improve the overall aesthetics of your bonsai. By repotting, you can adjust the position of the tree within the pot, ensuring that it is placed in a balanced and visually appealing manner. You can also prune and shape the branches, creating a more refined and harmonious silhouette for the bonsai.
Conclusion
Overall, repotting bonsai plants is an essential practice that should not be overlooked. It provides numerous benefits, including fresh soil and nutrients, root pruning, disease prevention, and aesthetic improvements. By regularly repotting your bonsai, you can ensure its health, vitality, and aesthetic appeal for years to come.
When is the best time to repot bonsai plants
Repotting bonsai plants is an essential part of their care and maintenance. This process involves transferring the plant to a new container, which helps promote growth and keeps the root system healthy. However, it is crucial to repot bonsai plants at the right time to ensure their overall health and vitality.
Spring is the ideal time for repotting bonsai plants
The best time to repot your bonsai plants is during the spring season. This is when the plants are entering their active growth period, and their root systems are more capable of recovering from the repotting process. The warmer temperatures and increased daylight in spring provide favorable conditions for root development and reduce the likelihood of transplant shock.
Exceptions for certain species
While spring is generally the best time for repotting bonsai plants, there are some exceptions when it comes to specific species. Some trees may prefer different repotting schedules based on their growth cycles or specific care requirements. For example, certain coniferous species may benefit from repotting in late winter, while tropical bonsai plants may require repotting during the warmer months of summer.
It is essential to research and understand the specific needs of your bonsai tree species before deciding on the ideal time to repot.
Observing the signs for repotting
Aside from considering the time of year, there are also visual cues that indicate when it’s time to repot your bonsai plant. These signs include roots growing through the drainage holes, a crowded root system, or slower growth and development of the plant. If you notice any of these signs, it’s an indication that repotting is necessary to allow the bonsai plant to thrive.
To determine the right time for repotting, gently remove the bonsai plant from its current container and inspect the roots. If they appear compacted or tangled, it’s a sign that repotting is required.
Using a proper repotting technique
When repotting your bonsai plant, it is crucial to follow the proper technique to minimize stress and ensure successful transplantation. Start by gently removing the plant from its container, carefully loosening the roots and removing any excess soil. Trim any damaged or overly long roots, and then place the plant into a new container with fresh bonsai soil mix. Be sure to water the plant thoroughly after repotting to help settle the soil.
| Key Points |
|---|
| Spring is the ideal time for repotting bonsai plants. |
| Some species may have different repotting schedules. |
| Observe visual cues and signs for repotting. |
| Follow a proper repotting technique for success. |
Materials needed for repotting bonsai plants
Repotting bonsai plants requires a few essential materials to ensure the plant’s health and proper growth. Here is a list of materials you will need:
| 1. Bonsai pot: Choose a pot that is appropriate for the size of your bonsai. It should have drainage holes to prevent waterlogging. |
| 2. Bonsai soil: Use a well-draining bonsai soil mix that is suitable for your tree species. Avoid using regular garden soil. |
| 3. Bonsai fertilizer: Get a slow-release or liquid bonsai fertilizer to provide the necessary nutrients for your tree’s growth. |
| 4. Pruning shears: Have a pair of sharp pruning shears to trim the roots and branches of your bonsai during repotting. |
| 5. Root hook or rake: Use a root hook or rake to gently comb out the roots and remove old soil from the rootball. |
| 6. Watering can: Keep a watering can handy to moisten the soil after repotting and during the recovery period. |
| 7. Bonsai wire: Use bonsai wire to secure your tree in the new pot and to shape the branches if necessary. |
| 8. Plastic mesh or drainage screens: Place plastic mesh or drainage screens over the drainage holes of the bonsai pot to prevent soil from escaping. |
| 9. Water tray: Place a water tray under your bonsai pot to catch excess water and create a humidity environment. |
| 10. Work table or surface: Find a sturdy work table or surface to carry out the repotting process comfortably. |
| 11. Protective gloves: It is recommended to wear protective gloves to avoid injuries when handling sharp tools or thorny plants. |
Having these materials ready before repotting your bonsai plants will make the process smoother and more efficient. Proper preparation ensures the health and vitality of your bonsai, promoting its long-term growth and enjoyment.
Steps to repotting bonsai plants for successful growth
Repotting is a crucial process in the care and maintenance of bonsai plants. It allows for the renewal of soil nutrients, proper root development, and helps in maintaining the overall health and growth of the plant. Here are the essential steps to successfully repot your bonsai:
Step 1: Choose the right time
Timing is crucial when it comes to repotting bonsai plants. The best time to repot is typically during the spring season, just before the new growth starts. This allows the plant to recover quickly and adapt to the changes in its environment.
Step 2: Prepare the materials
Gather all the materials you’ll need for repotting. This includes a suitable pot, fresh bonsai soil mix, pruning shears, root hook, and wire if necessary. Ensure that the pot you choose is slightly larger than the current one to accommodate the growth of the plant.
Step 3: Carefully remove the bonsai from its pot
Begin by loosening the soil around the edges of the pot using a root hook. Gently remove the bonsai from its pot, taking care not to damage the roots. If the roots are tightly wound, use the root hook to carefully separate them.
Step 4: Trim and prune the roots
Inspect the roots and trim away any damaged or excessively long roots using pruning shears. This helps promote healthy root development and prevents the roots from becoming too tangled in the future. Be cautious not to remove too much of the root system.
Step 5: Prepare the new pot
Before placing the bonsai in its new pot, ensure that the pot has drainage holes to prevent waterlogging. Add a layer of fresh bonsai soil mix to the bottom of the pot to provide essential nutrients to the bonsai.
Step 6: Position the bonsai in the new pot
Place the bonsai in the new pot, ensuring that it is positioned slightly off-center for aesthetic appeal. Gently spread out the roots over the fresh soil layer, making sure they are evenly distributed. Add more soil around the roots to secure the bonsai in place.
Step 7: Water and care for the bonsai
After repotting, water the bonsai thoroughly to help settle the soil and ensure proper hydration. Place the bonsai in a suitable location where it can receive adequate sunlight and maintain appropriate humidity levels. Regularly monitor and maintain the moisture levels of the soil to promote successful growth.
By following these steps, you can ensure the successful repotting of your bonsai plant, promoting healthy root development and overall growth. Remember to observe any specific requirements that may apply to your particular bonsai species for optimal care and maintenance.


