
Bonsai hoppers are an essential tool for maintaining the health and beauty of bonsai trees. They provide a controlled and regulated environment for your bonsai to grow in, ensuring that it gets the proper amount of moisture, sunlight, and nutrients. However, over time, dirt and debris can accumulate in the hoppers, which can hinder their functionality and effectiveness. In this article, we will guide you through the process of taking dirt out of bonsai hoppers, so you can continue to enjoy the benefits of these valuable tools.
First, it is important to gather the necessary materials. You will need a small brush with soft bristles, a pair of tweezers, a small bucket or container, and clean water. Make sure that your tools are clean and sanitized before you begin, as you want to avoid introducing any contaminants to your bonsai tree.
The next step is to carefully remove the bonsai hopper from its position. Gently lift it up and place it in a safe and stable area where you can work on it without causing any damage. Take your small brush and start by gently brushing away any loose dirt or debris that may be on the surface of the hopper. Be careful not to apply too much pressure, as you don’t want to scratch or damage the hopper in the process.
Once you have removed the loose dirt, use the tweezers to carefully pick out any remaining debris or particles that may be stuck in the crevices of the hopper. Take your time and be patient, as this step requires precision and attention to detail. After you have picked out all the visible dirt and debris, fill the small bucket or container with clean water and place the hopper in it. Gently agitate the hopper in the water, allowing the dirt to loosen and float away.

After the dirt has been loosened, carefully remove the hopper from the water and rinse it under running water to remove any remaining residue. Inspect the hopper to ensure that all the dirt and debris have been successfully removed. If needed, repeat the rinsing process until the hopper is completely clean. Once the hopper is clean, allow it to air dry before placing it back in its position with your bonsai tree.
In conclusion, taking dirt out of bonsai hoppers is a simple and necessary task to maintain the functionality of your bonsai tools. By following the steps outlined in this article, you can easily clean your bonsai hoppers and ensure that they continue to provide the optimal environment for your bonsai tree to thrive.
Removing Soil from Bonsai Hoppers: A Step-by-Step Guide
One of the tasks that all bonsai enthusiasts need to perform regularly is removing soil from bonsai hoppers. This process is essential to keep the hoppers clean and ensure the health of your bonsai trees. Here is a step-by-step guide on how to effectively remove soil from bonsai hoppers:
Step 1: Prepare the necessary materials
Before you start removing soil from the hoppers, gather all the materials you will need. This includes a small brush with soft bristles, a pair of tweezers, a container to collect the soil, and a clean cloth.
Step 2: Gently remove the bonsai tree from the hopper
Carefully lift the bonsai tree out of the hopper, taking care not to damage any roots or branches. Hold the plant gently by its base and avoid applying too much pressure.
Step 3: Brush off loose soil
Using the small brush, gently brush off any loose soil from the roots and branches of the bonsai tree. Be thorough but gentle to avoid damaging the delicate parts of the tree.
Step 4: Use tweezers to remove embedded soil
For any soil that is stuck or embedded in the roots or branches, use the tweezers to carefully remove it. Be patient and take your time to avoid damaging the bonsai tree.
Step 5: Wipe the hopper clean
After removing the bonsai tree, wipe the hopper clean using a clean cloth. Make sure to remove any debris or remaining soil to prevent any potential contamination in the future.
Step 6: Replant the bonsai tree
Once the hopper is clean, carefully replant the bonsai tree, making sure to position it properly and adjust the soil around the roots. Water the tree as needed and place it back in its original spot.
Step 7: Dispose of the collected soil
Dispose of the collected soil properly, following your local regulations. You can use it as compost or dispose of it in a designated area.
Step 8: Clean your tools
After finishing the process, clean your tools thoroughly to remove any remaining soil or debris. This will help maintain the cleanliness and functionality of your tools for future use.
By following these steps, you can effectively remove soil from bonsai hoppers and ensure the health and beauty of your bonsai trees. Regular cleaning of hoppers is crucial for maintaining the overall well-being of your bonsai collection.
Prepare the Necessary Tools
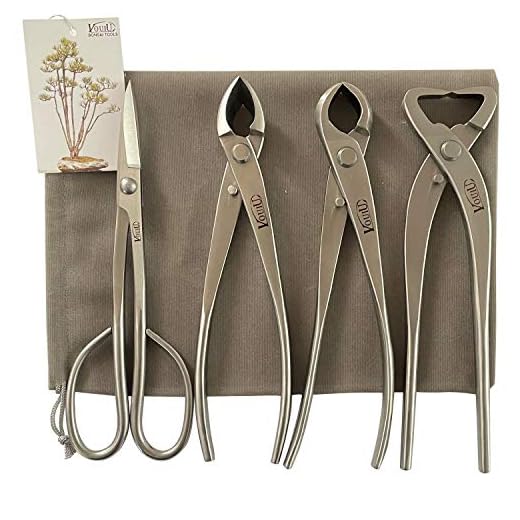
Before you start cleaning the dirt out of your bonsai hoppers, it is essential to gather the necessary tools. Having the right tools will make the cleaning process more efficient and effective. Here are some tools you will need:
Bonsai Brush
A bonsai brush is a specialized tool designed to clean bonsai hoppers without damaging the delicate roots. It typically has soft bristles and a small handle, making it easy to maneuver around the hoppers. Make sure to choose a brush that is appropriate for the size of your bonsai hopper.
Tweezers
Tweezers are useful for removing small particles of dirt or debris that may be nestled in between the hoppers. Opt for a pair of tweezers with a pointed tip, as it will allow for more precise handling.
Water Sprayer
A water sprayer with a fine mist setting will help moisten the soil and loosen any stubborn dirt that may be clinging to the hoppers. It is important to keep the soil moist throughout the cleaning process to avoid damaging the roots.
Pruning Scissors
In some cases, you may encounter roots that have become tangled or overly long. Having a pair of pruning scissors on hand will enable you to trim these roots back to a more manageable length. Ensure that your scissors are sharp and clean to avoid causing unnecessary stress or harm to the hoppers.
By gathering these essential tools before you begin cleaning your bonsai hopper, you will be better prepared to efficiently remove the dirt and maintain the health of your bonsai hoppers.
Gently Remove the Bonsai from the Hopper
Once you have successfully lifted the bonsai hopper and placed it on a stable surface, the next step is to remove the bonsai from the hopper. It is important to handle the bonsai with care and gentleness to avoid damaging its delicate roots and branches.
Follow these steps to gently remove the bonsai from the hopper:
- Carefully loosen the soil around the edges of the bonsai using a small handheld tool like a chopstick or a root hook. Be gentle and take your time to avoid ripping or tearing the roots.
- Once the soil is loosened, hold the bonsai firmly but gently at the base of the trunk with one hand, while using your other hand to lift the hopper away. Slowly and steadily lift the hopper, ensuring that no part of the bonsai is caught or tangled.
- If the bonsai is stuck to the hopper, gently tap the sides of the hopper to loosen any soil or roots that may be clinging to it. Avoid shaking the hopper forcefully as this can cause damage to the bonsai.
- Once the hopper is completely lifted, carefully place it aside and examine the bonsai for any signs of damage or entanglement.
- If you notice any tangled roots or branches, use your fingers or a pair of bonsai scissors to carefully untangle them. Be patient and take your time to avoid breaking or damaging the plant.
Remember, the key is to handle the bonsai with utmost care and to be patient throughout the process. Rushing or being rough can lead to irreversible damage to your precious bonsai. Once you have successfully removed the bonsai from the hopper, you can proceed with the necessary maintenance tasks such as pruning, repotting, or shaping as required.
Shake off Loose Dirt
When it comes to cleaning the dirt out of your bonsai hoppers, the first step is to shake off any loose dirt. This is an important initial step because removing loose dirt will make the cleaning process easier and more efficient.
To shake off the loose dirt, gently tap the bonsai hopper against a hard surface, such as a table or the ground. Be careful not to tap it too hard, as this could damage the hopper or the tree inside.
If the dirt is stubborn and doesn’t come off easily, you can use a soft brush or a toothbrush to gently brush away the loose dirt. Be sure to brush in the direction away from the tree, as you don’t want to accidentally damage any leaves or branches.
It’s important to note that shaking off loose dirt should be done regularly, especially if you notice a build-up of dirt on the hopper or if you see that the tree is struggling to receive enough water or nutrients. By removing the loose dirt, you’re ensuring that the bonsai hopper remains clean and your tree stays healthy.
Use a Soft Brush to Remove Excess Soil
When it comes to cleaning dirt out of bonsai hoppers, using a soft brush can be an effective method. This gentle approach ensures that you don’t damage the delicate roots or disturb the overall structure of the bonsai tree.
First, carefully lift the bonsai tree out of the hopper and place it on a clean surface. Gently tap the pot or container to loosen any loose soil, allowing it to fall away from the roots. Be careful not to shake the tree too vigorously, as this can cause damage.
Next, take a soft brush, such as a small paintbrush or a bonsai brush, and gently brush away any remaining dirt from the roots and surface of the soil. Use light strokes and be careful not to apply too much pressure. If there are stubborn clumps of dirt that won’t come off easily, you can use a pair of tweezers or a toothpick to gently loosen and remove them.
Remember to be patient and take your time during this process. Rushing or being too rough can harm the tree and lead to unnecessary stress. Take breaks if needed and continue until the excess soil has been removed. Once clean, carefully place the bonsai tree back into the hopper, making sure to position it securely.
Regularly cleaning and removing excess dirt from bonsai hoppers is essential for maintaining a healthy and thriving bonsai tree. By using a soft brush and taking a gentle approach, you can effectively remove dirt without harming the tree’s delicate roots or structure.
Tip: It is recommended to clean the brush thoroughly after use to prevent the spread of any potential pests or diseases.
Rinse the Bonsai with Lukewarm Water
Once you have removed the dirt from the bonsai hoppers, it is important to give your bonsai a thorough rinse with lukewarm water. This will help to remove any remaining dirt particles and allow the roots to breathe properly. Follow these steps to rinse your bonsai:
Step 1: Prepare the Water
Fill a clean bucket or basin with lukewarm water. Avoid using hot or cold water, as extreme temperatures can shock the bonsai tree.
Step 2: Submerge the Bonsai
Gently submerge the bonsai tree, making sure that the water covers the entire root system. Take care not to immerse the foliage or branches in the water, as this can cause damage.
Step 3: Swirl the Water
Gently swirl the water around the roots, using your hand or a soft brush. This will help to dislodge any remaining dirt particles and debris.
Step 4: Change the Water
After swirling the water for a few minutes, pour out the dirty water and refill the bucket or basin with fresh lukewarm water. Repeat the process of submerging and swirling the bonsai in the clean water.
Step 5: Repeat if Necessary
If the water is still dirty after the second rinse, repeat steps 3 and 4 until the water stays clear.
After rinsing the bonsai tree, gently pat it dry with a clean towel or allow it to air dry before placing it back in its original location. Remember to take extra care when handling the bonsai, as the branches and leaves can be delicate.
By rinsing the bonsai with lukewarm water, you are providing it with the necessary care to thrive and maintain its health and beauty.
Allow the Bonsai to Dry Completely
After carefully removing dirt from the bonsai’s hoppers, it is important to allow the bonsai to dry completely before reintroducing it back into its usual environment. This allows excess moisture to evaporate and prevents the growth of harmful fungi or bacteria that thrive in damp conditions.
Here are some steps to help you ensure the bonsai dries completely:
- Choose a well-ventilated area: Find a spot where there is sufficient airflow, but avoid direct sunlight as it can cause the bonsai to dry out too quickly.
- Place the bonsai on a clean surface: Use a clean and dry surface, such as a wire mesh or a wooden board, to rest the bonsai on.
- Avoid watering: Refrain from watering the bonsai during this drying period, as it may reintroduce moisture before it has dried completely.
- Monitor the drying progress: Check the bonsai regularly to assess its drying progress. Gently touch the soil to ensure it is dry to the touch. Depending on the size and species of the bonsai, this process may take several days to a couple of weeks.
By allowing the bonsai to dry completely, you are ensuring its health and longevity. Once the bonsai is dry, you can safely return it to its original environment and resume your regular care routine.