When it comes to painting techniques, there are various tools and methods that can be used to achieve different textures and finishes. One popular technique is known as stomp brushing, which involves using a special brush to create a unique pattern on the painted surface.
However, if you don’t have a stomp brush or simply want to try something different, you may be wondering if using a broom can produce a similar effect. While a broom may not give you the exact same results as a stomp brush, it can still be a viable alternative for creating texture and adding visual interest to your walls.
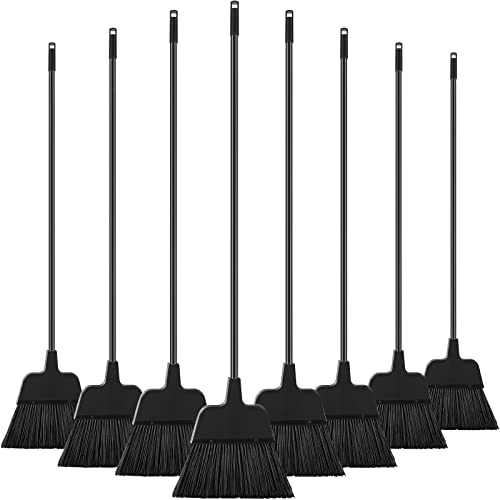
Using a broom for painting
Using a broom instead of a stomp brush can be a creative way to achieve a textured look in your painting project. To use a broom, you’ll need to dip the bristles in your paint and then lightly drag the broom across the surface of the wall, ceiling, or other painted area.
It’s important to note that the texture created by a broom will be different from the pattern achieved with a stomp brush. Instead of neat, uniform shapes, a broom will create a more random and organic texture.

Considerations and tips
While a broom can be a fun and unique tool to experiment with, there are a few things to keep in mind:
– Choose a broom with natural bristles, as synthetic bristles may not hold paint as well.
– Test the broom on a small area before committing to the entire project, as the texture may not be to your liking.
– Keep in mind that using a broom may require more paint, as the texture created can be more absorbent than a smooth surface.

Ultimately, whether you use a stomp brush or a broom, the choice is up to you and your personal preferences. Both tools offer unique effects and can be used to create interesting textures on your painted surfaces.
Using a Broom for Stomp Brush Techniques
Stomp brush techniques are commonly used in various painting projects to create textured patterns on surfaces. While traditionally a stomp brush is used, it is indeed possible to achieve similar results using a broom. Though not designed specifically for this purpose, a broom can serve as an effective alternative tool for stomp brush techniques.
First and foremost, it is important to select the right type of broom for the task. Brooms with stiff bristles are preferred, as they can mimic the texturing effects of a stomp brush more effectively. Additionally, ensure that the broom is clean and free from any loose debris that may interfere with the desired texture.
The technique for using a broom as a substitute for a stomp brush is similar to the traditional method. Begin by dipping the bristles of the broom into the paint or texture mixture. Ensure that the bristles are evenly coated, but not overloaded, to maintain control while applying the texture.
Next, hold the broom at an angle against the surface you wish to texture. Apply gentle pressure and “stomp” the bristles onto the surface, sweeping in one consistent direction. The width of the sweeping motion will determine the size and shape of the texture pattern.

Experimentation is key when using a broom for stomp brush techniques. Varying the angle of the broom, the pressure applied, or the speed of the sweeping motion can yield different texture patterns. It is advisable to practice on a small, inconspicuous area before applying the technique to a larger surface.
In conclusion, while a stomp brush is the ideal tool for achieving textured effects, a broom can be a suitable substitute. By selecting the right broom, mastering the technique, and allowing for experimentation, you can successfully use a broom for stomp brush techniques and add unique textures to your painting projects.
Broom as a Substitute
If you don’t have a stomp brush, a broom can be used as an alternative tool for creating texture on walls or ceilings. While it may not give the same precise results as a stomp brush, a broom can still provide a unique texture and pattern to your surfaces.
To use a broom as a substitute for a stomp brush, follow these steps:
- Prepare the surface: Make sure the surface you are working on is clean and dry. Remove any dirt, dust, or grease that may affect the adhesion of the texture.
- Choose the right broom: Select a broom with bristles that match the desired texture you want to achieve. Brooms with longer, thicker bristles will create a more pronounced texture, while shorter bristles will produce a lighter texture.
- Load the broom: Dip the bristles of the broom into a container of texture material, such as paint or joint compound. Make sure the bristles are evenly coated but not excessively loaded.
- Apply the texture: Hold the broom horizontally, parallel to the surface, and lightly press it against the wall or ceiling. Drag the broom across the surface with steady, even strokes. Experiment with different angles and pressures to achieve the desired texture.
- Dry and observe: Allow the texture to dry according to the manufacturer’s instructions. Once dry, examine the texture to see if any adjustments need to be made. If necessary, you can repeat the process to add more texture or make modifications.
Remember, using a broom as a substitute for a stomp brush may require some trial and error to achieve the desired results. It’s important to practice on a small, inconspicuous area before applying the texture to larger surfaces. Additionally, be aware that the texture created with a broom may be less refined and uniform compared to a stomp brush.

Always follow safety guidelines and use protective gear, such as goggles and gloves, when working with texture materials.
Pros and Cons of Using a Broom
Using a broom as a substitute for a stomp brush can be a practical solution in some cases. However, it is important to consider the pros and cons before deciding to use a broom for this purpose.
Pros:
- Cost-effective: Brooms are usually less expensive than specialized stomp brushes, making them a budget-friendly option.
- Accessible: Brooms are easily available in most households, making them a convenient tool to use when a stomp brush is not accessible.
- Multi-purpose: Brooms can serve multiple cleaning purposes, making them a versatile tool to have around the house.
- Easy to use: Brooms require minimal instruction or expertise, making them accessible to individuals of all skill levels.
Cons:
- Effectiveness: While a broom can create texture similar to a stomp brush, it may not be as effective in achieving the desired results. The bristles of a broom are typically larger and coarser, resulting in a different texture.
- Evenness: Achieving an even texture with a broom can be challenging, as it may leave uneven marks on the surface being worked on.
- Comfort: Brooms are not specifically designed for stomp brushing and may not provide the same level of comfort or control as a stomp brush.
- Durability: Bristles on a broom may wear down more quickly when used for stomp brushing, potentially leading to a shorter lifespan.
Ultimately, the decision to use a broom instead of a stomp brush comes down to personal preference, convenience, and the desired outcome. While a broom can be a practical substitute, it may not provide the same level of precision or quality as a dedicated stomp brush designed for creating textured finishes.
Alternative Tools for Stomp Brush Techniques
If you don’t have a stomp brush available, there are several alternative tools that you can use to achieve similar effects. While a stomp brush is specifically designed for certain techniques, these alternative tools can provide comparable results with some creativity and practice.
1. Broom
A broom can be a versatile substitute for a stomp brush. Use the bristles to create texture by lightly dabbing or sweeping them across the surface. Experiment with different angles and pressures to achieve the desired effect. Be mindful of the size and stiffness of the broom bristles, as they can affect the outcome.
2. Sponge
A sponge is another useful tool for achieving stomp brush effects. Cut a sponge into small pieces or use a natural sea sponge for more interesting textures. Dip the sponge in paint or glaze and lightly press or dab it onto the surface. Vary the pressure and motion to create different patterns and effects.
3. Toothbrush
A toothbrush can be a surprisingly effective tool for stomp brush techniques. Wet the bristles and load them with paint or glaze. Hold the toothbrush close to the surface and run your finger across the bristles, causing the paint to spatter onto the surface. This method can create a stippled effect similar to the stomp brush.
4. Stippling Brush
A stippling brush is commonly used for creating textured effects in painting and can be a good substitute for a stomp brush. Load the brush with paint or glaze and gently press or stipple it onto the surface. Vary the pressure to achieve different levels of texture and experiment with different brush sizes for various effects.
5. Rag or Cloth
A rag or cloth can also be used to achieve similar effects to a stomp brush. Twist or fold the cloth into a shape that allows you to dab or press it onto the surface. This method can create textures and patterns similar to those achieved with a stomp brush. Experiment with different materials and techniques to find the desired effect.
While these alternative tools can provide similar effects to a stomp brush, it’s important to note that they may not produce identical results. It’s advisable to practice with each tool and experiment with different techniques to find what works best for your specific project.