

A straw broom is a traditional and practical tool used for sweeping. It is made from natural materials, such as straw or corn husks, which can easily gather dust, dirt, and debris over time. Cleaning your straw broom regularly will not only prolong its lifespan but also ensure effective cleaning.
In this article, we will guide you through the process of cleaning a straw broom, step by step. We will provide you with simple yet effective methods that will help you keep your broom in top condition and ready for use.
Before starting the cleaning process, it is important to remove any loose dirt or debris from the broom. You can do this by gently tapping the broom against the ground or using a soft brush to brush off any dirt particles. This will help ensure that the cleaning process is more effective.
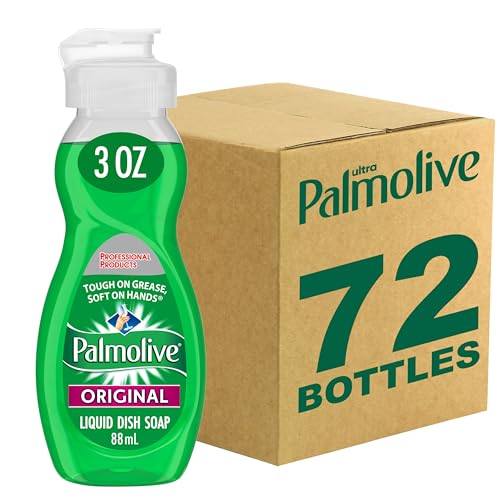
The next step is to prepare a cleaning solution. You can mix warm water and a mild detergent in a bucket or basin. Make sure to use a gentle detergent as harsh chemicals can damage the natural materials of the broom. Alternatively, you can use a mixture of vinegar and water, which is a natural and effective cleaning solution.
Cleaning your straw broom: the essentials
Cleaning a straw broom is essential to maintain its effectiveness and prolong its lifespan. Here are some simple steps to clean your straw broom:
Step 1: Remove loose debris
Start by removing any loose debris or dust from the broom by gently shaking it or tapping it against a hard surface. This will help to get rid of any loose dirt or particles that may have accumulated on the bristles.
Step 2: Soften the bristles
Fill a bucket or basin with warm water and add a few drops of mild detergent. Swirl the broom in the soapy water, making sure the bristles are completely immersed. Let it soak for a few minutes to soften the bristles and loosen any dirt or grime.
Step 3: Rinse with clean water
After soaking, remove the broom from the soapy water and rinse it thoroughly with clean water. Use your hands or a hose to rinse away any remaining soap residue or dirt.
Step 4: Air dry the broom
Shake off any excess water from the broom and hang it upside down in a well-ventilated area to dry. Avoid placing it in direct sunlight or near a heat source, as this can cause the straw to become brittle and break.
Note: It’s important to avoid getting the handle of the broom wet, as it can cause the wood to warp or become damaged. If the handle does get wet during cleaning, wipe it dry immediately.
By following these simple steps, you can keep your straw broom clean and in good condition, ensuring that it continues to sweep effectively for a long time.
Gather your supplies
Before you start cleaning your straw broom, make sure you have all the necessary supplies. Here’s what you’ll need:
- A sink or bucket
- Warm water
- Mild detergent or soap
- A scrub brush or old toothbrush
- A clean towel or cloth
Having these supplies ready will make the cleaning process much easier and more efficient.
Prepare your broom for cleaning
Before you begin cleaning your straw broom, it’s important to prepare it properly. Follow these steps to ensure that your broom is ready for a thorough cleaning:
1. Inspect the broom: Take a close look at your broom to assess its condition. Check for any loose or damaged straw bristles. If you notice any, consider replacing them or repairing the broom before cleaning.
2. Remove loose debris: Use your hands or a soft brush to gently remove any loose dirt, dust, or hair from the broom. Shake it over a garbage bin to dispose of the debris.
3. Rinse the broom: Fill a sink or large basin with warm water and add a small amount of mild detergent. Submerge the broom head in the soapy water and swirl it around gently. This will help to remove any remaining dirt or grime from the bristles.
4. Rinse thoroughly: Once you’ve soaked the broom, remove it from the soapy water and rinse it under running water. Make sure to rinse away all the soap residue, as it can attract more dirt when the broom is in use.
5. Squeeze out excess water: Gently squeeze the bristles of the broom to remove any excess water. Avoid wringing or twisting the broom, as this can damage the straw bristles.
6. Air dry the broom: Find a well-ventilated area, such as a balcony or patio, to hang the broom and allow it to air dry completely. Make sure to hang it upside down to help the water drain away from the bristles.
By following these steps, you’ll ensure that your straw broom is clean and ready for use. Taking care of your broom will help it last longer and maintain its effectiveness in sweeping your floors.
Remove loose dirt and debris
To begin cleaning your straw broom, it’s important to start by removing any loose dirt and debris that may have accumulated on the bristles. This will help ensure a more thorough and effective cleaning process.
First, take the broom outside and gently tap it against a hard surface, such as a sidewalk or wall. This will dislodge any loose dirt and dust that may be trapped in the bristles. Be careful not to hit the broom too hard or against delicate surfaces, as this may damage the broom or cause injury.
Using a brush or comb
Next, you can use a brush or comb to further remove any remaining dirt or debris. Gently run the brush or comb through the bristles, starting from the base and working your way towards the tip. This will help loosen and dislodge any stubborn dirt or debris that may be stuck within the broom’s bristles.
Make sure to comb or brush in the same direction as the bristles, as this will help maintain their shape and prevent them from breaking or bending. Take your time and be gentle to avoid damaging the broom or causing unnecessary wear and tear.
Once you have thoroughly combed or brushed the broom, take it outside again and give it another gentle tap against a hard surface to remove any loosened dirt or debris. This will help ensure that your broom is clean and ready for its next use.
Wash the broom with soapy water
To effectively clean a straw broom, start by filling a sink or bucket with warm water. Add a small amount of mild dish soap or a cleaning solution specifically designed for straw brooms.
Gently place the broom head into the water, ensuring that the bristles are fully submerged. Use your hands or a clean cloth to gently massage the soapy water into the bristles, removing any dirt, dust, or debris.
Be careful not to apply too much pressure or scrub aggressively, as this can cause the straw bristles to break or become misshapen.
After thoroughly washing the broom, rinse it with clean water to remove any remaining soap residue. Make sure to rinse both the broom head and the handle, as soap residue can make the bristles stiff and the handle slippery.
Once rinsed, gently shake off any excess water and pat the bristles with a clean towel to remove excess moisture.
Finally, allow the broom to air dry completely before using or storing it. This will help prevent mold or mildew from forming on the bristles.
Allow the broom to dry thoroughly
Once you have finished washing the straw broom, it is important to allow it to dry thoroughly before using it again. This will help prevent any mold or mildew from forming and ensure that the broom maintains its shape and effectiveness.
Here are some tips to help you dry your straw broom:
1. Hang the broom: Find a suitable place to hang the broom upside down, such as a hook or a nail on a wall. This will allow the bristles to air dry properly and prevent them from becoming misshapen.
2. Choose a well-ventilated area: Make sure the area where you hang the broom is well-ventilated to promote faster drying. Avoid damp or humid areas, as these conditions can prolong the drying time and potentially cause the broom to develop an unpleasant odor.
3. Pat the bristles dry: After washing, gently pat the bristles with a clean towel to remove excess moisture. This will help speed up the drying process and prevent any water from seeping deeper into the broom.
4. Allow sufficient time: Depending on the climate and humidity levels, it may take several hours or even a day for the broom to dry completely. Be patient and ensure that the broom is completely dry before storing or using it again.
| Tips: |
|---|
| • Avoid using a hairdryer or direct heat source on the broom, as this can damage the straw material. |
| • If the broom has a wooden handle, make sure to wipe it dry as well to prevent any moisture damage. |
| • Regularly check the broom for any signs of mold or mildew. If you notice any, repeat the cleaning and drying process or consider replacing the broom. |
By allowing your straw broom to dry thoroughly, you can extend its lifespan and ensure its cleanliness for future use.


