

If you are looking for a natural and sustainable alternative to traditional brooms, making your own branch broom can be a fun and rewarding project. Branch brooms, also known as besom brooms, have a long history and are still used today for cleaning and sweeping purposes.
Making a branch broom is a fairly simple process that requires a few basic materials and tools. The main component of the broom is the handle, which is traditionally made from a long, straight branch. Look for a branch that is about the length of your arm and has a comfortable grip.
Next, you will need to gather the bristles for your broom. Ideally, you want to use natural materials such as straw, hay, or long grass. These materials are not only environmentally friendly, but they also provide a great sweeping action. Gather a substantial amount of bristles and trim them down to a uniform length.
Once you have your handle and bristles, it’s time to assemble your branch broom. Start by firmly attaching the bristles to the handle. You can do this by tightly wrapping twine or string around the bristles and handle. Make sure to secure the bristles tightly, as they will loosen with use.
After attaching the bristles, trim any excess length to achieve your desired broom shape. You may want to trim the bristles at an angle to create a more effective sweeping action. Finally, give your branch broom a test run by sweeping an area to see if any adjustments need to be made.
By making your own branch broom, you not only create a functional tool for cleaning, but you also contribute to the reduction of waste and the preservation of natural resources. So, gather your materials and start sweeping the natural way!
Choosing the Right Branches
When it comes to making a branch broom, the first step is to choose the right branches. Here are some tips to help you select the best branches:
1. Size and Length: Look for branches that are long enough to serve as the handle of your broom. The ideal length is about 3-4 feet so that it is comfortable to hold and sweep with. Make sure the branches are strong and thick enough to withstand the pressure of sweeping.
2. Flexibility: It is important to choose branches that are flexible enough to create a sweeping motion. Look for branches that have a slight bend and can easily be maneuvered for sweeping different surfaces.
3. Clean and Dry: Choose branches that are clean and dry, as this will prevent the bristles from accumulating dirt and dust. If the branches have any leaves or twigs, gently remove them before starting the process.
4. Hardwood vs Softwood: Hardwood branches, such as oak or ash, are generally more durable and long-lasting compared to softwood branches like pine or cedar. However, the choice between hardwood and softwood will depend on personal preference and the availability of branches in your area.
5. Smooth and Knot-Free: Avoid branches with rough surfaces or knots, as they can cause splinters or damage the bristles of your broom. Look for branches that are smooth and free from any noticeable cracks or irregularities.
By following these tips, you can ensure that you choose the right branches for making your branch broom. Remember to always handle the branches with care and use appropriate tools when cutting or shaping them.
Step 1: Finding Suitable Branches
In order to make a branch broom, the first step is to find suitable branches. It’s important to choose branches that are long, straight, and sturdy. These branches will serve as the handle and bristles of the broom.
Choosing the Handle
When selecting branches for the handle, look for ones that are at least 4 feet long. This will provide enough length for a comfortable grip and sufficient leverage when sweeping. Also, consider the thickness of the branches – they should be thick enough to provide strength and durability.
TIP: It’s a good idea to choose branches that are smooth and free from any large knots or bumps. This will help prevent splinters and enhance the overall appearance of the broom.
Selecting Bristle Branches
The bristle branches are the ones that will do the actual sweeping. For this, choose branches that have many smaller twigs or leaves branching out. These smaller branches will create the bristle-like effect and help collect dirt and debris effectively.
Pro tip: It’s recommended to select branches with flexible smaller twigs or leaves. They should be able to bend slightly without breaking easily. This will ensure that the bristles are resilient and durable.
Once you have found the suitable branches for your branch broom, you can move on to the next step of the process.
Step 2: Evaluating Branch Quality
Before starting to assemble your branch broom, it is important to carefully assess the quality of the branches you will be using. This will help ensure that your finished broom is effective and long-lasting.
Here are a few factors to consider when evaluating branch quality:
| Factor | Considerations |
|---|---|
| Strength | Choose branches that are strong and sturdy, as they will be the main support for your broom. |
| Flexibility | Look for branches that are flexible enough to allow for easy sweeping motions. |
| Length | Select branches that are long enough to provide a comfortable grip and reach. |
| Smoothness | Avoid branches with rough or jagged surfaces, as they may cause discomfort or damage while sweeping. |
| Uniformity | Try to find branches that are similar in size and shape to ensure a balanced and symmetrical broom. |
Take your time to carefully examine each branch and choose the ones that meet these criteria. Remember, the quality of your branches will greatly influence the overall effectiveness and durability of your branch broom.
Gathering Materials
Before you can start making your own branch broom, you will need to gather the necessary materials. Here is a list of items you will need:
| 1. Branches | Collect a sufficient number of straight and sturdy branches. These branches will form the bristles of the broom. |
| 2. Strong Twine or Wire | You will need twine or wire to bind the branches together and create a secure base for the broom. |
| 3. Wood for Handle | Find a suitable length of wood that will serve as the handle for your broom. Make sure it is comfortable to hold and use. |
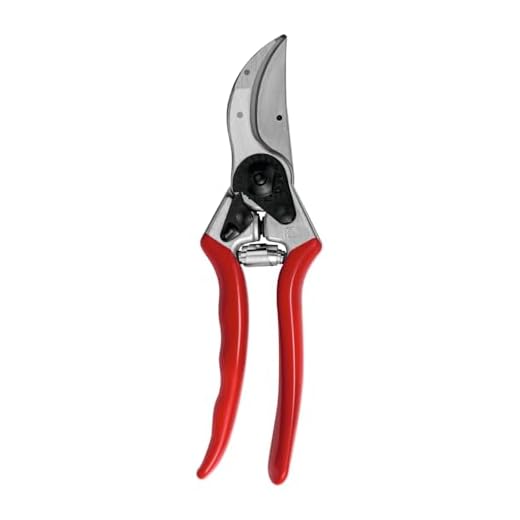
| 4. Sharp Knife or Pruning Shears | A sharp knife or pruning shears will be necessary to cut and trim the branches to the desired length. |
Once you have gathered all the materials, you will be ready to start assembling your branch broom.
Step 3: Obtaining Additional Materials
After gathering the branches for your broom, you will need to obtain a few additional materials to complete the project:
- String or twine: This will be used to tie the branches together and secure them in place.
- Scissors or a sharp knife: You will need these tools to trim the branches to the desired length and remove any excess foliage.
- Optional decorations: If you want to add a personal touch to your branch broom, you can gather additional materials like ribbons, feathers, or dried flowers.
Make sure to gather these materials before proceeding to the next step. Having everything prepared will make the process smoother and more efficient.
Step 4: Preparing the Branches
Before attaching the branches to the handle, you need to prepare them to ensure they are clean and free from any loose bark or debris that might interfere with the sweeping process.
Gather the Branches
Start by collecting a sufficient number of branches. Choose branches that are sturdy and have a good length to serve as the bristles of your broom.
Clean the Branches
Using a brush or a cloth, gently remove any loose bark, dirt, or debris from the branches. It is essential to have clean branches to ensure efficient sweeping.
Additionally, you can soak the branches in warm soapy water for a few minutes to help loosen any remaining dirt or substances. Rinse them thoroughly and allow them to dry completely before proceeding.
Once the branches are cleaned and dried, you are ready to attach them to the broom handle.
Assembling the Broom
Once you have gathered all the necessary materials, it’s time to start assembling your branch broom! Follow these steps to create your own functional and beautiful broom:
Step 1: Prepare the Branches
Start by trimming the branches to ensure they are of a similar length. Use a pruning shear to cut off any excess twigs and leaves. This will make it easier to bind the branches together.
Step 2: Arrange the Branches
Take a handful of branches and arrange them in a circular shape, with the cut ends facing down. Make sure the branches overlap slightly to create a sturdy base for your broom.
Step 3: Bind the Branches
Using the twine or string, tightly bind the branches together at the base of the broom. Wrap the string around the branches several times, making sure it is secure. Tie a knot to keep everything in place.
Step 4: Secure with Wire
To ensure the broom handle is firmly attached to the branches, use a piece of wire to wrap around the base of the branches and the handle. Twist the wire tightly to create a strong connection.
Step 5: Trim the Bristles
Use a pair of scissors or pruning shears to trim the broom bristles to your desired length. Cut the ends of the branches at an angle to create a tapered effect, which will improve the sweeping action of the broom.
Step 6: Personalize Your Broom
Now that your broom is assembled, you can add some personal touches to make it truly unique. Paint the handle in your favorite color, tie decorative ribbons around the base, or add any other embellishments you desire.
That’s it! Your homemade branch broom is now ready for use. Whether you use it for sweeping the porch or as a decorative piece, it’s sure to add a touch of rustic charm to your home.


