
Scotch broom, also known as Cytisus scoparius, is a plant that belongs to the Fabaceae family. While it is considered an invasive species in many parts of the world, it can actually be put to good use. One of the ways you can make use of this plant is by turning it into a broom. Not only is this an eco-friendly option, but it can also be a fun and creative project to undertake.
To make a broom from scotch broom, you will need a few basic materials. Firstly, you will need a sturdy broom handle. This can be made from any type of wood, but make sure it is strong enough to withstand regular use. Additionally, you will need a bundle of scotch broom branches. These branches should be long enough to form the bristles of the broom.
Once you have gathered your materials, the first step is to trim the scotch broom branches. Use a sharp pair of shears to cut off any excess leaves or twigs. You want the branches to be relatively straight and uniform in length. Remove any branches that are too thick or too thin, as this can affect the overall quality of the broom.
Next, take your broom handle and attach the scotch broom branches. Start by tying a strong knot at one end of the broom handle. This will serve as the anchor for the branches. Begin attaching the branches by wrapping them tightly around the broom handle, working your way from the top to the bottom. Make sure to overlap the branches so that the broom has a full and bushy appearance.
Finally, secure the branches in place by tying a knot at the bottom of the broom handle. This will prevent them from coming loose during use. You can also use a strong adhesive or twine to reinforce the branches if necessary.
Now you have your own homemade broom made from scotch broom! Not only is it a practical tool for cleaning, but it also adds a touch of nature to your everyday chores. So, next time you come across scotch broom in your garden or local area, consider turning it into a broom and enjoy the satisfaction of creating something useful with your own hands.
Gathering the materials
Before you can make a broom from scotch broom, you will need to gather all the necessary materials. Here is a list of what you will need:
- Scotch broom branches
- A sturdy wooden handle
- Twine or string
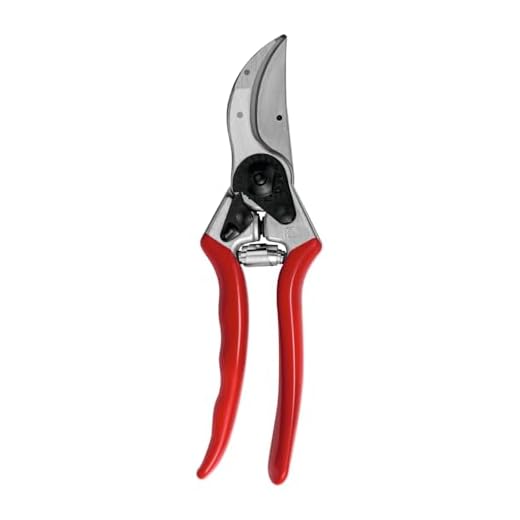
- A knife or pruning shears
- A broomcorn or natural fiber bundle
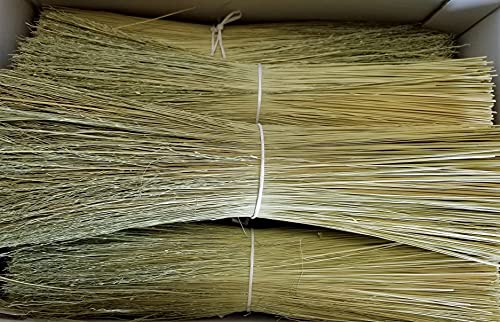
Scotch broom branches will serve as the bristles for your broom. These branches can be found in abundance in areas where scotch broom grows. Look for branches that are straight and sturdy, as these will make the most effective bristles.
The wooden handle should be long enough to provide a comfortable grip, but not so long that it becomes difficult to maneuver. Look for a sturdy piece of wood that can withstand the pressure of sweeping without breaking.
Twine or string will be used to attach the scotch broom branches to the wooden handle. Make sure to choose a strong and durable material that will securely hold the bristles in place.
A knife or pruning shears will be necessary to cut and shape the scotch broom branches. Make sure to use a sharp tool that can cleanly cut through the branches without causing any damage.
A broomcorn or natural fiber bundle will be used to tie and secure the scotch broom branches to the handle. This will provide additional support and ensure that the broom bristles stay in place during use.
Preparing the scotch broom
Before making a broom from scotch broom, it is important to properly prepare the plant material. Follow these steps to prepare the scotch broom for broom making:
- Find a suitable scotch broom plant: Look for a scotch broom plant with long, straight branches. Avoid selecting branches that are too thin or too thick. Ideally, choose branches that are about 1/2 inch in diameter.
- Cut the branches: Use a sharp pair of pruning shears or a knife to cut the branches of the scotch broom plant. Make clean cuts at a 45-degree angle to ensure that the branches have a clean edge.
- Remove the leaves: Strip off the leaves from the branches. You can do this by hand or by using a knife to scrape the leaves off the branches.
- Trim the branches: Trim any small side branches or twigs from the main branch, leaving only the long, straight section of the scotch broom.
- Dry the scotch broom: Once the branches have been prepared, lay them out in a dry and well-ventilated space. Allow the branches to dry for several days until they become stiff and less pliable.
By properly preparing the scotch broom, you will ensure that the broom you make is sturdy and durable.
Constructing the broom handle
To make the broom handle, you will need a sturdy piece of wood. Ideally, a hardwood like oak or ash works best for durability and strength. Measure the desired length for your broom handle, keeping in mind that it should be long enough to provide comfortable handling.
Once you have selected your wood, use a saw or a similar tool to cut the wood down to your desired length. Make sure to sand the cut ends to remove any rough edges. If desired, you can also shape the handle to create a more ergonomic grip.
If you want to add some extra reinforcement to your broom handle, consider using a metal or wooden dowel. Drill a hole into the base of the broom handle and insert the dowel, securing it with wood glue or screws.
Finally, you can choose to stain or paint the broom handle to add a personal touch or match your broom’s overall aesthetic. Allow time for the stain or paint to dry before attaching the broom head.
Once your broom handle is complete, you can move on to attaching the broom head and finishing your homemade broom.
Assembling the broom
Once you have gathered all the necessary materials, you can start assembling your broom using the following steps:
- Begin by cutting off the desired length of scotch broom stems for the broom handle. Make sure to choose a length that is comfortable for you to hold.
- Clean the stems by removing any leaves or debris. You can use a small brush or your hands to do this.
- Take the cleaned stems and tie them together at one end using a strong twine or rope. Make sure to secure the stems tightly so that they don’t come undone.
- Gradually add more stems to the bundle, tying them securely as you go. Make sure to overlap the stems slightly to create a denser broom head.
- Continue adding stems and tying them until you are satisfied with the size and thickness of the broom head.
- Once you have finished tying the stems, trim any excess twine or rope and make sure all the stems are tightly secured.
- Finally, if desired, you can decorate your broom handle by wrapping it with colorful ribbons or adding decorative ornaments.
And that’s it! Your homemade broom is now ready to use. Make sure to test it out and make any adjustments if necessary. Happy sweeping!