


Are you ready for some magic? If you’ve ever been fascinated by witches and their mysterious charms, then crafting a real witches broom is the perfect DIY project for you. Whether you want to enhance your Halloween decor or add a touch of enchantment to your everyday life, making your own broom is a fun and creative way to bring a little bit of magic into your world.
But wait, aren’t witches brooms just a thing of fantasy? While it’s true that brooms have been associated with witchcraft for centuries, the brooms used by witches in folklore and mythology are often quite different from the brooms we use for cleaning. These brooms, known as besoms, are traditionally made from natural materials like birch twigs, willow branches, and straw, and are believed to have powerful magical properties.
So, how can you make your own besom? First, you’ll need to gather your materials. Look for a sturdy wooden handle, such as a branch or dowel, that is long enough to serve as the broom’s handle. Next, collect a bundle of natural bristles, like birch twigs or straw, that will form the sweeping part of your broom.
The Magic of Creating Authentic Witches’ Brooms
Creating an authentic witches’ broom is a magical and ancient craft that has been passed down through generations. These brooms have been used by witches for centuries to glide through the night sky, harness the energy of nature, and cast spells. In this guide, we will explore the art of making a real witches’ broom and unleash our inner sorcery.
Materials Needed:
- A sturdy wooden branch or handle
- Long, strong fibers like straw, twigs, or straw rope
- Strong twine or wire
- A knife or sharp cutting tool
Step-by-Step Guide:
- Find a sturdy wooden branch or handle that speaks to you. It should be around 1 to 1.5 meters long.
- Using a knife or sharp cutting tool, remove any rough edges or knots from the handle. Smooth it down until it feels comfortable to hold.
- Gather your long, strong fibers such as straw, twigs, or straw rope. These will be the bristles of your broom.
- Attach the fibers to one end of the handle using strong twine or wire. Wrap it tightly around the handle to secure the fibers in place.
- Continue attaching the fibers all the way around the handle, layering them tightly together. This will create a thick and sturdy broom head.
- Once you have reached the end of the handle, secure the fibers in place with another round of twine or wire. Make sure everything is tightly fastened.
- Trim any excess fibers to create a neat and uniform appearance.
- Allow your witches’ broom to dry and settle for a few days before using it. This will ensure that the fibers are tightly secured and the broom is ready for magical flight.
Your authentic witches’ broom is now ready to be used for all your mystical endeavors. Remember to treat it with respect and care, as it is a sacred and powerful tool. With this broom, you will be able to harness the ancient magic of witches and embark on enchanting journeys of your own.
| Materials Needed | Step-by-Step Guide |
|---|---|
|
|
Gathering the Right Materials
Before you can start creating your own real witches broom, you will need to gather the necessary materials. While some items may be easily found around your home, others may require a bit of searching. Here are the materials you will need to collect:
1. Branches or Twigs
Start by finding a bundle of small, sturdy branches or twigs. These will serve as the bristles or brush part of the broom. Look for branches that are about 1 to 1.5 feet in length.
2. Binding Material
You will also need a strong, flexible material to bind the branches or twigs together. Natural fibers such as straw, hemp, or vines work well for this purpose.
Note: Make sure to gather enough binding material to securely fasten the branches together.
3. Wooden Handle
Next, you’ll need a sturdy wooden handle for your broom. Look for a straight and smooth piece of wood that is about 2 to 3 feet long. Ideally, the handle should be slightly thicker at one end to make it easier to hold.
Note: If you cannot find a suitable piece of wood, you can also purchase a wooden dowel from a craft or hardware store.
4. Scissors or Garden Shears
To trim and shape the branches, you’ll need a pair of scissors or garden shears. Make sure they are sharp and suitable for cutting through small branches.
5. Optional Decorative Items
If you want to add a personal touch to your witches broom, you can gather some decorative items. This could include ribbons, feathers, dried flowers, or any other items that you find appealing.
Now that you know what materials you need, it’s time to move on to the next step: preparing the branches and handle for assembly.
Preparing the Broomstick
Before you can start making your witches broom, you’ll need to prepare the broomstick. Follow these steps to ensure a sturdy and reliable broom:
1. Choose a sturdy stick: Look for a stick that is about 3 feet long and has a diameter of at least 1 inch. It should be strong enough to support your weight when you fly!
2. Clean the stick: Remove any bark or debris from the stick to give it a smooth surface. You can use a knife or sandpaper to achieve this.
3. Shape the handle: If your stick has any bumps or irregularities, use a knife to smooth them out and shape the handle to your liking. Make sure to leave enough of a grip at the top.
4. Seal the stick: To protect the wood from weather damage, apply a coat of outdoor sealant or varnish to the entire surface of the stick. This will help extend the lifespan of your broomstick.
5. Let it dry: Allow the sealant to dry completely before moving on to the next step. This may take a few hours or overnight, depending on the product you’re using.
Once your broomstick is prepared, you’re ready to move on to the next step: making the broom bristles!
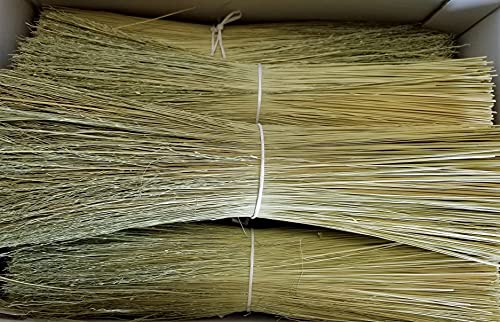
Selecting the Best Broom Corn
When it comes to making a real witches broom, selecting the right broom corn is crucial. Broom corn is a type of sorghum that is specifically grown for making broom bristles. Here are some factors to consider when choosing the best broom corn for your broom:
Length: Longer broom corn stalks produce longer bristles, which can be beneficial if you want a broom with extended reach. However, shorter bristles can offer more control and precision.
Color: Broom corn comes in various colors, including natural shades like brown, tan, and black. The color can affect the aesthetic appeal of your broom, so choose a color that complements your style or the intended purpose of the broom.
Stiffness: The stiffness of the broom corn bristles can determine the broom’s sweeping efficiency. If you’re looking for a broom that can handle heavy debris or outdoor surfaces, opt for broom corn with thicker and stiffer bristles.
Durability: Consider the durability of the broom corn as well. Some varieties are more resistant to wear and tear, making them suitable for frequent use.
Growth conditions: Broom corn is typically grown in warm climates with long summer days. Ensure that you choose a variety that is suitable for your specific growing conditions to promote healthy and abundant broom corn harvests.
By carefully considering these factors, you can select the best broom corn for your real witches broom that will meet your functional and aesthetic preferences.
Handcrafting the Broom
Once you have gathered all the necessary materials, it’s time to start handcrafting your broom. Follow these steps to create your very own witches broom:
Step 1: Preparing the Handle
- Take the chosen wooden stick and remove any bark or rough edges using sandpaper.
- Ensure that the stick is straight and smooth to provide a comfortable grip.
Step 2: Attaching the Bristles
- Separate the chosen twigs or bristles into small bundles.
- Use strong twine or natural plant fibers to bind the bundles tightly to the top end of the handle.
- Wrap the twine or fibers several times around the bristle bundles to secure them in place.
Step 3: Securing the Bristles
- Once all the bristle bundles are attached, use additional twine or fibers to wrap tightly around the base of the bristles.
- This will help to secure the bristles and prevent them from unraveling.
Step 4: Finishing Touches
- Trim the bristles to your desired length, making sure they are even all the way around.
- If desired, you can decorate the broom with ribbons, charms, or other magical symbols to add a personal touch.
Remember to handle your witches broom with care and respect. Use it responsibly and enjoy the magic it brings to your life!
Blessing and Empowering Your Broom
Once you have constructed your real witches broom, it’s important to bless and empower it. This ritual will infuse your broom with spiritual energy, making it a powerful tool for your magical practice.
Cleansing the Broom
Before proceeding with the blessing, it’s important to cleanse your broom from any negative or stagnant energies it may have picked up during the construction process. One way to do this is by holding the broom over a flame and allowing the smoke to purify it. You can also sprinkle it with water or pass it through incense smoke.
Blessing the Broom
Once the broom is cleansed, it’s time to bless it. Find a quiet and sacred space where you can perform this ritual undisturbed. Start by lighting a white candle, representing purity and divine energy. Hold the broom in your hands and close your eyes. Visualize a bright light surrounding the broom, infusing it with positive energy.
Say a blessing or prayer that resonates with your personal beliefs. You can ask for the broom to be a tool of cleansing, protection, and guidance in your magical practice. You may also want to invite the elements or deities that are meaningful to you to bless the broom.
Empowering the Broom
After blessing your broom, it’s time to empower it with your own energy. Stand up straight and hold the broom in front of you. Close your eyes and take several deep breaths, focusing your intention on infusing the broom with your personal power.
Visualize a golden light emanating from your heart and flowing down your arms into the broom. Imagine this light filling the broom with your intentions and goals. You can also recite affirmations or incantations to further empower the broom.
Once you feel that the broom is fully infused with your energy, thank the elements or deities for their assistance in the process. Extinguish the candle and place it in a safe location.
Using Your Empowered Broom
Now that your broom is blessed and empowered, it’s ready to be used in your magical practice. You can use it for sweeping away negative energies, purifying spaces, casting circles, or even as a focal point for meditation.
Remember to treat your broom with respect and care, as it is a sacred tool. Store it in a safe and sacred space when not in use, and periodically cleanse and recharge it to maintain its power.
By taking the time to bless and empower your broom, you are establishing a spiritual connection with this magical tool. It will become an extension of yourself and enhance your magical workings.


