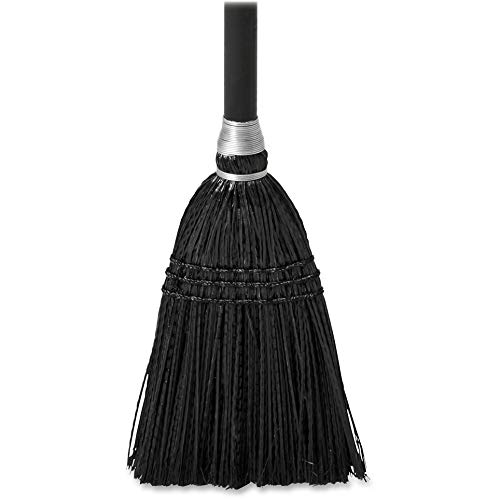
Are you looking for a fun and spooky Halloween decoration? Look no further! In this article, we will show you how to make a scary witch broom that will be the perfect addition to your Halloween decor.
Creating a witch broom is a simple and inexpensive craft project that will bring a creepy touch to your home or outdoor space. Whether you are hosting a Halloween party or just want to spook your trick-or-treaters, this DIY broom will definitely do the trick!
To make your own scary witch broom, you will need a few basic materials. First, gather a bundle of twigs or small branches. These can be found in your backyard or at a local park. Next, you will need some jute twine or thin rope to tie the twigs together. Lastly, grab a pair of scissors and a hot glue gun to secure the twine in place.
Once you have all your materials ready, it’s time to start making the broom. Begin by bundling the twigs together tightly, making sure they are all facing the same direction. Use the jute twine to tie the twigs together at the base, leaving a long piece of twine hanging down.
Next, take the long piece of twine and wrap it tightly around the twigs, working your way up towards the top. Use the hot glue gun to secure the twine in place every few inches. Make sure to wrap the twine tightly and evenly to create a sturdy broom.
Once you reach the top of the broom, tie a knot with the twine to secure it in place. You can also add a dab of hot glue to ensure it stays put. Trim any excess twine with scissors.
And just like that, your scary witch broom is complete! Hang it on your front door, place it in a decorative cauldron, or prop it up against a wall for an eerie effect. This DIY project is fun to do with kids and can be customized with additional decorations like ribbon or small plastic spiders.
So why wait? Get into the Halloween spirit and make a scary witch broom today. Your guests and trick-or-treaters will be spellbound by your creativity and spooky decor!
The Materials You’ll Need
Making a scary witch broom is a fun and creative DIY project that can add a spooky touch to your Halloween decorations. To make your own witch broom, you’ll need the following materials:
1. Stick or dowel: Find a sturdy stick or dowel that is about 3-4 feet long. This will be the handle of your broom.
2. Bristles: Gather a bundle of natural materials to create the bristles of your broom. You can use straw, twigs, or dried grass.
3. Twine or rope: You’ll need some twine or rope to secure the bristles to the stick and create the broom shape.
4. Scissors: You’ll need a pair of scissors to cut and trim the bristles and twine.
5. Decorative elements: Optional but fun additions include ribbons, fabric scraps, or fake spiders to give your broom a spooky touch.
Once you have gathered all the materials, you’re ready to start creating your scary witch broom. Follow the step-by-step instructions to bring your broom to life!
Gather All the Supplies for Your Witch Broom
Before you can start crafting your scary witch broom, you’ll need to gather all the necessary supplies. Here’s a list of items you’ll need:
1. A large wooden stick: Look for a sturdy and long wooden stick that will serve as the handle of your broom. It should be around 3-4 feet in length.
2. Natural materials for the bristles: Collect a bunch of long, dry straw or thin branches from your garden or local park. Make sure they are strong enough to withstand the weight of the broomstick.
3. Twine or thin rope: You’ll need twine or thin rope to secure the bristles to the broomstick. Choose a strong and durable material that won’t easily break.
4. Scissors: You’ll need a pair of scissors to trim the bristles to the desired length and to cut the twine or rope.
5. Optional decoration items: If you want to add some extra spooky flair to your witch broom, you can gather some additional materials like fake spider webs, tiny plastic spiders, or black ribbon to tie around the handle.
Make sure to gather all the supplies before you start making your witch broom. This will ensure a smooth crafting process and help you create the perfect spooky broom for Halloween.
Prepare the Broomstick
Before you can create your scary witch broom, you’ll need to gather the necessary materials and prepare the broomstick. Here’s what you’ll need:
- A long stick or branch
- Scissors or a craft knife
- Twine or rope
- Optional: paint or stain
To begin, find a suitable stick or branch that is long enough to serve as the handle of your broom. It should be sturdy and free from any splinters or rough edges. If needed, sand down the stick to ensure a smooth surface.
Next, decide on the desired length of your broomstick and use scissors or a craft knife to trim it to size. Be sure to measure and mark the desired length before cutting to ensure accuracy.
If you want to add some extra flair to your broomstick, you can paint it or apply a wood stain. This will give it a more rustic and aged look. Allow the paint or stain to dry completely before moving on to the next step.
Finally, take the twine or rope and securely wrap it around the trimmed end of the broomstick. Start by knotting the twine tightly and then continue wrapping it around, making sure to leave a small loop at the end for hanging. The twine should be wrapped tightly and evenly along the entire length of the broomstick.
Once the twine is securely in place, trim off any excess length and ensure that the knots are tight. Your broomstick is now prepared and ready to be attached to the bristles.
Choose a Sturdy Handle for Your Witch Broom
When making a scary witch broom, one of the most important aspects to consider is the handle. A sturdy handle not only provides stability but also ensures that your broom can withstand vigorous use. Here are some tips for choosing a handle that will make your witch broom spooky and durable:
- Material: Look for handles made from strong and durable materials such as wood or metal. These materials are not only sturdy but also add an authentic and rustic touch to your broom.
- Length: Consider the length of the handle based on your personal preference and the intended use of the broom. A longer handle can create a more dramatic effect, while a shorter handle can make the broom easier to handle.
- Texture: Opt for a handle with a rough or textured surface to enhance the spooky aesthetic of your witch broom. The texture can be achieved through carving, sanding, or adding decorative elements such as twine or fabric.
- Shape: Experiment with different handle shapes to find one that suits the overall look of your witch broom. Traditional broom handles feature a straight and cylindrical shape, but you can also explore curved or twisted designs for a more unique and eerie appearance.
- Attachment: Ensure that the handle is securely attached to the broom’s bristles. Use strong adhesive or fasteners to prevent the handle from coming loose during use.
By carefully choosing a sturdy handle for your witch broom, you can create a spooky and durable prop that will add an extra element of fright to your Halloween decorations.
Attach the Bristles
Now that you have your sturdy stick ready, it’s time to attach the bristles to create the broom’s brush-like end. For this, you will need a bundle of twigs or straw.
Start by cutting the twigs or straw to the desired length. If you are using twigs, make sure they are all of a similar size. If you prefer a more rustic look, you can leave the twigs uneven.
Next, create a small bundle of twigs or straw by gathering them together in your hand. Make sure the cut ends are aligned.
To attach the bundle to the stick, you can use a sturdy twine or thin rope. Start by tying a secure knot around the top of the bundle, making sure the twine or rope is tightly wrapped around the bristles.
Once the knot is secure, begin wrapping the twine or rope tightly around the bundle, moving downward towards the bottom. Make sure to keep the bristles evenly distributed as you wrap.
When you reach the bottom of the bristles, tie another knot to secure the twine or rope in place. Trim any excess bristles or twine if necessary.
Your witch broom is now ready to be used or displayed! The attached bristles give it that authentic and spooky witchy look. Hang it on a wall, use it as a prop, or take it along with your witch costume for a truly bewitching Halloween!
Secure the Bristles to the Broomstick
To create a spooky witch broom, it’s important to securely attach the bristles to the broomstick. Here’s how you can do it:
1. Gather your bristles. You can use natural materials like twigs or straw to create the bristles or purchase synthetic bristles from a craft store.
2. Place the broomstick on a flat surface. Make sure it is stable and won’t roll or move while you’re attaching the bristles.
3. Apply a generous amount of glue to one end of the broomstick. You can use a strong adhesive like hot glue or wood glue to ensure a secure bond.
4. Take a bunch of bristles and position them on the glued end of the broomstick. Arrange them in a circular or fan-shaped pattern, depending on your desired look.
5. Press the bristles firmly onto the glue, making sure they are evenly distributed and tightly secured to the broomstick.
6. Hold the bristles in place for a few seconds to allow the glue to dry and set.
7. Repeat the process on the other end of the broomstick, attaching another bunch of bristles in the same manner.
8. Once both ends of the broomstick are secure, reinforce the attachment by wrapping a strong twine or wire around the base of the bristles and the broomstick. This will provide extra stability and prevent the bristles from loosening over time.
9. Trim any excess bristles that may be sticking out unevenly to create a neat and uniform appearance.
10. Allow the glue to fully dry before using the witch broom for decoration or costume purposes.
By following these steps, you’ll have a securely attached bristle to the broomstick, resulting in a realistic and spooky witch broom that will surely impress!
Add a Scary Touch
To make your witch broom truly terrifying, you’ll need to add a few finishing touches. Here are some ideas to make it extra spooky:
1. Creepy Cobwebs
Using some white string or yarn, create a spider web effect by wrapping it around the handle of the broom. You can also attach small plastic spiders or insects to add an extra element of fright.
2. Ghoulish Ribbons
Tie strips of black or orange ribbon around the bristles of the broom to give it a more eerie appearance. You can also add some additional ribbons in different colors to create a festive and spooky look.
Remember to tie the ribbons tightly so they don’t come loose while you’re flying through the night!
With these extra touches, your scary witch broom will be ready to spook all who encounter it. Now, get ready to take flight on Halloween night and spread some haunting magic!


