


If you’re looking to add a touch of magic to your Halloween decorations, a witch’s broom wreath is the perfect DIY project. This whimsical and eye-catching decoration is easy to make, and it will certainly impress your guests. Whether you’re hosting a haunted house party or just want to spruce up your front door, this tutorial will guide you through the process of creating your very own witch’s broom wreath.
Making a witch’s broom wreath may seem complicated at first glance, but with a bit of creativity and some basic materials, you’ll have a stunning decoration in no time.
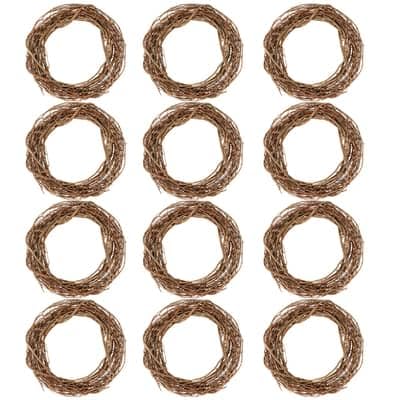
To begin, gather the necessary supplies. You’ll need a wooden dowel, preferably about 18 inches long, and some natural and synthetic straw or twine. You’ll also need a hot glue gun, wire cutters, and a wreath form. You can find wreath forms at your local craft store or make your own using a wire coat hanger.

Remember to be careful when handling hot glue and sharp tools, and always work in a well-ventilated area.
Step-by-step guide to making a witches broom for a wreath
If you’re looking to add a spooky touch to your Halloween wreath, a witches broom is the perfect addition. Follow this step-by-step guide to make your own witches broom for a wreath:
Materials you will need:
- 1 small stick or twig
- Raffia or straw
- Scissors
- Hot glue gun
- Black ribbon or twine
Instructions:
- Start by gathering your materials.
- Take the small stick or twig and trim it to your desired length for the broom handle.
- Using your hot glue gun, attach one end of the raffia or straw to the top of the stick. Begin to wrap it tightly around the stick, leaving a small portion at the top uncovered for the broom bristles.
- Continue wrapping and gluing the raffia or straw until you reach the bottom of the stick. Trim any excess material.
- Once the broom handle is covered, take a small section of raffia or straw and separate it from the rest. These will be the broom bristles.
- Using your hot glue gun, attach the separated section of raffia or straw to the top of the broom handle, creating the bristles.
- Allow the glue to dry completely.
- Add an extra touch by tying a black ribbon or twine around the base of the bristles to give your broom a finished look.
- Your witches broom is now ready to be added to your Halloween wreath! Simply attach it using twine or wire.
With this easy step-by-step guide, you can create your own witches broom for a wreath and bring a spooky element to your Halloween decorations. Get creative with different materials and colors to make a broom that suits your style!
Materials needed for making a witches broom
When making a witches broom for a wreath, there are a few key materials that you will need to gather. These materials can easily be found at your local craft or hobby store, or even online. Here is a list of the essential materials:
- 1. Large bundle of natural or synthetic brown bristles
- 2. Thin, sturdy stick or pole for the broom handle
- 3. Floral wire or strong twine
- 4. Scissors or garden shears
- 5. Hot glue gun or strong adhesive
- 6. Decorative ribbon or string
- 7. Optional: dried flowers or herbs for embellishment
Make sure to choose a bundle of bristles that is large enough to create a full and fluffy broom. You can opt for either natural bristles, such as straw or hay, or synthetic ones that closely resemble the natural texture. The broom handle should be thin and sturdy enough to support the weight of the bristles, and can be made from materials like bamboo or wooden dowels.
Use floral wire or strong twine to tightly secure the bristles to the broom handle. This will ensure that the broom remains intact and doesn’t unravel. Scissors or garden shears will be needed to trim the bristles to your desired length and shape.
For added durability, use a hot glue gun or strong adhesive to reinforce the attachment between the broom handle and bristles. This will prevent the broom from becoming loose or wobbly over time.
To add a decorative touch, consider wrapping the broom handle with a colourful ribbon or string. This will not only make the broom visually appealing, but will also provide extra support and stability.
If desired, you can further embellish the broom by attaching dried flowers or herbs. This can be done by either tying them around the handle or gluing them directly onto the bristles.
By gathering these materials, you will have everything you need to create a witches broom that is perfect for your Halloween wreath. Have fun and get creative!
Preparing the base for the witches broom
The base is an essential component when making a witches broom for a wreath. It serves as the foundation for the broom and gives it stability and structure. To create the base, you will need a few materials:
- A wooden dowel: Choose a dowel that is about 6-8 inches in length and around 1 inch in diameter. This will serve as the handle of the broom.
- Straw or twigs: Gather a good amount of straw or small twigs. This will form the bristles of the broom.
- Floral wire: Use floral wire to secure the bristles to the dowel. It should be strong enough to hold the bristles tightly in place.
- A hot glue gun: This will be necessary to add extra security to the broom by attaching the bristles to the handle.
Once you have gathered all the materials, you can start assembling the base. Begin by attaching the straw or twigs to the dowel using the floral wire. Make sure to wrap the wire tightly around the bristles and the handle to ensure it stays in place.
After securing the bristles with wire, use the hot glue gun to add an extra layer of adhesion. Apply a generous amount of glue to the area where the bristles meet the handle, and hold them together for a few seconds to allow the glue to dry.
Once the base is complete, you can move on to adding additional decorative elements to your witches broom for a wreath, such as ribbon, feathers, or Halloween-themed accents. Get creative and have fun with your design!
Creating the broom bristles
To create the bristles for your witches broom, you will need the following materials:
| Materials | Quantity |
|---|---|
| Broomcorn | 1 bundle |
| Craft wire | 1 roll |
| Scissors | 1 pair |
Start by unravelling the broomcorn bundle and separating the individual strands. These strands will serve as the bristles of your broom.
Once you have separated the strands, trim them to your desired length. You can make them all the same length or create a cascading effect by trimming them at varying lengths.
Next, gather a handful of trimmed broomcorn strands and hold them tightly together at one end. Use craft wire to secure the strands together, making sure to wrap it tightly around the base.
Continue this process until you have created enough broom bristles to cover the entirety of the broom handle. The number of bristles you need will depend on the size of your wreath and the desired fullness of the broom.
Finally, attach the broom bristles to the broom handle. You can do this by wrapping craft wire tightly around the base of the bristles and securing it to the handle. Make sure to cover the wire with additional broomcorn strands to give your broom a finished look.
Once your broom bristles are securely attached, you can fluff and arrange them to your liking. Trim any excess strands for a neat and tidy appearance.
Now that you have created the bristles for your witches broom, you are ready to move on to the next step: attaching the broom handle to the wreath.
Attaching the bristles to the base
Once you have gathered all the materials needed, it’s time to attach the bristles to the base of the witch’s broom wreath. This step requires precision and attention to detail to ensure that the bristles are securely attached and the broom looks realistic.
Step 1: Arrange the bristles
Start by arranging the bristles in a circular shape, resembling the shape of a broom. Make sure the bristles are evenly distributed and cover the entirety of the base. This will provide a full and visually appealing broom.
It’s important to note that you can use either natural bristles or synthetic ones, depending on your preference. Natural bristles provide a more authentic look, while synthetic bristles are often more readily available and easier to work with.
Step 2: Secure the bristles
Once you are satisfied with the arrangement of the bristles, use a strong adhesive or hot glue gun to secure them to the base. Apply the adhesive or hot glue along the base of each bristle, pressing firmly to ensure a tight bond. Take your time during this step to avoid any accidental bumps or misplacement.
It’s a good idea to work in small sections, adding adhesive or hot glue to a few bristles at a time. This will prevent the glue from drying out before you have a chance to attach the bristles. Repeat this process until all the bristles are securely attached.
Keep in mind that the base of the broom can be made of various materials, such as a wreath form, a wooden dowel, or even a bundle of twigs tied together. Choose a base that is sturdy and can support the weight of the bristles.
Note: For added durability, you may consider using floral wire to secure the bristles to the base. This will provide extra reinforcement and prevent the bristles from coming loose over time.
Step 3: Finishing touches
Once the bristles are securely attached, take a step back and assess the overall appearance of the broom. Make any necessary adjustments to ensure that the bristles are evenly distributed and cover any gaps in the base.
If desired, you can also trim the bristles to achieve your desired length or shape. Use a sharp pair of scissors to carefully cut the bristles, keeping in mind the overall proportions of the broom. This will give it a tidy and polished look.
With the bristles securely attached, your witch’s broom wreath is now ready to be displayed. Hang it on your front door, above the fireplace, or incorporate it into your Halloween decor to add a touch of whimsy and charm to your space.
Adding finishing touches to the witch’s broom
Once you have created the base of the witch’s broom, it’s time to add some finishing touches to give it an extra spooky and realistic look. Here are some ideas to make your broom stand out:
1. Wrap the handle
Start by wrapping the handle of the broom with some natural jute twine or raffia. Begin at the top and work your way down in a tight spiral, securing it with a small dot of hot glue every few inches. This will add texture and give the broom a more authentic appearance.

2. Add a bow
To add a festive touch to your witch’s broom, consider attaching a bow made of black and orange ribbon near the top of the handle. You can secure it with a small dab of hot glue or tie it in a knot to make it easily removable.
| Item | Description |
|---|---|
| Jute twine | Natural twine for wrapping the handle |
| Raffia | Alternative option for wrapping the handle |
| Ribbon | Black and orange ribbon for making a bow |
| Hot glue gun | To secure the wrapping and attach the bow |
These simple additions can make a big difference in the overall appearance of your witches broom. Feel free to get creative and add any other embellishments or decorations that you think will make your broom unique and spooky.


