

Do you remember the iconic broom used by Kiki in the Studio Ghibli film “Kiki’s Delivery Service”? If you’re a fan of the movie, you can make your own version of Kiki’s broom right at home!
Making Kiki’s broom is a fun and creative project that will allow you to have your very own piece of the enchanting world of Kiki. Whether you want to use it as a prop for a cosplay, or simply as a decorative item, this step-by-step guide will show you how to make a broom that resembles the one Kiki used.
Before we get started, gather the following materials:
- A long stick or dowel
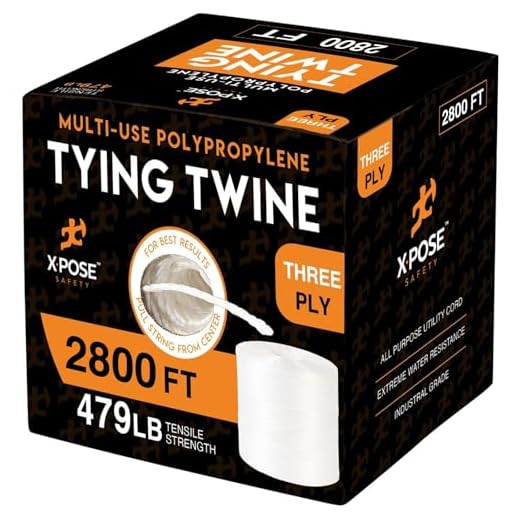
- Twine or thin rope
- Straw or dried grass
- Scissors
- Hot glue gun
- Brown paint (optional)
Once you have all the materials ready, let’s begin creating your own Kiki’s broom!
Creating Kiki’s Broom: A Step-by-Step Guide
In this guide, we will show you how to create Kiki’s broom, the iconic magical broomstick from the beloved animated movie “Kiki’s Delivery Service.” Follow these steps to make your very own broom that is perfect for cosplay or decoration!
Materials Needed:
- Thick wooden stick or dowel
- Bundle of straw or hay
- Craft wire or twine
- Scissors
- Glue
- Paint (optional)
Step 1: Prepare the Wooden Stick
Start by choosing a thick wooden stick or dowel that will serve as the broom’s handle. Make sure it is long enough to your desired length. You can leave it natural or paint it with brown or black paint for a more finished look.
Step 2: Attach the Straw
Take the bundle of straw or hay and cut it into smaller, manageable pieces. Take a handful of straw and tightly wrap it around one end of the wooden stick, securing it with craft wire or twine. Continue adding more straw and securing it until you reach your desired thickness for the broom’s bristles.
Step 3: Secure the Straw
Once you have wrapped enough straw around the wooden stick, use glue to secure the end of the straw to prevent it from unraveling. Make sure to let the glue dry completely before moving on to the next step.
Step 4: Decorate (Optional)
If you want to add some extra flair to your broom, you can paint the handle with decorative designs or add ribbons or other embellishments to the handle or bristles. Get creative and make it your own!
And there you have it! By following these simple steps, you can create your very own Kiki’s broom. Whether you’re a fan of the movie or just looking to add a touch of magic to your life, this broom is sure to bring a smile to your face!
Gathering the Materials
Before you can begin making Kiki’s broom, you will need to gather the following materials:
- A long and sturdy stick
- Thin and flexible branches
- Cord or twine
- Raffia or straw
- Scissors
- Wire or zip ties
The stick should be about as tall as you are, and the branches should be about half that length. Look for branches that are straight and without any cracks or weak spots.
The cord or twine will be used to bind the branches together, so make sure you have enough to wrap around each branch multiple times.
Raffia or straw will be used to create the bristles of the broom. You will need enough to wrap around the end of the stick and create a full and fluffy broom head.
Lastly, make sure you have a pair of scissors to trim the branches and raffia to the desired length and to cut any excess cord or twine.
Preparing the Broomstick
Before you can make Kiki’s broom, it’s important to prepare the broomstick. Here are the steps you need to follow:
1. Choose a Sturdy and Lightweight Stick
Look for a stick that is sturdy enough to withstand the weight of the broom and the person riding it, but also lightweight enough to be easily maneuvered. It should be about shoulder height or slightly taller for the best riding experience.
2. Remove any Rough or Splintered Areas
Using sandpaper or a file, carefully smooth out any rough or splintered areas on the broomstick to ensure a comfortable grip. You don’t want any sharp edges or rough surfaces that could cause discomfort or injury while riding.
Once you have prepared the broomstick, you are ready to move on to the next steps of making Kiki’s broom. Remember to take your time and be cautious while handling the broomstick to avoid any accidents.
Constructing the Bristles
Once you have completed the wooden handle of the broom, it is time to focus on creating the bristles. The bristles are an important component of Kiki’s broom as they help in sweeping and cleaning. Here is a step-by-step guide on how to construct the bristles:
Gather the Materials
Before starting, gather the necessary materials for the bristles. You will need:
- Straw or broomcorn
- Scissors
- String or twine
Prepare the Bristles
Start by cutting the straw or broomcorn into equal-length pieces, depending on how long you want the bristles to be. Make sure the pieces are all relatively the same length to ensure a uniform appearance.
Secure the Bristles
Once you have cut enough pieces of straw or broomcorn, gather them together and tie one end with a string or twine. This will keep the bristles in place while attaching them to the broom handle.
It is recommended to tie multiple layers of bristles for a sturdier and more effective broom, especially if you are planning to use it for heavy-duty cleaning.
After securing the bristles, attach them to the wooden handle by tightly wrapping the string or twine around the handle, ensuring that the bristles are tightly secured and won’t easily come loose during use.
Finally, trim any excess string or twine, and your bristles are ready for use!
Remember to regularly clean and maintain your broom’s bristles for optimal cleaning performance.
Making Kiki’s broom is a fun and rewarding process. By following this guide, you can construct the bristles and complete your very own Kiki-inspired broom.
Assembling the Broom
Once you have gathered all the necessary materials and finished decorating the bristles, it’s time to assemble the broom. Follow these step-by-step instructions to create Kiki’s broom:
1. Attach the bristles
Take the broomstick and insert it into the center hole of the bristle bundle. Make sure the bristles are evenly distributed around the broomstick.
2. Secure the bristles
Use a strong string or twine to tightly bind the bristles to the broomstick. Start at the top near the bristle bundle and work your way down, wrapping the string around the bristles and broomstick several times.
Ensure that the bristles are held securely in place by tying a knot at the bottom of the broomstick.
3. Add decorative elements
If desired, you can now add decorative elements to personalize your Kiki’s broom. Attach ribbons, feathers, or other materials to the top of the broomstick using glue or additional string.
Be creative and have fun with this step to make your broom truly unique!
Once you have finished assembling and decorating your Kiki’s broom, it will be ready for use. Whether it’s for cosplay or a themed event, this broom will surely make you feel like a witch soaring through the skies.
Finishing Touches and Decoration
Once you have assembled the basic structure of Kiki’s broom, it’s time to add those finishing touches and decorations that will make it truly magical. Here are some ideas to get you started:
1. Paint and Stain
A great way to add color and personality to your broom is by painting or staining the handle. Choose colors that represent Kiki’s style and personality, such as a deep shade of blue or a vibrant red. You can also add patterns or designs using stencils or freehand techniques.
2. Ribbons and Bells
Attach colorful ribbons along the length of the broom handle to give it a whimsical touch. You can tie them in bows or let them hang loosely. If you want to add a playful sound to your broom, consider attaching small bells to the ribbons. This will make your broom jingle as you fly through the air!
Remember: while decorations can be fun, make sure they are securely attached so they don’t fall off during use.
3. Charms and Trinkets
Add a touch of enchantment by hanging small charms or trinkets from the handle or bristles of the broom. Use elements that represent Kiki’s character, such as a black cat charm or a tiny broomstick pendant. You can also include symbols of good luck or protection, such as a four-leaf clover or a small crystal.
Note: be mindful of the weight of the charms and trinkets, as they might affect the balance and functionality of the broom.
By adding these finishing touches and decorations, you will transform your broom into a true replica of Kiki’s magical transportation. Let your imagination run wild and create a broom that is unique and special, just like Kiki herself!


