


Are you tired of your broom cluttering up your home? Do you find yourself tripping over it or struggling to find a suitable storage space? It’s time to take control and learn how to mount your broom.
Mounting your broom not only provides a convenient storage solution but also adds a touch of elegance to your living space. Whether you live in a small apartment or a spacious house, there are various options available to suit your needs and style.
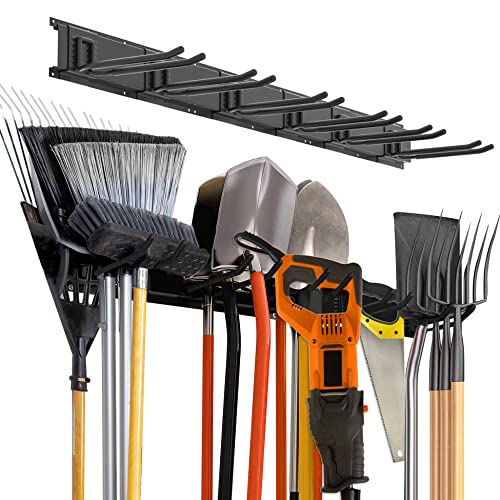
To mount your broom, you can opt for wall-mounted broom holders or broom hangers. These innovative devices securely hold your broom in place, keeping it off the ground and preventing it from falling or getting damaged. They are easy to install and usually come with instructions and mounting hardware.
When choosing a broom mount, consider the weight and size of your broom. Some holders are designed to accommodate multiple brooms and cleaning tools, making them a versatile choice for busy households. Additionally, look for mounts with adjustable hooks or grips, as they can accommodate brooms with different handle diameters.
Now that you know the benefits of mounting your broom and the different options available, it’s time to choose the best solution for your home. Say goodbye to broom clutter and hello to a tidy and organized living space!
Choosing the Right Broom for Mounting
When it comes to mounting your broom, choosing the right broom is essential for a successful and comfortable experience. Here are some factors to consider when selecting a broom:
1. Broom Type
|
There are different types of brooms available in the market, each designed for specific purposes. Some common types include:
|
|

2. Bristle Material
The bristle material of a broom can greatly impact its performance. Here are some common options:
- Natural Bristles: Brooms with natural bristles are best suited for indoor use as they are gentle on delicate surfaces.
- Synthetic Bristles: Brooms with synthetic bristles are more durable and suitable for heavy-duty sweeping tasks.
- Rubber Bristles: Brooms with rubber bristles are ideal for capturing pet hair and fine particles.
3. Handle Length
The length of the broom handle is an important consideration for comfortable mounting. Ideally, the handle should be long enough to allow you to comfortably reach the ground without stooping.
By considering these factors and selecting the right broom for mounting, you can ensure a seamless and hassle-free experience. Happy flying!
Types of Brooms to Consider
When it comes to mounting your broom, it’s important to choose the right type of broom for the task at hand. There are several different types of brooms available, each with their own unique features and benefits.
1. Traditional brooms: These brooms have been around for centuries and are still widely used today. They typically have a long handle and a bundle of bristles made from natural materials like straw or corn. Traditional brooms are great for sweeping outdoor areas or large indoor spaces.
2. Push brooms: Push brooms are larger and more heavy-duty than traditional brooms. They are designed to be pushed rather than swept, making them ideal for cleaning up large messes or debris on hard surfaces like concrete or asphalt. Push brooms usually have stiff bristles and a wide head.
3. Angle brooms: Angle brooms have a unique shape that allows them to reach into corners and tight spaces. They are typically used for sweeping up smaller messes or for cleaning along baseboards and edges. Angle brooms often have long, angled bristles that make it easier to reach into hard-to-reach areas.
4. Electric brooms: For those who prefer a more advanced cleaning option, electric brooms are a great choice. These brooms are powered by electricity and feature rotating bristles that quickly and efficiently pick up dirt and debris. Electric brooms are particularly useful for quick touch-ups or cleaning smaller spaces.
5. Carpet brooms: If you have carpeted floors, a carpet broom is essential. These brooms have soft bristles that are gentle on carpets but still effective at lifting dirt and dust. Carpet brooms are designed to be used with a sweeping motion to effectively clean carpet fibers.
When selecting the right broom for your needs, consider the type of surface you will be sweeping, the size of the area, and your own personal preference. With the right broom in hand, mounting your broom will be a breeze!
Tools and Materials Required for Mounting
In order to successfully mount your broom, you will need a few basic tools and materials. These include:
- Screwdriver: A Phillips screwdriver will be necessary for attaching the broom bracket to your wall.
- Mounting Bracket: This is the support bracket that you will attach to the wall, allowing you to hang your broom securely.
- Wall Anchors: Depending on the type of wall you have, you may need wall anchors to provide extra support for the mounting bracket.
- Screws: You will need screws to secure the mounting bracket and wall anchors to the wall.
- Level: A level will ensure that your broom is mounted straight and level on the wall.
- Pencil: Use a pencil to mark the locations for the mounting bracket and wall anchors.
Once you have gathered these tools and materials, you will be ready to proceed with mounting your broom securely and efficiently.
Step-by-Step Guide to Mounting Your Broom
Mounting a broom may sound like a magical task, but with the right technique and a little practice, anyone can do it. Follow these step-by-step instructions to learn how to mount and ride your broom like a pro.
Step 1: Choose the Right Broom
Not all brooms are created equal, so it’s important to select the right broom for mounting. Look for a broom with a sturdy handle and bristles that are in good condition. Avoid brooms that are too heavy or have loose bristles.
Step 2: Find a Comfortable Grip
Before mounting your broom, it’s important to find a comfortable grip. Hold the broom handle firmly with both hands, making sure your palms are facing downwards. Keep your fingers relaxed and slightly spread apart.
Step 3: Plant Your Feet
To properly mount your broom, you need a stable base. Stand with your feet shoulder-width apart and slightly bend your knees. This will help you maintain balance and control once you’re on the broom.
Step 4: Position the Broom
With a secure grip on the broom, position it between your legs. The bristles should be pointed towards the ground, and the handle should be touching the inside of your thighs. Make sure the broom is centered and balanced.
Step 5: Take a Deep Breath
Before taking off, take a deep breath and relax your body. This will help you focus and maintain control while riding your broom.
Step 6: Lift Off
With your grip and stance secure, it’s time to lift off. Push down with your feet to gain momentum and use your core muscles to raise your body off the ground. The broom will naturally lift with you as you push off.
Step 7: Find Your Balance
Once you’re airborne, it’s important to find your balance. Keep your feet slightly apart and your knees slightly bent. Use your core muscles to stabilize your body and adjust accordingly to maintain stability.
Step 8: Soar Through the Skies
Now that you’re confidently mounted on your broom, it’s time to enjoy the ride. Lean forward slightly to gain speed and lift your broom higher if you want to ascend. Experiment with different body positions and movements to control your flight.
Remember, mounting a broom takes practice. Start by attempting short flights and gradually increase your distance and speed as you become more comfortable. With time and patience, you’ll be soaring through the skies like a true broomstick expert.
Preparation
Before mounting your broom, it’s important to have all the necessary tools and materials ready. Here are some steps you can take to ensure a smooth mounting process:
Gather the materials
- A sturdy broomstick
- A broom handle mount or clamp
- Screws or bolts
- A power drill or screwdriver
- A measuring tape
Choose a suitable location
Find a suitable location where you can mount your broom. It should be a space that is easily accessible and where the broom will not get in the way. Consider the height and position of the mount to ensure it is comfortable and convenient for you.
Measure the broomstick
Using a measuring tape, measure the length of the broomstick. This will help you determine the appropriate size for the mount or clamp.
Prepare the mounting area
Clear the designated area of any obstacles or debris. This will ensure a clean surface for mounting and prevent any accidents or damage.
Attach the mount or clamp
Using screws or bolts, attach the mount or clamp to the wall or desired surface. Make sure it is secure and tightly fastened.
Slide the broomstick into the mount
Slide the broomstick into the mount or clamp, ensuring a snug fit. Test the broomstick to ensure it is securely mounted and can hold your weight.
Double-check the stability
Give the broomstick a gentle shake to ensure it is stable and securely mounted. If there is any movement or instability, tighten the screws or bolts further.
Once you have completed these preparation steps, your broom should be securely mounted and ready for use. Always remember to take necessary safety precautions while mounting and using your broom.
Positioning and Anchoring
Properly positioning and anchoring your broom is essential to ensure stability and safety. Here are some tips to help you mount your broom securely:
1. Find a Suitable Location:
Choose a location where your broom can be easily accessed and is out of the way of foot traffic. Look for a wall or corner where your broom can be stored vertically.
2. Install Hooks or Racks:
Install hooks or racks on the wall or in a closet to hang your broom. Make sure they are sturdy enough to hold the weight of the broom. If using nails or screws, ensure they are properly anchored in the wall to prevent them from coming loose.
3. Use Broom Clips or Holders:
Broom clips or holders can be attached to the wall to keep the broom secure. These devices have gripping arms that hold the broom handle firmly in place.
4. Consider Magnetic Mounts:
Magnetic mounts can be a convenient option for mounting your broom. These mounts use strong magnets to hold the broom in place, keeping it secure and easily accessible.
5. Utilize Tension Grips:
Tension grips are adjustable holders that can be attached to the wall or inside a closet. These grips securely hold the broom in place by exerting pressure on the handle.
By following these positioning and anchoring techniques, you can ensure that your broom is securely mounted and ready for use whenever you need it.


