
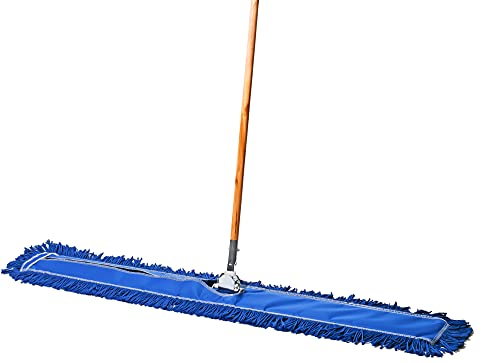


When you buy a new broom, you may notice that it is covered in chaff, which is the loose husks or fragments of grain or grass. This chaff can be a nuisance and make your broom less effective. Fortunately, there are several methods you can use to remove chaff from your new broom and keep it clean and ready for use.
1. Shake it out: The simplest and quickest way to remove chaff from your new broom is to give it a good shake. Take the broom outside and firmly shake it up and down to dislodge the chaff. You may want to wear gloves or use a broom handle to avoid getting your hands dirty. Repeat this process a few times until most of the chaff has been removed.
2. Brush it off: If shaking the broom doesn’t remove all the chaff, you can try brushing it off. Use a stiff brush, such as a scrub brush or an old toothbrush, to gently scrub the bristles, starting from the top and working your way down. Be careful not to apply too much pressure, as you don’t want to damage the bristles. Continue brushing until all visible chaff has been removed.
3. Use tape: Another effective method for removing chaff from a new broom is to use tape. Wrap a piece of sticky tape, such as masking tape or duct tape, around your hand with the sticky side facing outwards. Press the tape against the broom bristles and move your hand up and down to pick up the chaff. Repeat this process until the tape is full of chaff and no more chaff appears on the broom.
Remember, it’s important to remove chaff from your new broom as it can interfere with the broom’s ability to sweep effectively. Regular maintenance will help ensure your broom lasts longer and performs at its best.
Why removing chaff from a new broom is important for cleaning
When you purchase a new broom, it often comes with chaff or loose bristles that can make cleaning less effective. Removing this chaff from your broom is essential to ensure optimal cleaning performance.
Chaff can clog the bristles of the broom, preventing them from effectively sweeping up dirt, dust, and debris from your floors. This can result in a less thorough clean and require more effort on your part to get your floors looking their best.
Not only does chaff affect your broom’s cleaning ability, but it can also scratch or damage delicate surfaces. Loose bristles might scrape against sensitive flooring materials, leaving behind marks or even causing permanent damage. By removing chaff from your new broom, you can prevent any unintended damage to your floors or objects.
Regularly removing chaff from your broom is also important for maintaining its longevity. When chaff accumulates on the bristles, it can cause them to become bent, frayed, or even break. This can lead to a shorter lifespan for your broom, requiring more frequent replacements and resulting in unnecessary expenses.
To remove chaff from your new broom, follow these simple steps:
| 1. | Hold the broom over a trash can or large garbage bag. |
| 2. | Using your hands or a brush, gently run your fingers or the brush along the bristles, removing any loose chaff. |
| 3. | Tap the broom on the ground or against a hard surface to dislodge any stubborn chaff. |
| 4. | Inspect the broom to make sure all the chaff has been removed. If necessary, repeat the process. |
By taking the time to remove chaff from your new broom before use, you can ensure that it performs at its best, prolong its lifespan, and prevent any damage to your floors or objects. Remember to regularly clean your broom to maintain its effectiveness and keep your living spaces clean and tidy.
The benefits of removing chaff from a new broom
Removing chaff from a new broom can provide several benefits. Chaff refers to the small pieces of straw or other debris that may be stuck to a new broom when first purchased. While it may be tempting to ignore these small pieces, taking the time to remove the chaff can greatly improve the performance and longevity of the broom.
Here are some key benefits of removing chaff from a new broom:
| Enhanced sweeping effectiveness | By removing the chaff, the broom’s bristles can freely move and make better contact with the floor or surface being swept. This allows for more efficient and effective sweeping, ensuring that dirt and debris are properly collected and removed. |
| Improved durability | Chaff can accumulate over time and cause the broom’s bristles to become tangled or bent. This can result in decreased durability and a shorter lifespan for the broom. By removing the chaff, you can help maintain the broom’s original shape and maximize its longevity. |
| Reduced risk of scratching surfaces | If the chaff contains sharp or abrasive objects, such as small stones or metal debris, it can scratch or damage delicate surfaces. Regularly removing the chaff from the broom ensures that these potential hazards are eliminated, reducing the risk of causing scratches or other marks. |
| Improved cleanliness | Chaff can collect dust, dirt, and other particles, which can make the broom less effective at cleaning. By removing the chaff, you can ensure that the broom remains clean and ready to efficiently sweep away any mess or debris. |
| Optimal performance | By taking the time to remove the chaff from a new broom, you are ensuring that it performs at its best. A clean broom with properly aligned bristles will have better sweeping capabilities, making your cleaning tasks easier and more efficient. |
In conclusion, removing chaff from a new broom has several benefits that contribute to its overall performance, durability, and effectiveness. By regularly maintaining and cleaning your broom, you can prolong its lifespan and ensure that it continues to serve its purpose effectively.
Steps to remove chaff from a new broom
When you bring home a new broom, you may notice that it has some loose chaff or bristles that can be annoying during cleaning. Removing this chaff from your new broom is a simple process that you can easily do at home. Here are the steps to follow:
Step 1: Prepare the broom
Before you start, make sure your broom is clean. Remove any dust or dirt particles that may be present on the bristles. You can gently tap the broom against a hard surface to get rid of loose dust.
Step 2: Examine the chaff
Take a close look at your broom’s bristles and identify the areas where chaff is the most visible. Chaff is the small pieces of fibers or bristles that may be loosely attached to the main bristle structure.
Step 3: Use a comb or brush
Get a comb or brush with bristles that are firm but not too rough. Gently run the comb or brush through the broom’s bristles, focusing on the areas with chaff. This will help loosen the chaff and make it easier to remove.
Step 4: Shake the broom
After combing or brushing the bristles, take the broom outside or to an open area. Hold the handle firmly and shake the broom vigorously to dislodge any loose chaff. Be sure to shake the broom in different directions to remove as much chaff as possible.
Step 5: Repeat if necessary
If you still notice some chaff on the broom after shaking it, repeat steps 3 and 4 until you are satisfied with the cleanliness of the broom. This will help ensure that your broom is in top shape for effective cleaning.
By following these simple steps, you can easily remove chaff from your new broom and ensure optimal cleaning performance. Remember to regularly check your broom for any loose chaff and remove it promptly to maintain its effectiveness.


