

Tulips are one of the most popular flowers in the world, known for their vibrant colors and beautiful shapes. If you’re a fan of tulips but don’t have a garden, you may be wondering if you can plant tulip bulbs in planters. The good news is that you absolutely can!
Planting tulip bulbs in planters is a great way to enjoy these stunning flowers even if you don’t have a large outdoor space. Planters provide a controlled environment for the bulbs, allowing you to create a mini garden on your balcony, patio, or even indoors.
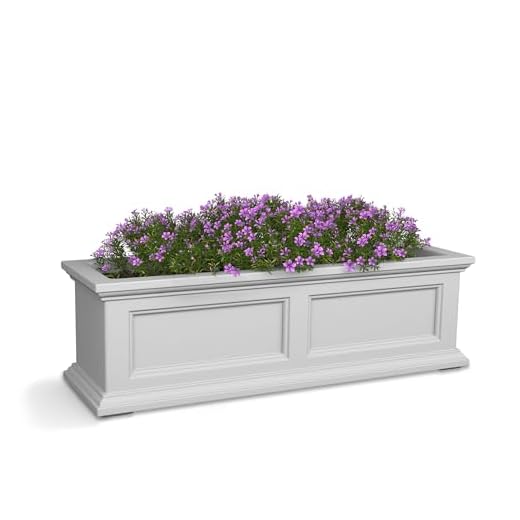
When choosing planters for tulip bulbs, make sure they are deep enough to accommodate the bulbs and allow for proper root growth. Select a well-draining potting mix to ensure that the bulbs don’t sit in water and rot. Remember that tulips need a period of cold dormancy, so it’s important to choose a planter that can be stored in a cold place during the winter months.
Planting Tulip Bulbs: A Guide for Planters
If you don’t have a garden or a large yard, you can still enjoy the beauty of tulips by planting them in planters. Planting tulip bulbs in planters not only adds life and color to your outdoor space but also allows you to easily move them around and control their growing conditions. Here’s a step-by-step guide to help you plant tulip bulbs in planters.
1. Choose the right planter
When it comes to choosing the right planter for your tulip bulbs, size and drainage are crucial factors to consider. Select a planter that is at least 12 inches deep, as tulip bulbs need sufficient space for their roots to grow. Additionally, make sure the planter has drainage holes at the bottom to prevent waterlogging, which can lead to bulb rot.
2. Prepare the soil mix
Prepare a well-draining soil mix for your tulip bulbs. A good mix consists of equal parts loamy soil, peat moss, and coarse sand. This combination ensures that the bulbs are planted in a nutrient-rich medium while allowing excess water to drain away, preventing root rot.
3. Plant the bulbs
Gently place the tulip bulbs in the planter, pointed end up. Make sure to space them evenly, leaving at least an inch between each bulb to allow for proper growth. Cover the bulbs with the prepared soil mix, ensuring that they are completely buried and there are no air pockets left.
4. Water and fertilize
After planting, give the bulbs a thorough watering to settle them in. Water the planter whenever the top inch of soil feels dry, but avoid overwatering. Additionally, fertilize the bulbs once a month with a balanced, water-soluble fertilizer to provide them with essential nutrients.
5. Provide proper care
Place the planter in a location that receives full sun exposure for at least six hours a day. Keep the soil moist but not soaking wet, as too much moisture can cause bulb rot. Protect the planter from extreme cold or heat by moving it to a suitable spot indoors or providing insulation during harsh weather conditions.
With proper care and attention to these steps, you can enjoy a beautiful display of tulips in your planters. From vibrant reds to delicate pastels, tulips add a touch of elegance and charm to any outdoor space.
| Advantages | Disadvantages |
|---|---|
| Tulips can be planted in small spaces or balconies. | Tulip bulbs need to be dug up and stored during the off-season. |
| Planters allow for easy mobility and control over growing conditions. | Tulip bulbs in planters may require more frequent watering and fertilizing. |
| Planting in planters reduces the risk of bulb diseases and pests. | Tulip bulbs planted in planters may not produce as large or numerous blooms compared to those planted in the ground. |
Benefits of Planting Tulip Bulbs in Planters
Planting tulip bulbs in planters offers several benefits. Here are some of the advantages of using planters for tulip bulb planting:
- Flexibility: Planters provide flexibility in terms of where you can place the tulip bulbs. You can easily move the planters around to find the perfect spot for your tulips, whether it’s in a sunny window or on a balcony.
- Easy Maintenance: Planters make it easier to maintain and care for your tulip bulbs. You can control the soil quality, drainage, and temperature more effectively in a planter than in the ground. This allows you to provide the optimum growing conditions for your tulips.
- Protection: Planters offer protection against pests and diseases. By planting tulip bulbs in planters, you can reduce the risk of damage from common garden pests, such as slugs and snails. Additionally, planters can provide some protection against diseases that may be present in the soil.
- Extended Blooming Period: Planting tulip bulbs in planters can help extend the blooming period. By staggering the planting of bulbs in different planters, you can ensure a continuous display of beautiful tulips throughout the spring season.
- Aesthetics: Planters can enhance the overall aesthetics of your garden or outdoor space. With a variety of planter designs available, you can choose ones that complement your tulip bulbs and create a visually appealing display.
- Accessibility: Planters make it easier to enjoy and appreciate your tulips up close. By placing the planters at eye level, you can admire the beauty and fragrance of the flowers without bending down or straining your back.
Overall, planting tulip bulbs in planters offers numerous advantages and can be a great option for gardeners of all experience levels. Whether you have limited space or simply want more control over the growing conditions, consider using planters to enjoy the beauty of tulips in your garden.
Choosing the Right Planter for Tulip Bulbs
When it comes to planting tulip bulbs, choosing the right planter is crucial. The type and size of the planter can greatly affect the growth and blooming of your tulips. Here are some factors to consider when selecting a planter for your tulip bulbs:
1. Size
The size of the planter is important as it determines the amount of space available for the tulip bulbs to grow and spread their roots. Make sure to choose a planter that is deep enough to accommodate the length of the tulip bulbs and wide enough to provide adequate spacing between each bulb.
2. Drainage
Good drainage is essential for the health of tulip bulbs. Make sure the planter you choose has drainage holes at the bottom to prevent waterlogging and root rot. Additionally, using a planter with a saucer or tray underneath can help catch excess water and prevent it from sitting in the soil.
3. Material
The material of the planter can also impact the growth of tulip bulbs. Porous materials like terracotta allow for better aeration and drainage, but they can also dry out more quickly. If you choose a terracotta planter, make sure to water the tulip bulbs more frequently. Plastic or resin planters are less porous and retain moisture better, making them a suitable choice for areas with hot and dry climates.
4. Mobility
If you want the flexibility to move your tulip bulbs around, consider choosing a planter with handles or wheels. This allows you to adjust the position of the planter to optimize sunlight exposure or protect the tulips from extreme weather conditions. However, make sure the planter is stable and well-balanced to prevent it from toppling over or spilling soil.
By considering these factors, you can choose the right planter for your tulip bulbs, providing them with a suitable environment to thrive and bloom beautifully.
Steps to Successfully Planting Tulip Bulbs in Planters
Planting tulip bulbs in planters is an excellent way to add color and beauty to your outdoor space. With the right care and technique, you can enjoy stunning tulips in your containers. Here are the steps to successfully plant tulip bulbs in planters:
1. Choose the right planter: Select a planter that is at least 12 inches deep and has drainage holes at the bottom. Tulips need well-draining soil to thrive, so make sure your planter has good drainage.
2. Prepare the soil: Fill the planter with a well-balanced potting mix. Avoid using garden soil, as it can be heavy and compacted. Tulips prefer loose and fertile soil, so add organic matter like compost or peat moss to improve drainage and fertility.
3. Select the bulbs: Choose high-quality tulip bulbs from a reputable nursery or garden center. Look for bulbs that are firm, plump, and free from mold or blemishes. Select a variety that suits your desired color and height preferences.
4. Plant the bulbs: Dig holes in the soil that are three times as deep as the bulb’s height. Place the bulbs in the holes with the pointed end facing up. Space the bulbs evenly, leaving a few inches between each bulb. Gently cover the bulbs with soil, making sure to press it down lightly.
5. Water thoroughly: After planting, water the bulbs thoroughly to settle the soil and promote root growth. Make sure the soil is evenly moist but not saturated. During the growing season, water the bulbs whenever the top inch of soil feels dry.
6. Provide sunlight and protection: Place the planters in a sunny location that receives at least six hours of sunlight per day. If you live in a region with harsh winters, consider protecting the planters by bringing them indoors or wrapping them with burlap to insulate them from extreme temperatures.
7. Fertilize as needed: Tulip bulbs contain all the nutrients they need to grow and flower. However, you can apply a slow-release bulb fertilizer or bone meal to promote healthy growth. Follow the instructions on the fertilizer packaging for the appropriate dosage.
8. Monitor and maintain: Keep an eye on your tulip bulbs as they grow. Watch out for pests or signs of disease, and take appropriate action if needed. Remove any dead or faded flowers to encourage more blooms. After the tulips have finished flowering, allow the foliage to die back naturally before removing it.
By following these steps, you can successfully plant tulip bulbs in planters and enjoy a stunning display of colorful tulips in your outdoor space. With proper care and maintenance, your tulips will reward you with their beauty year after year.


