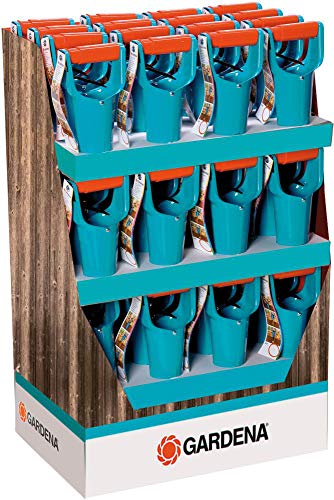


If you want to add a burst of color to your garden, planting bulbs is a great way to achieve that. Bulbs, such as tulips, daffodils, and hyacinths, are easy to plant and can create a stunning display in your outdoor space. A bulb planter is a handy tool specifically designed to make the planting process quick and efficient.
Step 1: Prepare your soil
Before you start planting, it’s important to prepare the soil. Bulbs prefer well-drained soil, so make sure to remove any weeds, rocks, or other debris. Loosen the soil with a garden fork or shovel, breaking up any clumps, and add organic matter, such as compost or peat moss, to improve drainage and fertility.
Step 2: Choose your bulbs
When selecting bulbs, choose ones that are firm and plump, avoiding any that feel soft or have mold or damage. Different bulbs have different planting depths, so be sure to check the packaging or bulb catalog for guidelines. It’s also a good idea to choose bulbs with different flowering times to enjoy a continuous display throughout the season.
Step 3: Use a bulb planter
Using a bulb planter can make the planting process much easier and more precise. Simply insert the bulb planter into the soil at the desired location, twist it back and forth to create a hole, and then remove the planter, leaving a hole in the soil. Place the bulb in the hole, making sure it’s facing the right direction (pointy end up), and cover it with soil, gently pressing it down to eliminate air pockets. Repeat this process for each bulb, leaving enough space between them for growth.
It’s important to note that bulb planters come in different sizes, so choose one that matches the size of your bulbs. Larger bulbs require a larger planter, while smaller bulbs can be planted with a smaller one.
Step 4: Water and maintain
Once all the bulbs are planted, water the area thoroughly to settle the soil and initiate the growth process. After that, water regularly, especially during dry spells, allowing the soil to dry out slightly between waterings. Keep an eye out for any signs of pests or diseases, and remove any faded flowers to encourage the bulb to put more energy into its roots for next season.
With the right preparation, tools, and care, using a bulb planter can make the process of planting bulbs a breeze. Soon enough, your garden will be filled with vibrant blooms, adding beauty and charm to your outdoor space.
How to Plant Bulbs using a Bulb Planter
Planting bulbs can be an easy and enjoyable way to add color to your garden or landscapes. By using a bulb planter, you can quickly and efficiently plant bulbs with minimal effort. Here are the steps to follow:
Choose the Right Bulb Planter
There are different types of bulb planters available in the market, so it’s important to choose one that suits your needs. Look for a bulb planter with a sharp cutting edge and a handle that provides a comfortable grip.
Prepare the Soil
Before planting the bulbs, make sure the soil is well-drained and enriched with organic matter. Loosen the soil using a garden fork or a tiller to a depth of about six to eight inches.
Measure and Mark
Using a tape measure or a ruler, measure the recommended planting depth for the bulbs you are planting. Use your finger or a small stick to mark the desired depth on the bulb planter.
Plant the Bulbs
Press the bulb planter into the soil at the marked depth. Twist the bulb planter gently to create a hole. Remove the planter from the soil, leaving the hole intact.
Place the bulb in the hole with the pointy end facing upwards. Gently cover the bulb with soil, making sure not to leave any air pockets. Firmly press down the soil to secure the bulb in place.
Finish and Water
Once all the bulbs are planted, give the area a good watering to help settle the soil. Water regularly to keep the soil consistently moist, but not waterlogged.
Note: Remember to follow the specific planting instructions for the bulbs you are planting, as different bulbs may have different planting depths and spacing requirements.
In conclusion, planting bulbs using a bulb planter can save you time and effort, allowing you to easily create beautiful displays of flowers in your garden. By following these simple steps, you’ll be on your way to a successful bulb planting experience.
Choosing the Right Bulb Planter
When it comes to planting bulbs, having the right tools is key. One essential tool you’ll need is a bulb planter. With a bulb planter, you can easily dig precise holes for planting bulbs, saving you time and effort. Here are some factors to consider when choosing the right bulb planter for your gardening needs:
1. Size: Bulb planters come in different sizes, so it’s important to choose one that matches the size of the bulbs you’ll be planting. If you’re planting larger bulbs, opt for a larger bulb planter to ensure the hole is deep and wide enough.
2. Depth markings: Look for a bulb planter with depth markings on the side. This will help you gauge how deep you’re planting the bulbs, ensuring they’re at the right depth for optimal growth.
3. Material: Bulb planters are typically made of either plastic or metal. Plastic planters are lightweight and easy to use, while metal planters are more durable and can handle tougher soils. Consider the type of soil you have and choose a bulb planter accordingly.
4. Comfort: Pay attention to the handle of the bulb planter. Look for one with a comfortable grip that will allow you to easily push it into the soil without straining your hand or wrist.
5. Extras: Some bulb planters come with additional features, such as a release mechanism to easily remove the soil from the planter or a depth gauge to ensure consistent planting depth. Consider these extras when making your decision.
By selecting the right bulb planter, you can ensure that your bulbs are planted correctly, leading to successful growth and beautiful blooms. Take the time to choose a bulb planter that suits your needs, and enjoy the process of planting bulbs in your garden.
Preparing the Soil for Planting
Before planting your bulbs, it is important to prepare the soil to provide optimal growing conditions. Follow these steps to ensure your bulbs have the best chance of thriving:
1. Choose the Right Location
Find a location in your garden that receives full sun or partial shade. Most bulbs prefer at least six hours of direct sunlight each day.
2. Remove Weeds and Debris
Clear the area of any weeds, grass, or debris. This will give your bulbs the best chance to grow without competition for nutrients and water.
3. Loosen the Soil
Using a garden fork or spade, loosen the soil to a depth of at least 12 inches. This will improve drainage and make it easier for the bulbs to establish roots.
4. Add Organic Matter
Amend the soil with compost or well-rotted manure to improve its fertility and structure. This will provide essential nutrients for your bulbs to grow strong and healthy.
5. Level the Surface
Rake the soil surface to level it and remove any large clumps or stones. This will create a smooth planting area and prevent uneven growth.
By taking the time to properly prepare the soil, you will create a favorable environment for your bulbs to thrive and produce beautiful blooms. Remember to water your bulbs regularly and provide any necessary additional care to ensure their successful growth.
Planting the Bulbs
Once you have chosen the perfect location for your bulbs, it’s time to start planting. Follow these steps to ensure the bulbs have the best chance of thriving:
1. Prepare the soil
Before planting the bulbs, it’s important to prepare the soil to provide the right environment for growth. Use a garden fork or spade to loosen the soil and remove any weeds or rocks. Incorporate organic matter, such as compost or well-rotted manure, to improve soil fertility and drainage.
2. Choose the right bulb planter
Select a bulb planter that is appropriate for the size of your bulbs. Different bulb planters have varying depths and widths, so pick one that accommodates the specific bulbs you’re planting. This tool will make the planting process easier and more efficient.
3. Dig the holes
Using the bulb planter, dig holes at the appropriate depth for your bulbs. The depth will vary depending on the specific type and size of bulb, so refer to the package instructions for guidance. Place the bulb planter into the soil and twist it to create a hole, then remove the soil plug from the planter.
4. Plant the bulbs
Place the bulbs into the holes, pointed end up. Ensure they are positioned at the recommended distance apart, which will also be specified on the packaging. Gently press the soil plug back into the hole, covering the bulbs completely. Repeat this process for each bulb, spacing them evenly throughout the planting area.
5. Water and mulch
After planting, water the bulbs thoroughly to settle the soil and provide moisture for growth. Apply a layer of mulch, such as straw or wood chips, around the bulbs to help conserve moisture, suppress weeds, and insulate the soil. This will create an optimal environment for the bulbs to establish roots and grow.
Following these steps will result in a successful bulb planting. Remember to take note of the specific instructions for the bulbs you are planting, as different varieties may have unique requirements. With proper care and maintenance, your bulbs will soon burst into beautiful blooms.


