Planting bulbs in your grass can be a great way to add beauty and color to your lawn. However, doing it manually can be a daunting task, especially if you have a large area to cover. That’s where a bulb planter can come in handy. A bulb planter is a specialized tool designed to make the process of planting bulbs in grass much easier and more efficient.
Using a bulb planter is relatively straightforward. First, you’ll need to choose the right spot in your lawn to plant the bulbs. Look for an area with well-drained soil and enough sunlight. Once you’ve found the perfect spot, simply push the bulb planter into the ground, using your foot to apply pressure if necessary.
The bulb planter will create a cylindrical hole in the ground, which is perfect for planting bulbs. Take your bulb and place it into the hole, making sure it is positioned correctly. Then, gently release the soil around the bulb, covering it entirely. Repeat this process for each bulb you want to plant.
Using a bulb planter has several key advantages. Firstly, it makes the process much faster and more efficient, as you can plant multiple bulbs in quick succession. Secondly, it ensures that the bulbs are planted at the correct depth, which is crucial for their growth and development. Lastly, it helps to protect the bulbs from damage, as the planter creates a neat hole without disturbing the surrounding soil or grass.
In conclusion, using a bulb planter in grass is a simple and effective way to plant bulbs in your lawn. With this tool, you’ll be able to create beautiful flower displays without breaking a sweat. So why not give it a try and enjoy the stunning results!
What is a bulb planter?
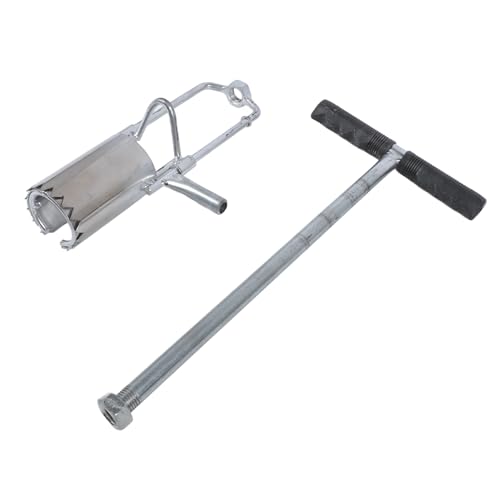
A bulb planter is a useful gardening tool designed specifically for planting bulbs in grass or soil. It consists of a metal or plastic tube with a sharp, pointed end and a handle at the top. The pointed end is used to create a hole in the ground, while the handle allows for easy gripping and control.
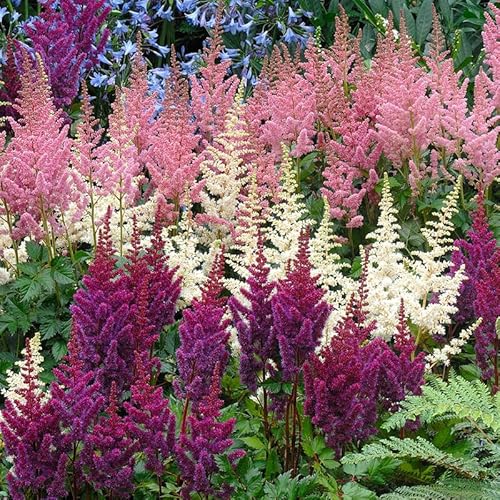
Bulb planters come in various sizes and designs to accommodate different bulb types and soil conditions. They are commonly used to plant spring-flowering bulbs like tulips, daffodils, and crocuses, but can also be used for planting other types of bulbs or even small plants.
Using a bulb planter helps to ensure proper depth and spacing when planting bulbs, which is essential for their growth and blooming. The sharp end of the planter easily cuts through the grass or soil, creating a clean hole without damaging surrounding plants or roots.
To use a bulb planter, simply position it vertically over the desired planting spot, press it into the ground using your foot or hand, and twist it slightly to create a hole. Then, place a bulb into the hole, making sure it sits at the recommended depth, and gently cover it with soil. Repeat the process for each bulb you want to plant.
Some bulb planters have depth markings on the side, which can be helpful for achieving consistent planting depth. Additionally, some models may have an ejector mechanism that allows for easy removal of soil from the planter after each use.
Overall, a bulb planter is a handy tool for efficiently and accurately planting bulbs in grass or soil. It saves time and effort compared to manually digging individual holes, and helps ensure that bulbs are planted at the correct depth for optimal growth and blooming.
Discover the tool used for planting bulbs in grass
When it comes to planting bulbs in grass, one of the most efficient tools you can use is a bulb planter. This specialized tool is designed to make the process of planting bulbs in grass easier and more efficient.
A bulb planter is typically a long, cylindrical tool with a sharp, pointed end and a handle at the top. It is used by pushing the pointed end into the ground to create a hole, and then using the handle to lift out the plug of soil. This creates a perfect hole for planting bulbs in grass, allowing them to be placed at the desired depth.
The advantage of using a bulb planter in grass is that it helps you plant bulbs quickly and accurately. The pointed end of the tool makes it easy to penetrate the soil, even in dense grass, while the handle provides leverage for lifting out the plug of soil. This saves you time and effort compared to digging individual holes by hand.
Another benefit of using a bulb planter is that it helps you maintain a neat and uniform appearance in your garden. By creating clean, round holes, the bulb planter ensures that each bulb is planted at the same depth and distance from neighboring bulbs. This results in an even and attractive display of flowers when they bloom.
Using a bulb planter in grass is relatively straightforward. Start by selecting the area where you want to plant your bulbs. Push the pointed end of the bulb planter into the ground at the desired location, using your foot to provide additional force if needed. Once the hole is deep enough, use the handle to lift out the plug of soil. Repeat this process for each bulb you wish to plant.
After planting the bulbs, be sure to water the area thoroughly to help settle the soil and encourage the bulbs to establish roots. You may also want to spread a layer of mulch over the area to help conserve moisture and suppress weed growth.
| Benefits of using a bulb planter in grass: |
|---|
| 1. Saves time and effort |
| 2. Ensures accurate and consistent planting depth |
| 3. Creates a neat and uniform appearance in the garden |
| 4. Easy to use and requires minimal skill or strength |
Step-by-step guide to using a bulb planter in grass
Step 1: Choose the right spot in your lawn where you want to plant the bulbs. Make sure it gets enough sunlight and has well-drained soil.
Step 2: Use a bulb planter tool to dig a hole in the grass. Insert the tool into the ground and twist it back and forth to create a hole big enough for the bulb.
Step 3: Remove the bulb planter from the hole, keeping the soil intact inside the tool. This will ensure that the soil does not get mixed with the grass on the surface.
Step 4: Place the bulb into the hole with the pointed end facing upwards. Make sure the bulb is positioned correctly to ensure proper growth.
Step 5: Gently press the soil back into the hole using the bulb planter or your hands. Ensure that the bulb is securely covered with soil and there are no air pockets left.
Step 6: Repeat steps 2 to 5 for each bulb you want to plant in the grass. Leave enough space between each hole to allow the bulbs to grow and spread naturally.
Step 7: Water the newly planted bulbs thoroughly to help settle the soil and provide moisture for their initial growth. Avoid over-watering as it can lead to rotting.
Step 8: After planting the bulbs, take care of them by regularly watering and fertilizing as needed. Follow the specific care instructions for the type of bulbs you have planted.
Step 9: Enjoy the beauty of your blooming bulbs! Sit back and watch as they grow and add charm to your lawn.
Note: Bulb planting in grass may require preparation and maintenance such as lawn mowing, so plan accordingly.
Learn the easy process of planting bulbs in your lawn
Planting bulbs in your lawn is a simple and effective way to add vibrant colors and beautiful blooms to your outdoor space. With the help of a bulb planter, you can easily create stunning flower displays without damaging your grass. Follow the step-by-step guide below to learn how to use a bulb planter in grass:
1. Choose the right bulbs
Before starting the planting process, it’s important to select the right bulbs for your lawn. Consider the blooming time, sunlight requirements, and the type of soil in your yard. Popular bulb options for grass include tulips, daffodils, crocuses, and hyacinths. Choose bulbs that are suitable for your climate and will thrive in your lawn.
2. Prepare the planting area
Identify the area of your lawn where you want to plant the bulbs. Use a rake or garden fork to remove any debris, weeds, or rocks. Loosen the top layer of soil with a shovel or garden fork to create a planting bed for the bulbs.
3. Use a bulb planter
A bulb planter is a handy tool specifically designed for planting bulbs. It allows you to dig precise holes in the grass without damaging the surrounding areas. Insert the bulb planter into the soil at the desired location and twist it back and forth to create a hole about 4-6 inches deep.
4. Plant the bulbs
Place the bulbs into the hole with the pointed end facing upwards. Gently cover the bulbs with soil and press it down to ensure firm contact. Make sure the top of the bulbs is 2-3 inches below the surface of the grass. Repeat this process for each bulb, leaving enough space between them to allow for growth and expansion.
5. Water and care for the bulbs
After planting the bulbs, give them a good watering to help them settle in. Continue to water the area regularly, especially during dry spells, to keep the soil moist. Apply a layer of mulch to help retain moisture and prevent weed growth. Avoid mowing the area until the foliage has died back naturally.
6. Enjoy the blooms
With proper care and maintenance, the bulbs will start to sprout and eventually bloom, adding a burst of color to your lawn. Enjoy the beautiful flowers and the benefits they bring to your outdoor space.
By following these simple steps, you can easily plant bulbs in your lawn using a bulb planter. Experiment with different types of bulbs and colors to create a stunning floral display that will enhance the beauty of your outdoor area.
Tips for successful bulb planting in grass
Planting bulbs in grass can add a beautiful touch to any garden. However, it requires careful planning and execution to ensure successful growth. Here are some tips for successfully planting bulbs in grass:
- Choose the right location: Select an area in your grass that receives ample sunlight and has well-drained soil. Avoid areas with heavy foot traffic as it can damage the bulbs.
- Prepare the soil: Before planting, loosen the soil using a garden fork or a bulb planter. This will help with root penetration and drainage.
- Measure and mark: Use a measuring tape to mark the spots where you want to plant the bulbs in the grass. This will help you ensure an even distribution and avoid overcrowding.
- Use a bulb planter: A bulb planter is a useful tool for planting bulbs in grass. It allows you to dig precise holes without damaging the existing grass. Insert the bulb planter into the ground, twist it, and lift to remove a plug of soil. Place the bulb in the hole and gently press the soil back in.
- Plant at the right depth: The depth at which you plant bulbs depends on the type of bulb you are planting. As a general rule, plant bulbs at a depth that is about three times their diameter. This will help prevent them from drying out or being damaged by external factors.
- Water thoroughly: After planting the bulbs, water the area thoroughly. This will provide the bulbs with the necessary moisture for growth.
- Maintain proper care: Once the bulbs have sprouted, continue to water them regularly and provide adequate nutrients. Avoid mowing the grass until the foliage has completely withered, as this will help the bulbs store energy for the next growing season.
- Consider naturalizing bulbs: If you prefer a more natural look, you can scatter the bulbs across the grass and plant them wherever they fall. This will create a more random and natural appearance.
By following these tips, you can ensure successful bulb planting in your grass and enjoy a vibrant and colorful garden.
Ensure your bulbs thrive with these helpful tips and tricks
Planting bulbs in your grass is a great way to add color and beauty to your lawn. Whether you’re planting tulips, daffodils, or crocuses, these tips and tricks will help ensure your bulbs thrive:

| Tip | Description |
|---|---|
| Choose the right bulbs | Make sure to select bulbs that are suitable for planting in grass. Look for varieties that are naturalizing and will multiply over time. |
| Prepare the soil | Before planting, prepare the soil by removing any weeds or grass. Loosen the soil and add some organic matter to improve drainage. |
| Use a bulb planter | A bulb planter is a handy tool that makes it easy to dig uniform holes for planting bulbs. Use it to create holes at the recommended depth for the specific bulb variety you are planting. |
| Plant at the right depth | Plant your bulbs at the correct depth to ensure they have the best chance of thriving. As a general rule, bulbs should be planted at a depth that is three times their height. |
| Water regularly | After planting, water the area thoroughly to settle the soil and provide moisture to the bulbs. Continue to water regularly, especially during dry periods, to help the bulbs establish roots. |
| Maintain proper lawn care | While the bulbs are growing, be sure to mow the grass at the recommended height and avoid cutting off the foliage too early. The bulbs need the foliage to produce energy for next year’s growth. |
| Protect from pests | Keep an eye out for pests, such as squirrels or rabbits, that may try to dig up or eat your bulbs. Consider using protective measures like netting or repellents to keep them away. |
| Allow foliage to die back naturally | After the bulbs have finished flowering, allow the foliage to die back naturally. Do not remove it until it has turned yellow and withered away. This allows the bulbs to store energy for the next growing season. |
By following these tips and tricks, you can ensure that your bulbs thrive and provide a stunning display of color in your grassy lawn.