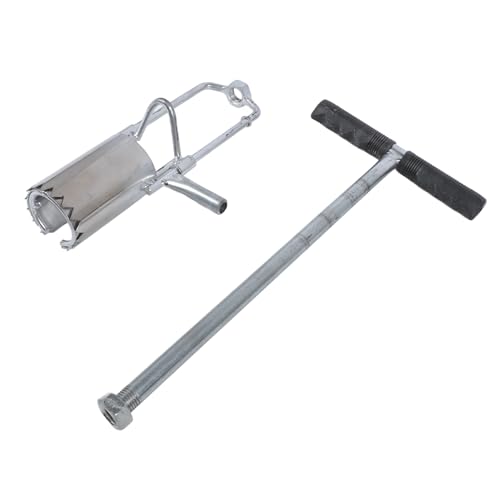
Planting bulbs can be a delightful way to add color and beauty to your garden. However, the traditional method of digging individual holes for each bulb can be time-consuming and back-breaking. That’s where the Gardena bulb planter comes in to save the day.
The Gardena bulb planter is a handy tool that allows you to quickly and effortlessly plant bulbs with precision and ease. Whether you’re a seasoned gardener or a novice, this tool is designed to make your bulb planting experience a breeze.
Using the Gardena bulb planter is simple. First, choose a suitable spot in your garden where you want to plant your bulbs. Make sure the soil is loose and well-drained. Then, firmly press the sharp end of the bulb planter into the ground, using your foot if necessary.
Once the bulb planter is in the ground, twist it slightly to create a small hole. Insert the bulb into the hole, making sure it is the right way up. Gently release the soil by loosening the grip on the bulb planter and lift it out of the ground. Voila! Your bulb is now perfectly planted.
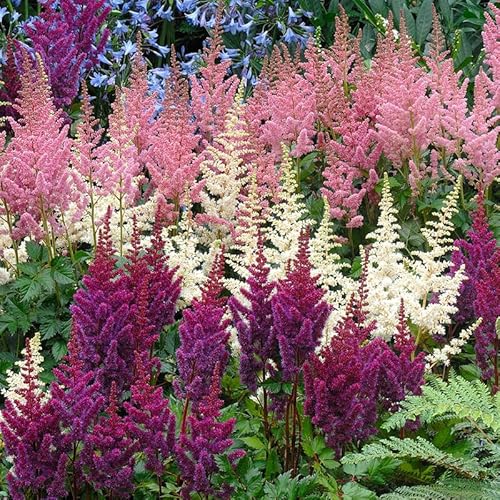
Whether you’re planting tulips, daffodils, or any other type of bulb, the Gardena bulb planter is a must-have tool for every gardener. Say goodbye to sore backs and hours of digging, and say hello to a quick and efficient way of planting bulbs. With this tool in hand, your garden will be blooming with colorful flowers in no time.

So, why wait? Get yourself a Gardena bulb planter and start enjoying the beauty and simplicity of bulb planting today!
Benefits of Using a Gardena Bulb Planter
Using a Gardena bulb planter offers a multitude of benefits for gardeners, making the task of planting bulbs easier and more efficient. Whether you are a seasoned gardener or a beginner, a Gardena bulb planter can greatly enhance your gardening experience.
1. Time and Energy Saving
One of the major advantages of using a Gardena bulb planter is the amount of time and energy it saves. Planting bulbs manually can be a laborious task, requiring you to dig multiple holes using a traditional garden trowel. With a Gardena bulb planter, you can simply insert the tool into the soil, twist it, and lift out a perfectly-sized hole for your bulbs. This eliminates the need for excessive digging and squatting, allowing you to plant bulbs quickly and effortlessly.
2. Precise and Consistent Planting
A Gardena bulb planter ensures precise and consistent planting depths for your bulbs. The tool has depth markings that guide you in creating holes of the correct depth, ensuring that each bulb is planted at the optimal depth for growth and blooming. This level of precision helps to promote even growth and uniformity among your plants.
Additionally, the consistent size of the holes created by the bulb planter helps to create a neat and tidy appearance in your garden. The uniformity of the holes gives your garden a professional and well-maintained look.
| Benefits | Details |
|---|---|
| Time Saving | Eliminates excessive digging and squatting, allowing bulbs to be planted quickly and effortlessly. |
| Energy Saving | Reduces physical strain on the body as compared to manual bulb planting. |
| Precise Planting Depths | Depth markings on the bulb planter guide you in creating holes of the correct depth for optimal growth. |
| Consistent Planting | Creates holes of consistent size, promoting even growth and a professional appearance. |
| Ease of Use | The bulb planter is designed for user-friendly operation, making it suitable for both beginners and experienced gardeners. |
Overall, using a Gardena bulb planter offers time and energy-saving benefits, precision in planting depths, consistent and neat appearance, and ease of use. These advantages make it an indispensable tool for any gardener looking to simplify the process of planting bulbs while achieving professional results.
Tips for Choosing the Right Gardena Bulb Planter
When it comes to planting bulbs in your garden, having the right tools can make all the difference. The Gardena Bulb Planter is a handy tool designed specifically for planting bulbs with ease. However, with different types and sizes available, it can be overwhelming to choose the right one. Here are some tips to help you make an informed decision:
| Tip | Description |
|---|---|
| Consider bulb size | Before purchasing a Gardena Bulb Planter, consider the size of the bulbs you will be planting. Bulb planters come in different sizes, so choose one that is appropriate for the types of bulbs you usually plant. |
| Check for depth markings | Some Gardena Bulb Planters have depth markings on the tube, which can be helpful for ensuring you plant bulbs at the correct depth. This feature can be particularly useful if you are new to gardening or unfamiliar with the ideal planting depth for different types of bulbs. |
| Look for ergonomic design | Since planting bulbs can require some physical effort, it’s important to choose a Gardena Bulb Planter with an ergonomic design. Look for features such as a comfortable grip or a handle that reduces strain on your wrist. This will make the planting process much easier and more comfortable. |
| Consider durability | Investing in a high-quality Gardena Bulb Planter can save you money in the long run. Look for a planter made from durable materials such as stainless steel or reinforced plastic. These materials are less likely to break or wear out, ensuring your planter will last for many planting seasons. |
| Read reviews | Before making a final decision, take the time to read reviews from other gardeners who have used the Gardena Bulb Planter you are considering. Their feedback can provide valuable insights into the tool’s performance, durability, and ease of use. |
By following these tips, you can choose the right Gardena Bulb Planter for your gardening needs and enjoy effortless bulb planting in your garden.
Step-by-Step Guide on How to Use a Gardena Bulb Planter
Using a Gardena bulb planter is a simple and efficient way to plant bulbs in your garden. Whether you are a seasoned gardener or a beginner, this step-by-step guide will walk you through the process of using a Gardena bulb planter.
Step 1: Prepare the Soil
Before using the Gardena bulb planter, prepare the soil by loosening it with a garden fork or a spade. Remove any weeds or rocks from the planting area to ensure a smooth planting process.
Step 2: Adjust the Depth
Next, adjust the depth of the Gardena bulb planter to match the size of the bulbs you are planting. This can be done by adjusting the depth control knob located on the handle of the planter. It is important to choose the right depth to ensure that the bulbs are placed at the appropriate level in the soil.
Step 3: Insert the Gardena Bulb Planter
Insert the Gardena bulb planter into the prepared soil at the desired planting location. Push down on the handle firmly to penetrate the soil. This will create a hole where the bulb will be planted.
Step 4: Place the Bulb
With the Gardena bulb planter still inserted in the soil, place the bulb into the hole. Make sure the bulb is positioned with the root side facing down and the pointed end facing up.
Step 5: Remove the Bulb Planter
Gently lift the Gardena bulb planter out of the soil, leaving the bulb behind. This action will create a small hole in the soil where the bulb is now planted.
Step 6: Repeat the Process
Continue using the Gardena bulb planter to create holes and plant bulbs in the desired area. Space the bulbs according to the planting instructions provided with the bulbs.
Step 7: Water and Mulch
After all bulbs are planted, water the area thoroughly to help settle the soil around the bulbs. Apply a layer of mulch to help retain moisture and suppress weed growth.
Congratulations! You have successfully used a Gardena bulb planter to plant your bulbs. With proper care and maintenance, you can enjoy beautiful and vibrant flowers in your garden.
Common Mistakes to Avoid when Using a Gardena Bulb Planter
Using a Gardena Bulb Planter can greatly simplify the process of planting bulbs in your garden, but there are a few common mistakes that people make when using this tool. By avoiding these mistakes, you can ensure that your bulbs are planted correctly and have the best chance of thriving in your garden.
1. Planting bulbs too deep
One common mistake is planting bulbs too deep into the ground. It is important to follow the instructions on the Gardena Bulb Planter and plant the bulbs at the recommended depth. Planting bulbs too deep can prevent them from receiving the sunlight they need to grow and can also make it difficult for them to emerge through the soil.
2. Not preparing the soil
Another mistake is not properly preparing the soil before using the Gardena Bulb Planter. It is important to loosen the soil and remove any weeds or grass from the planting area. This will provide a better growing environment for the bulbs and help them establish strong roots.
Additionally, it is recommended to amend the soil with compost or other organic matter to improve its fertility and drainage. This will help create an optimal environment for bulb growth.
3. Using the wrong size bulb planter
Using the wrong size bulb planter can also lead to problems. It is important to select a bulb planter that is appropriate for the size of the bulbs you are planting. Using a bulb planter that is too large can result in overly large holes and make it difficult for the bulbs to establish a strong root system. On the other hand, using a bulb planter that is too small can result in cramped conditions for the bulbs and hinder their growth.
4. Not spacing bulbs correctly
Properly spacing the bulbs is essential to ensure that they have room to grow and flourish. Avoid the mistake of planting bulbs too close together, as this can result in overcrowding and competition for resources. Consult the instructions on the Gardena Bulb Planter or bulb packaging for the recommended spacing between bulbs.
By avoiding these common mistakes, you can maximize the success of your bulb planting using the Gardena Bulb Planter and enjoy a beautiful garden filled with vibrant blooms.
Caring for Your Gardena Bulb Planter: Maintenance and Storage Tips
Properly maintaining and storing your Gardena bulb planter is essential for ensuring its longevity and optimal performance. By following a few simple steps, you can keep your tool in excellent condition for many planting seasons to come.
1. Cleaning
After each use, it’s important to thoroughly clean your bulb planter. Remove any soil or debris from the blades and handle using a brush or hose. Pay special attention to the area where the soil and blades meet, as it can easily accumulate dirt. Once cleaned, allow the planter to dry completely before storage to prevent rust or corrosion.
2. Lubrication
To keep the moving parts of your bulb planter working smoothly, it’s recommended to apply a thin layer of lubricating oil. This will help reduce friction and prevent rust. Use a cloth or sponge to apply the oil to the blades and other movable components, then wipe off any excess before storing.
3. Storage
When not in use, it’s best to store your Gardena bulb planter in a clean, dry place. Avoid exposing it to extreme temperatures or moisture, as this can damage the tool. If possible, store it in a tool shed or garage, away from direct sunlight. Additionally, consider using a storage bag or container to protect it from dust and other contaminants.
Note: Do not store your bulb planter with soil or debris still attached, as this can lead to clogging and damage.
4. Blade Sharpening
Over time, the blades of your bulb planter may become dull. To maintain optimal cutting performance, it’s recommended to sharpen the blades regularly. Use a sharpening tool or file to carefully sharpen the cutting edges, following the original angle. Take care not to remove too much material, as this can affect the planter’s functionality.
By following these maintenance and storage tips, you can ensure that your Gardena bulb planter remains in excellent condition, ready for successful planting seasons year after year.