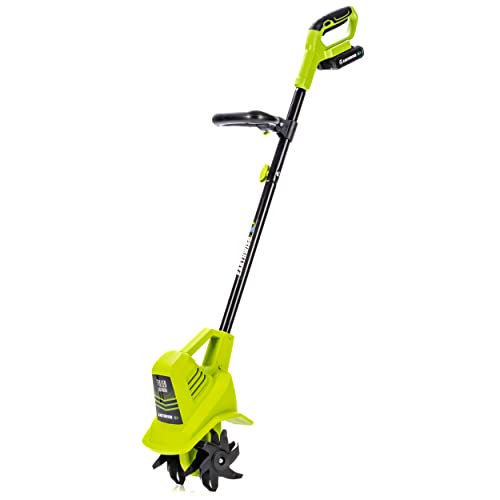
Replacing the drive belt on your cultivator can seem like a daunting task, but with a little patience and the right tools, you can easily get your machine back up and running smoothly. The drive belt is a critical component of the cultivator, as it is responsible for transferring power from the engine to the tines, allowing them to rotate and break up the soil.
Before you begin, it is important to make sure you have the correct replacement belt for your specific cultivator model. Consult the owner’s manual or contact the manufacturer to ensure you have the right size and type of belt. Once you have the proper belt, follow these step-by-step instructions to fit it:
Step 1: Disconnect the spark plug wire to prevent accidental engine starts. This safety precaution is crucial to avoid any potential injuries or accidents during the belt replacement process.
Step 2: Locate the tensioner pulley, which is typically positioned near the engine. The tensioner pulley is responsible for maintaining the proper tension on the belt. Use a wrench to loosen the bolt or nut holding the pulley in place.
Step 3: Slide the old belt off the pulleys, taking note of its routing path. It may be helpful to take a picture or make a diagram of the belt’s path to ensure proper installation of the new belt.
Step 4: Place the new belt on the pulleys, following the routing path you noted earlier. Make sure the belt is properly seated on each pulley to prevent slipping or damage.
Step 5: Use the wrench to tighten the bolt or nut on the tensioner pulley, ensuring the belt is properly tensioned. Check the owner’s manual for the recommended tension for your particular cultivator model.
With the new drive belt properly installed and tensioned, you can now reconnect the spark plug wire and start your cultivator. Test the machine to ensure the belt is functioning correctly and adjust the tension if necessary. By following these steps, you can easily fit a new drive belt on your cultivator and get back to tackling your gardening tasks with ease.
How to Replace a Cultivator Drive Belt
Replacing a cultivator drive belt is an essential maintenance task to keep your cultivator functioning smoothly. Here is a step-by-step guide on how to replace a cultivator drive belt:
Step 1: Safety Precautions
Before starting any maintenance work on your cultivator, make sure to take the necessary safety precautions. Wear appropriate protective clothing, such as gloves and safety goggles, to protect yourself from any potential injuries.
Step 2: Prepare the Cultivator
Position the cultivator on a stable surface and make sure it is turned off. Disconnect the spark plug wire to prevent any accidental starting of the engine during the replacement process.
Step 3: Locate the Drive Belt
Identify the drive belt on your cultivator. It is often located on the engine or near the transmission. Consult your cultivator’s manual for the exact location if you are unsure.
Step 4: Remove the Old Belt
- Use a wrench or socket set to loosen the belt tensioning device and relieve tension on the belt.
- Slide the old belt off the pulleys and remove it from the cultivator.
Step 5: Install the New Belt
- Place the new belt on the pulleys, making sure it is properly aligned.
- Use the wrench or socket set to tighten the belt tensioning device and restore tension to the belt.
Step 6: Test the Cultivator
Reconnect the spark plug wire and start the cultivator. Engage the drive system to verify that the new belt is properly installed and functioning correctly. Observe the belt’s movement to ensure that there are no signs of slipping or misalignment.
Following these steps will help you replace the drive belt on your cultivator effectively. Remember to consult your cultivator’s manual for any specific instructions or guidelines related to your model. Regularly inspect and replace the drive belt to maintain the performance and longevity of your cultivator.
Step 1: Gather the necessary tools
Before you begin the process of fitting a cultivator drive belt, it’s important to gather all the necessary tools to ensure a smooth and efficient task. Here are the tools you will need:
Tools:
- Socket set
- Spanner wrench
- Adjustable wrench
- Flathead screwdriver
- Vise grips
- Allen wrench set
- Torque wrench
- Safety goggles
Materials:
- New drive belt
- Clean cloth or rag
- Penetrating oil
Make sure you have all these tools and materials readily available before you start the process, as it will make the job much easier and more efficient.
Step 2: Prepare the cultivator
Before you begin installing the new drive belt on your cultivator, it’s important to prepare the machine properly. Follow these steps to ensure a smooth installation process:
1. Disconnect the spark plug wire
For safety reasons, always disconnect the spark plug wire before working on your cultivator. This will prevent the engine from accidentally starting while you’re installing the drive belt.
2. Remove the existing belt
If you’re replacing an old drive belt, you’ll need to remove it first. Locate the belt tensioner on your cultivator and release the tension by moving it away from the belt. Once the tension is released, you can simply slide the old belt off the pulleys.
3. Inspect the pulleys and tensioner
While the drive belt is removed, take some time to inspect the pulleys and tensioner for any signs of wear or damage. If you notice any issues, such as cracked or worn pulleys, it’s best to replace them before installing the new belt. This will ensure optimal performance and a longer lifespan for your cultivator.
4. Clean the belt path
Before installing the new drive belt, it’s important to clean the belt path to ensure a smooth operation. Use a brush or a cloth to remove any dirt, debris, or grease from the pulleys and tensioner. This will help the belt operate more efficiently and reduce the risk of premature wear.
5. Install the new drive belt
Now that your cultivator is prepared, you can proceed with installing the new drive belt. Follow the manufacturer’s instructions and route the belt around the pulleys and tensioner. Make sure the belt is properly seated and that there is enough tension for it to operate correctly.
By following these steps, you’ll be ready to install your new cultivator drive belt with ease. Remember to always refer to the manufacturer’s instructions for specific guidance and precautions.
Step 3: Remove the old drive belt
Before installing the new drive belt, you will need to remove the old one from your cultivator. Follow these steps to do so:
1. Disconnect the spark plug
For safety purposes, it is important to disconnect the spark plug wire before working on the drive belt. This will prevent the engine from accidentally starting.
2. Release the tension on the drive belt
Locate the tensioner pulley, which is responsible for keeping the drive belt tight. Use a wrench or other appropriate tool to release the tension on the belt by either loosening or removing the fasteners that hold the tensioner in place. This will allow you to easily remove the old drive belt.
3. Remove the old drive belt
Once the tension has been released, carefully slide the old drive belt off the pulleys. Take note of how the belt was originally positioned, as this will help you when installing the new belt.
With the old drive belt removed, you can now proceed to the next step of the installation process.
Step 4: Install the new drive belt
Once you have removed the old drive belt, it’s time to install the new one. Follow the steps below to properly install the new drive belt:
| Step | Instructions |
| 1 | Begin by locating the drive belt tensioner. It is typically located near the engine or transmission. |
| 2 | Use a wrench to rotate the drive belt tensioner in the direction that releases the tension on the belt. This will allow you to easily remove the old belt and install the new one. |
| 3 | Slide the new drive belt over the pulleys, following the same path as the old belt. Make sure it is properly aligned and seated on each pulley. |
| 4 | Release the tension on the drive belt tensioner, allowing it to apply tension to the new belt. Double-check that the belt is properly tensioned and aligned. |
| 5 | Start the engine and ensure that the new drive belt is working properly. Listen for any unusual noises or vibrations that may indicate a problem with the installation. |
| 6 | If everything looks and sounds good, close any access panels or covers that were removed during the replacement process. |
Following these steps will ensure that your new drive belt is properly installed and functioning correctly in your cultivator. Remember to refer to the manufacturer’s instructions or consult a professional if you have any doubts or difficulties during the installation process.
Step 5: Adjust the tension
Once the new drive belt is in place, it is important to adjust the tension to ensure proper operation of the cultivator. The tension should be tight enough to prevent slipping, but not too tight that it puts unnecessary strain on the belt and pulleys.
To adjust the tension, locate the tension adjusting bolt or mechanism on the cultivator. This is typically located near the engine or drive pulley. Use a wrench or screwdriver to loosen the bolt or adjust the mechanism, allowing the belt to be tightened or loosened.
While adjusting the tension, it is important to check the owner’s manual or manufacturer’s instructions for the correct tension specifications. This will ensure that the belt is adjusted to the proper tension for optimal performance.
Once the tension is adjusted to the correct specifications, tighten the tension adjusting bolt or mechanism to secure the belt in place. Be sure not to overtighten, as this can lead to premature wear and damage to the belt and pulleys.
After adjusting the tension, start the cultivator and observe its operation. The belt should run smoothly and without slipping during operation. If there are any signs of slipping or abnormal behavior, stop the cultivator immediately and recheck the tension adjustment.
Regularly inspect and adjust the tension of the drive belt to maintain optimal performance and prevent unnecessary wear. Following the manufacturer’s recommendations and instructions will help ensure the longevity of the drive belt and the overall functionality of the cultivator.
Step 6: Test the cultivator
Once you have successfully fitted the drive belt to your cultivator, it is important to perform a test to ensure that everything is working properly.
1. Start the cultivator
First, start the cultivator by turning the ignition key or using the start button.
2. Engage the drive
Engage the drive by moving the gear lever into the appropriate position. This will enable the power from the engine to be transmitted to the tines.
3. Observe the belt
While the cultivator is running and the drive is engaged, carefully observe the drive belt. Make sure it is rotating smoothly and without any slipping or excessive vibrations.
If you notice any issues with the belt, such as slipping or excessive wear, it may indicate that the belt is not properly installed or that it needs to be replaced.
Note: During the testing process, it is important to keep your hands and other body parts away from the moving parts of the cultivator to avoid any accidents or injuries.
4. Test the tines
With the drive engaged, test the tines by placing the cultivator onto a patch of soil or grass. Observe how well the tines penetrate the ground and how smoothly they rotate.
If the tines are not functioning properly, it might indicate a problem with the drive belt. Double-check the installation and make any necessary adjustments.
Remember to always read the manufacturer’s instructions and follow all safety precautions when working with machinery.
By performing this test, you can ensure that the drive belt is correctly installed and that your cultivator is functioning optimally. If you encounter any issues during the test, it is recommended to consult the manufacturer’s manual or seek professional assistance to avoid further damage to the cultivator.