
Attaching forks to a bike frame is an important step in the assembly process. The forks are one of the essential components that ensure stability and control while riding. Correctly attaching the forks will not only provide a smooth riding experience but also ensure your safety on the road.
Step 1: Gather the necessary tools
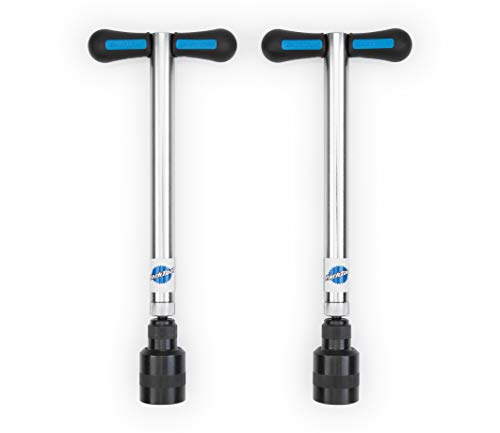
Before you start attaching the forks, make sure you have all the necessary tools handy. You will need a set of Allen wrenches, a torque wrench, and the manufacturer’s specific instructions or a user manual for your bike model.
Step 2: Position the forks correctly
Next, position the forks correctly on the bike frame. The fork blades should be aligned with the frame’s front dropouts. Make sure the brake mounts and fender eyelets (if present) are also in the correct position. This alignment is crucial for the overall stability and functionality of the bike.
Step 3: Tighten the headset
After positioning the forks, tighten the headset. The headset is the part that connects the forks to the bike frame’s head tube. Use an Allen wrench to tighten the headset cap bolt, ensuring it is secure but not overly tightened. An overly tightened headset can lead to poor handling and potential damage to the frame and forks.
Step 4: Secure the stem
Once the headset is tightened, secure the stem to the steerer tube of the forks. The stem holds the handlebars in place and provides stability while steering. Use an Allen wrench and a torque wrench to tighten the stem bolts to the manufacturer’s recommended torque settings. Make sure the stem is aligned with the front wheel and is at the desired angle for comfortable riding.
By following these steps, you can correctly attach forks to a bike frame and ensure a safe and enjoyable riding experience. If you are unsure or unfamiliar with the process, it is always recommended to consult a professional bike mechanic for assistance.
Essential Steps for Attaching Forks to a Bike Frame
Attaching forks to a bike frame is a crucial step in the assembly process. Proper installation ensures stability and safety while riding. Here are the essential steps to follow when attaching forks to a bike frame:
- First, gather all the necessary tools for the job. You will need a wrench, a bike stand or a sturdy work surface to keep the bike stable, and the forks and frame themselves.
- Before attaching the forks, make sure the bike frame is clean and free from any debris that may hinder the attachment process.
- Next, inspect the fork steerer tube and the corresponding hole in the bike frame’s head tube. The steerer tube should be clean and free from any cracks or damage. The head tube should also be clean and have no obstructions.
- Apply a small amount of grease to the headset bearings and the steerer tube. This will help reduce friction and enable smoother steering.
- Slide the forks’ steerer tube through the head tube until the fork crown rests on the bottom of the head tube. Make sure the fork is aligned straight with the frame.
- Tighten the headset top cap with a wrench, but only enough to eliminate any play in the headset bearings. Avoid over-tightening, as it may result in damage to the bearings or the steerer tube.
- Attach and tighten the stem onto the steerer tube. Again, do not over-tighten to prevent damage. Make sure the stem is aligned with the front wheel and the handlebars are straight.
- Check the alignment of the forks and frame by standing in front of the bike and looking down at the front wheel and handlebars. If they are not aligned, loosen the stem and adjust accordingly before retightening.
- Finally, test the stability of the forks by gently pushing and pulling the handlebars. They should move smoothly without any excessive play or resistance.
Following these essential steps will ensure proper attachment of forks to a bike frame. Always refer to the manufacturer’s guidelines for specific instructions and torque specifications. If you are uncertain about any step, consult a professional bike mechanic for assistance.
Choosing the Right Forks
When it comes to attaching forks to a bike frame, it is essential to choose the right forks that will provide the best performance and safety. The forks play a crucial role in enabling smooth handling, absorbing shock, and providing stability for the rider. Here are some factors to consider when choosing the right forks for your bike:
| Factor | Description |
|---|---|
| Material | Consider the material used in constructing the forks. Common materials include steel, aluminum, carbon fiber, and titanium. Each material has its own pros and cons in terms of weight, strength, and price. Choose a material that suits your riding style and budget. |
| Type | Decide on the type of forks based on your riding preferences. There are rigid forks that do not have any suspension, suitable for smooth roads and light off-road use. On the other hand, there are suspension forks that provide a smoother ride on rough terrains and absorb shocks. Choose the type of fork that matches your riding style and terrain. |
| Size | Ensure that the forks you choose fit the size and specifications of your bike frame. Pay attention to the steerer tube diameter, axle-to-crown length, and wheel size compatibility. Choosing the right size forks will ensure proper installation and optimal performance. |
| Features | Consider additional features that may enhance your riding experience, such as adjustable suspension, lockout mechanisms, or the ability to mount accessories like fenders or racks. These features can provide added versatility and convenience. |
| Brand and Reviews | Do thorough research on different brands and read reviews from other cyclists to get an idea of the quality and performance of the forks. Opt for reputable brands known for producing reliable and durable forks. |
By carefully considering these factors, you can make an informed decision and choose the right forks that will enhance your riding experience and ensure your safety.
Gathering the Necessary Tools
Before you can attach forks to a bike frame, you’ll need to gather a few essential tools. Having the right tools can make the process much easier and ensure that everything is properly installed.
1. Adjustable Wrench
An adjustable wrench is a versatile tool that you’ll need to tighten and loosen nuts and bolts. Look for one with a comfortable grip and a wide range of sizes to accommodate different bike parts.
2. Allen Wrench Set
Many bike components, including forks, use hex bolts. An Allen wrench set with a variety of sizes will come in handy for tightening and loosening these bolts.
3. Cable Cutters
If you’ll be installing new forks with disc brakes, you may need to cut and re-route the brake cables. Cable cutters will allow you to make clean cuts, ensuring that your brakes work properly.
4. Grease
Applying a thin layer of grease to the area where the forks will attach to the bike frame can help prevent rust and corrosion. Make sure to use a bike-specific grease for best results.
5. Torque Wrench
A torque wrench is essential for tightening bolts to the manufacturer’s recommended specifications. This ensures that the forks are securely attached without risking damage to the bike frame.
By gathering these tools beforehand, you’ll be well-prepared to attach forks to your bike frame and complete the installation with ease.
Preparing the Bike Frame
Before attaching the forks to the bike frame, it’s important to properly prepare the frame. This will ensure that the forks are securely attached and that the bike is safe and stable to ride. Here are the steps to follow when preparing the bike frame:
1. Clean the frame:
Start by cleaning the bike frame thoroughly. Use a mild detergent and a soft cloth to remove any dirt, grease, or debris. Pay close attention to the areas where the forks will be attached, as these need to be clean and free from any obstructions.
2. Inspect the frame:
Next, carefully inspect the bike frame for any damage or cracks. Look for any signs of wear or weakness, particularly around the areas where the forks will be attached. If you notice any damage, it’s important to have it repaired before proceeding with attaching the forks.
3. Prep the mounting points:
Make sure the mounting points on the bike frame are ready for the forks. These are the areas where the fork crown and the fork dropouts will attach. Clean them thoroughly and ensure there are no obstructions or debris that could interfere with the attachment.
4. Check alignment:
Verify that the bike frame is properly aligned. Use a straightedge or a string to check that the frame is in line vertically and horizontally. If the frame is misaligned, it may affect how the forks are attached and could compromise the stability of the bike.
5. Apply grease:
Apply a thin layer of grease to the fork dropouts and the fork crown. This will help prevent rust and make it easier to insert the fork blades into the dropouts. Be sure to use an appropriate grease for your bike’s components.
By properly preparing the bike frame, you’ll ensure a secure and reliable attachment for the forks. This will not only improve the overall performance of your bike, but also make your rides safer and more enjoyable.
Installing the Forks
Installing forks on a bike frame is an important step in the process of building your own bike or replacing old forks. Follow these steps to properly install forks on your bike:
Gather the Tools
Before you begin, make sure you have all the necessary tools. You will need a set of wrenches, a hammer, a torque wrench, a threadless headset, and a crown race installation tool.
Prepare the Frame
Start by removing the old forks, if applicable, by loosening the headset bolts and removing the stem. Clean the inside of the head tube to ensure a smooth surface for the new forks.
Next, lubricate the inside of the head tube with a thin layer of grease. This will help prevent corrosion and ensure smooth movement of the forks.
Install the Crown Race
Slide the crown race onto the forks’ steerer tube. Use the crown race installation tool and a hammer to tap it into place. Be careful not to damage the race or the forks while doing this.
Attach the Forks
Align the forks with the head tube and insert the steerer tube into the head tube. Use a torque wrench to tighten the headset bolts to the manufacturer’s specifications.
Finally, reattach the stem to securely hold the forks in place. Make sure the stem is aligned with the front wheel and tighten the bolts according to the recommended torque settings.
With the forks properly installed, you can now continue building your bike or enjoy a smoother ride with your newly replaced forks.
Tightening the Forks
Once you have attached the forks to the bike frame, it is important to properly tighten them to ensure stability and safety. Follow these steps to tighten the forks on your bike:
-
Prepare the tools
- Before you start tightening the forks, gather the necessary tools. You will need a socket wrench or an Allen key that fits the size of the bolts on your fork.
-
Locate the bolts
- Find the bolts that secure the forks to the bike frame. These bolts are usually located on the top and bottom of the fork steerer tube.
-
Check for any play
- Before tightening, check if there is any play or movement in the forks. If you feel any looseness or wobbling, the forks may need adjustment or tightening.
-
Tighten the bolts
- Using the socket wrench or Allen key, start tightening the bolts on the forks. Begin with a snug fit and gradually increase the torque until the bolts are securely tightened.
- Make sure not to overtighten the bolts, as this can cause damage to the fork or the bike frame.
-
Test the stability
- After tightening the bolts, test the stability of the forks. Push down on the handlebars and check if there is any movement or play in the forks. If they feel secure and stable, you have successfully tightened the forks.
Remember to periodically check the tightness of the forks, especially after long rides or when you feel any looseness. Properly tightened forks will enhance the riding experience and ensure your safety on the road.
Testing and Fine-tuning
Once you have successfully attached the forks to your bike frame, it is crucial to test and fine-tune the installation to ensure optimal performance and safety. Here are some steps you can follow:
- Check the alignment: Make sure that the forks are aligned properly with the front wheel. This can be done by standing in front of the bike and checking if the forks and wheel are in line with each other.
- Test the suspension: If your forks have suspension, it is important to test it to ensure proper functioning. You can do this by applying weight to the front end of the bike and observing how the suspension responds.
- Check for any play or looseness: Give the forks a gentle shake and see if there is any noticeable play or looseness. If you feel any movement or hear any unusual noise, it may indicate that the installation needs adjustment.
- Make necessary adjustments: If you detect any issues during the testing process, you may need to make some adjustments. This could involve tightening bolts, adjusting the suspension settings, or realigning the forks.
- Retest and repeat if needed: After making adjustments, retest the forks to ensure that the changes have resolved any issues. If necessary, repeat the adjustment process until you are satisfied with the performance.
Remember that proper testing and fine-tuning are crucial for both your safety and the longevity of your bike. If you are unsure about any aspect of the installation or adjustments, it is always best to consult a professional bike mechanic for assistance.


