Harley-Davidson motorcycles are known for their smooth rides and iconic style. However, over time, the fork springs on your Harley may begin to wear out and lose their effectiveness, resulting in a less comfortable and less safe ride. Fortunately, changing the fork springs on your Harley is a relatively simple task that can be done at home with the right tools and a little bit of patience.
Before you begin, it’s important to note that changing the fork springs on your Harley can be dangerous if not done correctly. It’s always a good idea to consult your bike’s owner’s manual for specific instructions and safety precautions. Additionally, if you don’t feel comfortable performing this task yourself, it’s best to take your Harley to a professional mechanic.
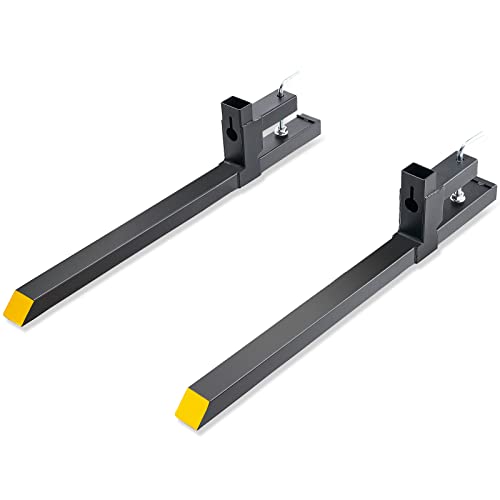
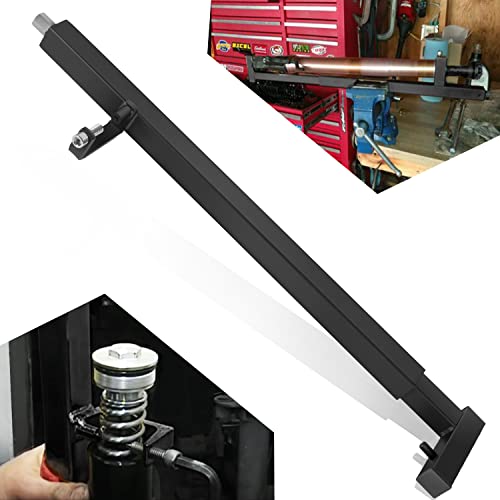
To start, you’ll need a few tools: a socket wrench, a torque wrench, a fork spring compressor tool, and a new set of fork springs. You can find these tools at most motorcycle supply stores or online. Once you have your tools ready, you can begin the process of changing the fork springs.
The first step is to remove the front wheel of your Harley. Use your socket wrench to loosen the axle nut and remove the axle, then carefully remove the front wheel. Next, you’ll need to remove the front forks. Start by loosening the top cap on each fork tube, then use your fork spring compressor tool to compress the springs and remove the fork assembly.
With the fork assembly removed, you can now remove the old fork springs and replace them with the new ones. Simply unscrew the top cap on each fork tube, remove the old springs, and insert the new springs. Make sure the new springs are properly aligned and seated in the fork tubes before proceeding.
Once the new fork springs are in place, carefully reassemble the fork assembly by compressing the springs with your fork spring compressor tool and tightening the top cap on each fork tube. Be sure to torque the top cap to the manufacturer’s specifications using your torque wrench.
Finally, reinstall the front forks onto your Harley by sliding the fork assembly back into the fork tubes and tightening the top cap. Reinstall the front wheel by sliding the axle back through the forks and tightening the axle nut with your socket wrench. Double-check that all bolts and nuts are tightened properly before taking your Harley out for a test ride.
Changing the fork springs on your Harley can improve your bike’s stability, comfort, and overall performance. With the right tools and a little bit of know-how, you can easily tackle this task yourself and enjoy a smoother and more enjoyable ride on your Harley.
Replacing Fork Springs on Harley: Step-by-Step Guide
If you’re experiencing a rough ride or sagging front end on your Harley, it may be time to replace your fork springs. Upgrading the springs can improve your bike’s suspension and overall performance. This step-by-step guide will help you replace your fork springs with ease.
What You’ll Need:
- New fork springs
- Fork oil
- Socket wrench
- Allen wrench set
- Vice grips
- Fork oil measuring tool
- Shop rag
- Service manual (optional, but recommended)
Step 1: Preparation
Before starting the replacement process, make sure to secure and stabilize your bike. Use a lifting stand or have someone assist you in holding the bike upright. Safety should be your top priority.
Step 2: Drain Fork Oil
Locate the drain screws on each fork leg and place a drain pan underneath. Loosen the screws using an Allen wrench and allow the fork oil to drain completely. Clean the area with a shop rag afterward.
Step 3: Remove Forks
Using a socket wrench or Allen wrench, remove the front wheel, fender, and brake calipers. Slowly slide the fork tubes out, taking care not to damage any components.
Step 4: Replace Fork Springs
Place the fork tubes securely in a vice grip and loosen the top caps using an Allen wrench. Carefully remove the top caps and springs from each fork leg. Replace the old springs with new ones, ensuring they are the correct fit for your Harley model..
Step 5: Refill Forks with Oil
Refer to the service manual or manufacturer’s instructions to determine the correct amount of fork oil required for your bike. Use a fork oil measuring tool to achieve the correct levels. Reinstall the top caps tightly.
Step 6: Reassemble Forks
Slide the fork tubes back into the triple trees, making sure they are properly aligned. Reinstall the front wheel, fender, and brake calipers. Tighten all the bolts to the manufacturer’s specifications.
Step 7: Test and Adjust
Once everything is reassembled, bounce the front end of your bike a few times to allow the new springs to settle. Take a short ride to test the performance and adjust the fork oil levels if needed.
By following these steps, you can easily replace the fork springs on your Harley and enjoy a smoother, more comfortable ride. If you’re unsure about any aspect of this process, consult a professional motorcycle mechanic for further assistance.
Preparation and Safety Measures
Before beginning the process of changing the fork springs on your Harley motorcycle, it is important to take some necessary preparations and safety measures to ensure a smooth and safe procedure. Follow these steps to ensure a successful spring replacement:
1. Gather the necessary tools and equipment: You will need a variety of tools to complete this task, including a fork spring compressor, a socket set, a torque wrench, and safety glasses. Make sure you have all the required tools before you start.
2. Park your motorcycle on a flat and stable surface: Find a suitable location to work on your motorcycle, preferably a flat and stable surface. This will provide stability and prevent the bike from accidentally falling over during the procedure.
3. Wear proper safety gear: Always wear protective gear, including gloves and safety glasses, to prevent any potential injuries during the process. Working with motorcycles can be dangerous, so take all necessary precautions.
4. Secure the motorcycle: Before starting any work, make sure the motorcycle is properly secured. Use a motorcycle stand or a sturdy jack to lift the front end of the bike and ensure it is stable and secure.
5. Familiarize yourself with your motorcycle’s manual: It is crucial to read and understand the manufacturer’s instructions and guidelines provided in your motorcycle’s manual. This will help you gain a better understanding of the specific steps and safety precautions required for your particular model.
6. Drain and remove the fork oil: As part of the fork spring replacement process, you will need to drain the existing fork oil. Refer to your motorcycle’s manual for the specific instructions on how to perform this task properly.
7. Work in a clean and organized environment: Keeping your workspace clean and organized will help prevent any mishaps or loss of important parts during the spring replacement process. Use a clean towel or cloth to lay out your tools and parts in an orderly manner.
8. Take your time and follow instructions: Changing fork springs can be a complex task, especially for those who are not experienced in motorcycle maintenance. Take your time, follow the step-by-step instructions provided in your manual, and double-check your work at each stage.
9. Seek professional assistance if needed: If you are unsure about any step of the process or lack the necessary skills and experience, it is recommended to seek professional assistance. Motorcycle dealerships or experienced mechanics can provide expert guidance and ensure a safe and successful spring replacement.
By following these preparation and safety measures, you can proceed with confidence in changing the fork springs on your Harley motorcycle. Remember to prioritize safety at all times and enjoy the improved ride and handling of your bike once the replacement is complete.
Removing Old Fork Springs
To change the fork springs on your Harley, you will first need to remove the old fork springs. Follow these steps to complete this process:
1. Start by securing your motorcycle on a stable lift or jack to ensure it remains steady throughout the process.
2. Locate the front end of your Harley and identify the fork tubes. These tubes are responsible for holding the fork springs in place.
3. Use a socket wrench to loosen and remove the bolts securing the front fender. This will provide better access to the fork tubes and springs.
4. Next, unscrew the fork caps located at the top of each fork tube. These caps hold the fork springs in place and must be removed to access the springs.
5. Once the fork caps are removed, carefully slide the fork tubes downward to release the tension on the old fork springs.
6. With the fork tubes lowered, use an appropriate tool, such as a spring compressor or a pair of fork spring compressors, to compress and remove the old fork springs.
7. As you remove each old spring, be cautious of any residual tension or force stored within. Release the tension slowly and carefully to avoid any accidents or injuries.
8. Repeat this process for both fork tubes until all the old fork springs have been successfully removed.
9. Inspect the removed fork springs for any signs of damage or wear. If necessary, replace them with new springs before reassembling the fork tubes.
Congratulations! You have successfully removed the old fork springs from your Harley. Now you can proceed to install new fork springs and complete the fork spring replacement process.
Installing New Fork Springs
The process of installing new fork springs on a Harley Davidson bike is a straightforward task that can greatly improve the performance and handling of the motorcycle. Here are the steps to follow:
1. Preparation:
Before beginning the installation, ensure that you have all the necessary tools and equipment. This may include a socket set, a torque wrench, a spring compressor, and a service manual specific to your Harley model.
Note: It is recommended to have a professional mechanic guide you through the installation process if you are not familiar with working on motorcycles.
2. Removing the Front Wheel:
Start by securely supporting the motorcycle to prevent it from falling over. Loosen the front axle pinch bolts, remove the axle nut using a socket or wrench, and slide the front wheel out from the fork legs.
3. Removing the Fork Tubes:
Next, you will need to remove the fork tubes from the triple tree. Loosen the upper and lower pinch bolts, then carefully slide the fork tubes downward and out of the triple tree. It is essential to support the fork tubes with one hand while doing this to avoid any sudden movements.
4. Draining the Fork Oil:
Once the fork tubes are removed, drain the fork oil by removing the drain plug or bolt at the bottom of each fork leg. Allow the oil to fully drain into a drain pan or container.
5. Installing the New Springs:
With the fork tubes emptied of oil, the new springs can be installed. Follow the instructions provided in the spring kit or service manual for your specific Harley model. Use a spring compressor tool to compress the new springs and carefully slide them into the fork tubes.
6. Reassembling the Fork Tubes:
Once the new springs are installed, reattach the fork tubes to the triple tree by sliding them upward and aligning them with the fork bracket. Tighten the upper and lower pinch bolts securely.
7. Refilling the Fork Oil:
Refill each fork leg with the recommended amount and type of fork oil, as specified in your service manual. Use a funnel and pour the oil through the fork tube until the proper level is reached. Replace the drain plug or bolt.
8. Reinstalling the Front Wheel:
Slide the front wheel back into the fork legs and insert the axle through the wheel and fork. Tighten the axle nut to the recommended torque using a torque wrench. Check that the front wheel spins freely and align it correctly with the front fender.
9. Test and Adjust:
Before riding the motorcycle, bounce the front end up and down to ensure proper suspension action. Adjust the preload and rebound settings if necessary. Take the bike for a short test ride to evaluate the handling and make any further adjustments as needed.
By replacing the fork springs on your Harley Davidson bike, you can significantly improve its performance and enjoy a smoother and more controlled ride. However, always consult your service manual or seek professional assistance if you are unsure about any step of the installation process.