Changing your push bike fork can be a great way to upgrade your bike’s performance or to replace a damaged or worn-out fork. Whether you are a seasoned bike mechanic or a beginner, this guide will take you through the step-by-step process of changing your push bike fork.
Step 1: Gather the necessary tools
Before you start, make sure you have all the tools you will need for this task. You will typically need a set of Allen wrenches, a socket wrench, a torque wrench, a fork cutting guide, a hacksaw, a ruler or tape measure, and a bike stand or workbench to secure your bike.
Step 2: Remove the front wheel and brake system
Start by removing the front wheel of your bike. Use your Allen wrench or socket wrench to loosen and remove the axle nuts or quick-release skewer. Once the wheel is off, loosen the brake cables and disconnect them from the brake calipers. This will allow you to fully remove the fork without any obstructions.
Note: Make sure to take note of the arrangement and position of the brake components to ensure a proper reinstallation later.
Step 3: Loosen the stem and handlebars
Next, use your Allen wrench or socket wrench to loosen the bolts on the stem and handlebars. Once the bolts are loosened, you can gently tap the top of the stem with a mallet or a rubber mallet to release it from the fork steerer tube. Carefully remove the stem and handlebars from the old fork.
Step 4: Remove the old fork
With the stem and handlebars removed, you can now remove the old fork from the frame. Use your Allen wrench or socket wrench to loosen and remove the bolts or Allen screws that hold the fork in place. Once the bolts are removed, gently pull the fork out of the frame, being careful not to damage the frame or any other components.
Step 5: Install the new fork
Before installing the new fork, you may need to cut the new fork steerer tube to the correct length using a fork cutting guide and a hacksaw. Measure and mark the desired length, then carefully cut the tube. Once the new fork is the correct length, insert it into the frame and tighten the bolts or screws to secure it in place.
Note: Make sure to follow the manufacturer’s instructions for torque specifications when tightening the bolts or screws.
Step 6: Reinstall the stem, handlebars, front wheel, and brake system
With the new fork properly installed, it’s time to reattach the stem and handlebars. Insert the stem into the steerer tube and tighten the bolts to hold it securely. Reattach the brake cables to the brake calipers, making sure they are properly aligned and tightened.
Finally, reinstall the front wheel, making sure it is aligned properly in the fork dropouts and tighten the axle nuts or quick-release skewer. Give the front wheel a spin to make sure it rotates smoothly and the brakes are working correctly.
Step 7: Test and adjust
Before you head out for a ride, take your bike for a test spin to ensure everything is working properly. Check the alignment of your handlebars and make any necessary adjustments. Additionally, make sure your brakes are functioning correctly and the front wheel is securely attached.
By following these steps, you can successfully change the push bike fork and improve your bike’s performance or fix any issues you may have been experiencing. Remember to always prioritize safety and consult a professional if you are unsure about any step in the process.
Step-by-step guide to changing your push bike fork
Changing the fork on your push bike can greatly improve its performance and overall ride quality. Whether you’re upgrading to a new fork or replacing a damaged one, here’s a step-by-step guide to help you through the process.
Step 1: Start by gathering all the necessary tools and equipment. You will need a set of Allen wrenches, a fork crown race remover, a crown race installation tool, a torque wrench, and a new fork that is compatible with your bike.
Step 2: Next, remove the front wheel and detach the brake caliper from the fork. Use the Allen wrenches to loosen and remove the bolts that secure the caliper to the fork. Carefully set the caliper aside.
Step 3: Use the Allen wrenches to remove the bolts holding the stem in place on the steerer tube. Once the bolts are removed, gently tap the top of the stem with a rubber mallet to loosen it. Slowly slide the stem up and off the steerer tube and set it aside.
Step 4: Now it’s time to remove the old fork from the bike. Loosen and remove the pinch bolts on the side of the headset to release the fork. Gently pull the fork out of the head tube, being careful not to damage the frame or any other components.
Step 5: Once the old fork is removed, clean the head tube and fork crown with a cloth to remove any dirt or debris. Take the new fork and apply a small amount of grease to the steerer tube and press the crown race onto the base of the fork crown.
Step 6: Carefully insert the new fork into the head tube, making sure it is properly aligned. Tighten the pinch bolts on the side of the headset to secure the fork in place. Double-check that the fork is straight and centered before moving on.
Step 7: Reinstall the stem onto the steerer tube and tighten the bolts to the manufacturer’s recommended torque. Make sure the stem is properly aligned and tightened before proceeding.
Step 8: Reattach the brake caliper to the fork using the Allen wrenches. Make sure the caliper is properly aligned with the brake rotor and tighten the bolts securely.
Step 9: Finally, reinstall the front wheel and make sure it is securely fastened. Double-check all the bolts and connections to ensure everything is tight and secure before taking your bike out for a test ride.
By following these steps, you’ll be able to successfully change the fork on your push bike and enjoy improved performance and ride quality. Remember to always consult the manufacturer’s instructions or seek professional help if you’re unsure about any step of the process.
Preparation for fork replacement
Before you begin replacing the fork on your push bike, it’s important to gather all the necessary tools and materials. Here are the steps you should follow to prepare for the fork replacement:
1. Gather the tools
Make sure you have all the required tools for the job. This usually includes a set of metric Allen wrenches, a torque wrench, a crescent wrench or adjustable spanner, a hammer, a rubber mallet, a headset press or a headset cup remover tool, and a fork crown race setter tool.
2. Select the new fork
Choose a fork that is compatible with your bike’s frame and suspension system. Consider factors such as axle type, steerer tube length, travel distance, and wheel size when selecting the new fork.
3. Remove the old fork
Before removing the old fork, make sure to release any air pressure from the suspension system if applicable. Use the appropriate tools to remove the stem, handlebars, front wheel, and brake caliper. Loosen and remove the crown race from the old fork using a crown race removal tool.
4. Clean and inspect the frame
With the old fork removed, take the opportunity to clean and inspect the areas where the new fork will be installed. Remove any dirt, grease, or debris and check for any damage or wear that may affect the installation of the new fork.
5. Prepare the new fork
Before installing the new fork, ensure that all necessary components, such as the crown race and any bearing cups, are properly installed. Apply a thin layer of grease to the inside of the fork steerer tube to aid in installation and prevent corrosion.
By following these preparation steps, you’ll be well-equipped to begin the process of replacing the fork on your push bike. Remember to consult the manufacturer’s instructions for your specific bike and fork model for any additional steps or recommendations.
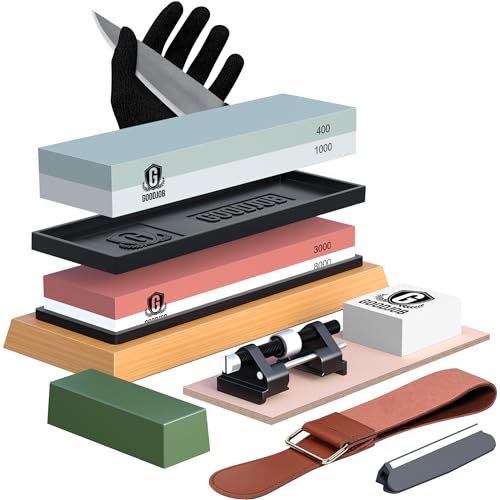
Tools and materials needed
Before you begin changing your push bike fork, make sure you have the following tools and materials:
- Adjustable spanner or socket set
- Allen wrench set
- Torque wrench
- Grease
- Rag or paper towels
- Replacement fork
- Stem remover tool
- Fork crown race setter
- Crown race removal tool
Having these tools and materials ready will ensure a smoother and more efficient fork replacement process.
Removal of the old fork
To begin the process of changing a push bike fork, you will need to first remove the old fork. Follow these steps:
- Gather the necessary tools: You will need a set of Allen keys, an adjustable wrench, and a hammer.
- Secure the bike: Find a stable surface to secure the bike. Consider using a bike stand or a workbench to prevent the bicycle from moving during the removal process.
- Loosen the stem: Locate the stem bolts at the top of the fork. Use the Allen keys to loosen and remove them, allowing the handlebars to move freely.
- Remove the front wheel: Use an adjustable wrench to loosen the nuts or quick-release mechanism securing the front wheel. Once loose, carefully remove the wheel and set it aside.
- Detach the brake: If your bike has rim brakes, use an Allen key to loosen the brake caliper and remove it from the fork. If you have disc brakes, disconnect the brake cable from the caliper.
- Disconnect the cable housing: Locate the cable housing attached to the fork and disconnect it from any cable clamps or guides. Release any zip ties or clips that may be securing the cable housing.
- Remove the headset: Use an Allen key to loosen the headset cap bolt located on the top of the fork. Once loose, carefully remove the cap and spacer below it. Take note of the order and orientation for reassembly.
- Remove the fork: With the headset cap and spacer removed, firmly grasp the fork blades and pull upwards to remove the fork from the bike frame. If the fork is stuck, tap the steerer tube with a hammer to loosen it before attempting to remove it.
With these steps completed, you have successfully removed the old fork from your push bike. Proceed to the next step to install the new fork.
Installation of the new fork
Once you have removed the old fork from your push bike, it’s time to install the new fork. Follow the steps below to ensure a proper and secure installation:
Step 1: Prepare the new fork
Before installing the new fork, make sure it is the correct size and type for your push bike. Check that the steerer tube length matches the head tube length of your bike frame. If necessary, cut the steerer tube to the appropriate length using a tube cutter or hacksaw.
Step 2: Grease the headset bearings
Apply a thin layer of bicycle-specific grease to the headset bearings. This will help reduce friction and ensure smooth steering.
Step 3: Install the crown race
Slide the crown race onto the fork’s steerer tube. Use a crown race setting tool or a piece of PVC pipe to tap the race into place until it is fully seated against the fork crown.
Step 4: Install the fork
Insert the steerer tube into the head tube of your bike frame. Ensure that the fork is aligned properly and that the headset bearings are seated correctly. Use a torque wrench to tighten the headset cap bolt to the manufacturer’s recommended torque setting.
Step 5: Attach the brake and wheel
Reinstall the front brake and wheel onto the bike. Adjust the brake caliper to ensure proper alignment with the brake rotor or rim. Make sure the wheel is securely attached, and the axle is tightened to the proper torque specification.
With the new fork installed, give it a few test rides to ensure everything is working properly. Check for any unusual noises or vibrations and make any necessary adjustments. You are now ready to hit the road with your newly installed push bike fork!