


Swapping out a threaded fork for a threadless one can be a daunting task, but with the right tools and some know-how, it’s a relatively straightforward process. Whether you’re looking to upgrade to a modern threadless fork or just want to change the look of your bike, this guide will walk you through the steps to make the switch.
Step 1: Gather the necessary tools
Before you begin, make sure you have the right tools on hand. You’ll need a set of Allen wrenches, a headset press or a large adjustable wrench, a pair of pliers, and a crown race setter. Having the proper tools will make the process much easier and ensure that you don’t damage any of the components.
Step 2: Remove the old fork
The first step is to remove the old threaded fork from your bike. Start by loosening the stem bolt located on the top of the stem. Once the stem bolt is loose, remove the stem from the steerer tube. Next, remove the front brake caliper and any other accessories that may be attached to the fork. Finally, loosen the headset locknut and remove the fork from the frame.

Step 3: Install the new fork
With the old fork removed, it’s time to install the new threadless fork. Start by applying a thin layer of grease to the inside of the head tube. This will help prevent corrosion and make it easier to remove the fork in the future. Next, slide the crown race onto the fork steerer tube and set it in place using a crown race setter. Insert the fork into the head tube and tighten the headset locknut to secure it in place.
Step 4: Reassemble the bike
Once the new fork is installed, it’s time to reassemble your bike. Start by sliding the stem back onto the steerer tube and tightening the stem bolt. Make sure the stem is aligned with the front wheel and the handlebars are straight. Then, reattach the front brake caliper and any other accessories that were removed. Finally, give the entire bike a once-over to make sure everything is in place and secure.
By following these steps, you can easily change your threaded fork to a threadless one. Just remember to take your time, use the right tools, and double-check everything to ensure a smooth and successful swap.
How to Convert Threaded Forks to Threadless: A Step-by-Step Guide
Converting threaded forks to threadless can be a great way to upgrade your bike’s front end and take advantage of the latest advancements in headset technology. This guide will walk you through the process step-by-step, ensuring a smooth and successful conversion.
Tools and Materials You Will Need:
- Threadless headset
- Threadless stem
- Threadless fork
- Headset press
- Headset spacers
- Allen wrench set
- Adjustable wrench
- Grease
Step 1: Remove the Old Fork
Start by removing the front wheel from your bike. Loosen and remove the headset locknut and the upper and lower headset cups using an adjustable wrench. Carefully remove the fork from the frame.
Step 2: Install the Threadless Fork
Apply a small amount of grease to the crown race of the new threadless fork. Slide the fork into the frame, making sure the crown race is properly seated on the fork’s crown. Tighten the headset cups onto the frame using a headset press.
Step 3: Install the Threadless Headset
Grease the bearings and races of the threadless headset. Place the lower headset cup onto the fork’s crown race, followed by the bearings and upper headset cup. Install the headset spacers on top of the upper headset cup. Finally, secure the headset using a headset press.
Step 4: Install the Threadless Stem
Grease the stem’s steerer tube and slide it onto the fork’s steerer tube. Align the stem with the front wheel and tighten the stem’s bolts using an Allen wrench set. Make sure the stem is securely attached to the fork.
Step 5: Test and Adjust
Once everything is installed, make sure to test the steering and make any necessary adjustments to ensure smooth operation. Double-check all bolts and connections for tightness.
By following these steps, you should be able to successfully convert your threaded forks to threadless. Enjoy the improved performance and adjustability that a threadless setup offers!
Understanding the Difference between Threaded and Threadless Forks
When it comes to bicycle forks, one of the main design differences you’ll come across is whether they are threaded or threadless. Understanding the difference between these two types of forks is essential, especially if you are considering changing from a threaded fork to a threadless fork.
A threaded fork has a stem that screws directly into the fork’s steerer tube. This design has been widely used for many years and is an older style of fork. It often requires a threaded headset and has the disadvantage of being more difficult to adjust and install.
On the other hand, a threadless fork uses a compression system to hold the stem in place. This design is more modern and has become increasingly popular in recent years. It typically requires a threadless headset and offers several advantages over a threaded fork.
One of the key advantages of a threadless fork is its simplicity and ease of adjustment. With a threadless fork, the stem is clamped onto the steerer tube using a compression bolt, making it much easier to make changes to the handlebar height and reach. This also means that swapping out stems or handlebars is a quick and straightforward process.
Another advantage of a threadless fork is its increased stiffness and strength. The absence of threads allows for a larger diameter steerer tube, which improves the overall rigidity of the fork. This can enhance steering precision and provide a more responsive ride, especially when riding off-road or at higher speeds.
Switching from a threaded fork to a threadless fork requires a few changes to your bike’s components. You will need to replace the threaded headset with a threadless headset, as well as switch to a threadless stem. Additionally, you may need to modify or replace the fork’s steerer tube to accommodate the threadless system.
| Threaded Fork | Threadless Fork |
|---|---|
| Older design | Modern design |
| Requires threaded headset | Requires threadless headset |
| Difficult to adjust and install | Easy to adjust and install |
| Smaller diameter steerer tube | Larger diameter steerer tube |
| Less stiff and strong | More stiff and strong |
In conclusion, understanding the difference between threaded and threadless forks is crucial when considering a conversion from one type to another. While both types have their advantages and disadvantages, the threadless fork offers simplicity, ease of adjustment, and increased stiffness and strength. Switching to a threadless fork may require some component changes, but it can greatly enhance your riding experience.
Tools and Materials You’ll Need for the Conversion
Converting threaded forks to threadless requires a few specific tools and materials to ensure a successful transition. Here is a list of what you’ll need:
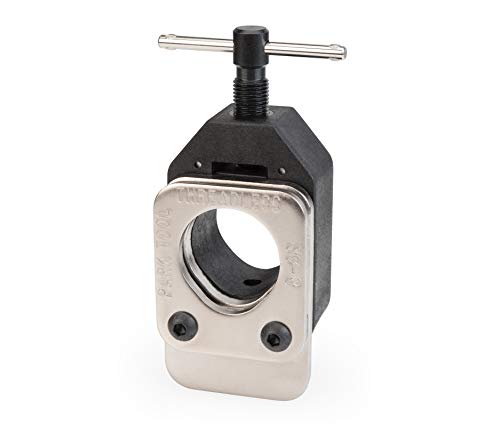
1. Fork Cutting Guide
To remove the threaded portion of your fork, you’ll need a fork cutting guide. This tool helps you make a clean, straight cut and ensures that the new threadless headset fits properly.

2. Pipe Cutter
A pipe cutter is necessary to cut the steerer tube of your fork to the correct length. Make sure to use a pipe cutter specifically designed for bike forks to ensure a smooth and precise cut.
3. Star Nut Setter
A star nut setter is used to install the star nut in the steerer tube. This component is essential for attaching the stem to the fork. Ensure that you choose a star nut setter that matches the size of your steerer tube.
4. Threadless Headset
You’ll need a threadless headset to replace the threaded headset. Make sure to select a headset that is compatible with your fork’s steerer tube diameter. The headset is responsible for providing smooth steering and stability to your bike.
5. Stem
A stem is required to attach the handlebars to the fork. Choose a stem that matches the diameter of your handlebars and is compatible with the steerer tube diameter of your fork.
6. Allen Wrenches
Various sizes of Allen wrenches will be needed for the installation process. These wrenches are used to tighten the bolts and ensure that all components are securely fastened.
7. Grease
Applying grease to the threads and contact points of the components is crucial for smooth installation and to prevent corrosion. Make sure to use grease that is specifically designed for bicycles.
Make sure to gather all of these tools and materials before starting the conversion process. Having everything ready will make the process smoother and faster, ensuring that your bike is ready to ride with the new threadless fork!
Step-by-Step Process of Converting Threaded Forks to Threadless
Step 1: Remove the threaded headset
Start by loosening the locknut on the threaded headset using a wrench. Once loose, remove the locknut, the upper bearing, the lower bearing, and the top race. Set these components aside for later use or replacement.

Step 2: Remove the stem and handlebars
Next, remove the stem bolts located on top of the stem. Once loosened, the stem should easily slide out of the fork’s steerer tube. Remove the handlebars from the stem and set them aside.
Step 3: Remove the threaded fork
Using a wrench, loosen the headset locknut located at the bottom of the fork’s steerer tube. Once loose, unscrew the fork from the headset and remove it from the frame. Take caution not to damage the frame or any other components during this process.
Step 4: Prepare the threadless headset
If your threadless headset did not come pre-assembled, you will need to install the cups and bearings onto the new fork. Apply a thin layer of grease to the cups and press them into the head tube of the frame. Insert the appropriate bearings into the cups.
Step 5: Install the threadless fork
Gently slide the threadless fork into the head tube of the frame, making sure the bearings align properly with the cups. Secure the fork using the appropriate headset compression cap and bolt, making sure not to overtighten.
Step 6: Install the stem and handlebars
Attach the stem to the fork’s steerer tube and tighten the bolts using the appropriate torque. Make sure the stem is aligned with the front wheel and tighten the bolts evenly to ensure proper alignment. Attach the handlebars to the stem and tighten the clamp bolts.
Step 7: Adjust the headset and test
Begin by tightening the headset compression cap until there is no play or wobble in the fork. Test the fork’s movement by turning the handlebars from side to side. If there is any resistance or tightness, adjust the headset accordingly until the movement feels smooth.
Step 8: Final check and safety
Double-check that all bolts are tightened securely, especially the stem bolts and the headset compression cap bolt. Test the bike’s stability by gently rocking it back and forth, ensuring there is no excessive movement or play in the steering. Once everything feels secure, your threadless fork conversion is complete.


