
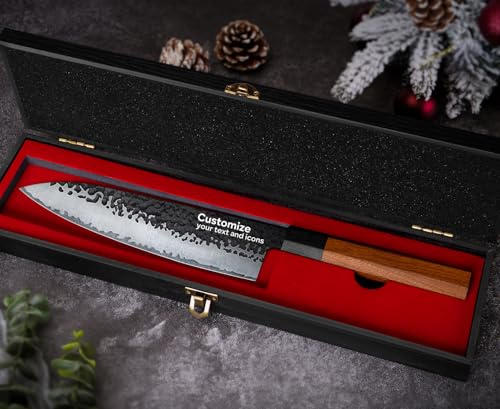


Do you want to add a personal touch to your dining experience? Customising your fork and knife is a unique way to showcase your personality and style. Whether you’re hosting a special event or looking to spice up your everyday meals, customised cutlery can make a statement.
Step 1: Choose Your Design
Before you start customising your fork and knife, take some time to brainstorm and choose a design that reflects your individuality. You can opt for a simple monogram or get creative with intricate patterns and motifs. The possibilities are endless, so let your imagination run wild!
Step 2: Gather Your Materials
Once you have decided on a design, gather all the necessary materials. You will need clean and dry forks and knives, acrylic paints in your chosen colours, a paintbrush, masking tape, and a sealant to protect the design from wear and tear.
Step 3: Prep and Paint

Before you start painting, make sure to wash and dry your cutlery thoroughly. Then, use masking tape to mark off any areas you do not want to paint. This will help you achieve clean and crisp lines. Now, it’s time to apply the paint! Dip your paintbrush into the acrylic paint and carefully apply it to the desired areas of your fork and knife. Allow the first coat to dry completely before applying additional coats for a more vibrant finish.
Step 4: Seal and Cure
Once you are satisfied with the painted design, let it dry completely. Then, apply a sealant to protect your customisation from scratches and fading. Follow the manufacturer’s instructions for curing time, as this may vary depending on the type of sealant you choose.
Step 5: Enjoy Your Customised Cutlery
Once the sealant has fully cured, your customised fork and knife are ready to use! Show off your unique style and bring a touch of personality to your meals. Whether it’s a regular dinner or a special occasion, your customised cutlery will surely impress your guests and make your dining experience even more enjoyable.
Customising your fork and knife is a fun and creative way to add a personal touch to your dining table. Get started today and unleash your imagination!
Personalizing your cutlery
When it comes to making your dining experience unique, personalizing your cutlery is one way to add a special touch. Whether it’s for a special occasion or just to add some personality to your everyday meals, there are several ways to customize your forks and knives.
Engraving
Engraving your cutlery is a classic way to add a personal touch. It can be as simple as adding your initials or a short phrase to each utensil. Many specialty shops offer engraving services, or you can even do it yourself if you have the right tools. Engraving can give your cutlery a sophisticated and elegant look.
Handle Wrapping
Another way to personalize your cutlery is by wrapping the handles with different materials. You can use colorful threads, ribbons, or even strips of leather to create a unique and stylish look. This method allows you to easily swap out the wrapping whenever you feel like changing up the style.
It’s important to choose materials that are durable and easy to clean, as cutlery can come into contact with food and liquids. Experiment with different textures and colors to find the perfect combination that suits your personal taste.
| Method | Pros | Cons |
|---|---|---|
| Engraving | Classic and elegant look | Requires special tools or services |
| Handle Wrapping | Easy to personalize and change | Requires regular upkeep and maintenance |
Remember, personalizing your cutlery is a great way to showcase your individuality and make your dining experience more enjoyable. Whether you choose to engrave your initials or wrap the handles, these small touches can make a big difference.
Enhancing the look of your silverware
Your silverware, such as forks and knives, can be more than just functional tools for dining. With a little creativity and a touch of personalization, you can transform them into unique and eye-catching pieces that reflect your style and personality. Here are some ideas to enhance the look of your silverware:
1. Personalized Engravings
One of the simplest ways to customize your silverware is by engraving them with your initials or a special message. This can be done by a professional or even by using a DIY engraving tool. Engravings add a personal touch and make your silverware truly one-of-a-kind.
2. Paint or Dip-dye
If you’re feeling artistic, you can paint your silverware with food-safe paint or even dip-dye them. This allows you to create a color scheme that matches your table setting or complements your kitchen decor. Just remember to use non-toxic materials and follow the necessary safety precautions.
3. Add Decorative Handles
Another way to enhance the look of your silverware is by replacing the handles with decorative ones. You can find a wide variety of handle designs made from materials like wood, resin, or even gemstones. This simple swap instantly elevates the look of your silverware and gives them a unique twist.
4. Wrap with Fabric or Ribbon
Add a touch of elegance to your silverware by wrapping the handles with fabric or ribbon. You can use lace, satin, or even patterned cloth to create a sophisticated look. This method is not only visually appealing but also provides a more comfortable grip during meals.
Remember, when customizing your silverware, make sure to consider the practicality and functionality. Avoid covering the eating surfaces to ensure your silverware remains food-safe. With these creative ideas, you can make your dining experience even more enjoyable and stylish.
Adding decorative elements to your utensils
If you’re looking to add a touch of personal flair to your fork and knife, there are several ways you can customize them with decorative elements. From simple DIY techniques to more advanced methods, the possibilities are endless. Here are some ideas to get you started:
1. Engraving
Engraving your utensils is a classic and elegant way to customize them. You can engrave your initials, a special date, or even a short message. This can be done by using an engraving tool or by taking your utensils to a professional engraver. Not only does it add a personal touch, but it also makes your utensils uniquely yours.

2. Adding gemstones
If you want to add a touch of glamor to your utensils, consider adding gemstones. You can choose small, decorative gemstones that can be glued onto the handle of your utensils. Select gemstones that match your personal style or the occasion you plan to use the utensils for. This will give your utensils an elegant and luxurious look.
Make sure to use strong adhesive specifically designed for attaching gemstones to metal surfaces, as regular glue might not hold them securely.
Remember to always clean your utensils with gentle soap and water to preserve the decorative elements you’ve added. Avoid using harsh abrasives or abrasive cleaners, as they can damage the customization.
Painting and engraving your fork and knife
If you want to give your forks and knives a personalized touch, painting and engraving are great ways to do it. These methods allow you to create unique designs that reflect your style and taste.
When it comes to painting your utensils, you can use acrylic paints or enamel paints. Acrylic paints are water-based and easy to work with. They dry quickly and come in a wide range of colors, allowing you to experiment with different shades and combinations. Enamel paints, on the other hand, are oil-based and provide a glossy finish. They are known for their durability and resistance to chipping.

Before you start painting, make sure to clean your fork and knife thoroughly to remove any dirt or grease. You can use warm soapy water and a sponge for this purpose. Once the utensils are dry, you can apply a layer of primer to help the paint adhere better. Let the primer dry completely before moving on to the next step.
Next, you can start painting your design using a small brush or even a toothpick for fine details. Take your time and use thin coats of paint to prevent any drips or streaks. You can also use stencils or tape to create clean lines and patterns.
If you prefer engraving over painting, you can use a variety of tools such as a Dremel rotary tool or an engraving pen. Ensure that your utensil is secured properly before you begin engraving. Start by lightly marking your design with a pencil, then slowly and carefully trace over the lines with your engraving tool. Take breaks if necessary to prevent the utensil from becoming too hot.
Once you finish painting or engraving, allow the utensils to dry completely before using or handling them. This will ensure that the design stays intact and doesn’t smudge or chip. If desired, you can also apply a coat of clear varnish or sealant to protect the design and add a glossy finish.
- Choose acrylic or enamel paints for painting.
- Clean utensils thoroughly before painting.
- Apply a layer of primer before painting.
- Use thin coats of paint.
- Consider using stencils or tape for clean lines and patterns.
- Secure utensils properly before engraving.
- Trace over pencil lines with an engraving tool.
- Allow utensils to dry completely before use.
- Apply clear varnish or sealant for added protection.
With these techniques, you can transform your ordinary forks and knives into personalized pieces of art that will impress your guests and make every meal special.
Tips for maintaining customised cutlery
Once you have customised your cutlery to make it one-of-a-kind, it is important to properly maintain it to ensure its longevity and pristine appearance. Here are some helpful tips:
1. Hand-wash only: To prevent any damage to the customisation, it is recommended to hand-wash the cutlery rather than using a dishwasher. The high heat and harsh detergents in dishwashers can fade or wear away the customised design.
2. Use mild soap: When cleaning the cutlery, use a mild soap and warm water. Avoid using abrasive cleaners or scrub brushes as they can scratch the customised surface.
3. Dry thoroughly: After washing, make sure to dry the cutlery completely to prevent any water spots or corrosion. Use a soft cloth or towel to gently dry the pieces.
4. Avoid harsh chemicals: When storing the customised cutlery, keep them away from harsh chemicals or cleaning agents, as they can potentially damage the finish. Instead, store them in a clean and dry area.
5. Handle with care: Be mindful when using the customised cutlery to avoid any unnecessary force or impact on the design. Avoid using knives to cut on hard surfaces, as it can scratch or chip the customisation.
6. Regularly inspect: Regularly inspect the customised cutlery for any signs of wear or damage. If you notice any issues, such as peeling or fading, consider contacting the artisan or manufacturer who customised your cutlery for guidance on repair or touch-up options.
By following these maintenance tips, you can ensure that your customised cutlery remains in excellent condition and retains its unique charm for years to come.


