Fork oil plays a crucial role in the performance of your bike’s forks. It not only lubricates the moving parts but also provides damping to absorb the bumps and vibrations. Over time, the oil can degrade or leak, causing a loss of performance and potentially damaging the forks themselves. To maintain optimal fork performance, it’s important to regularly check and fill the oil in your forks.
Step 1: Gather the necessary tools
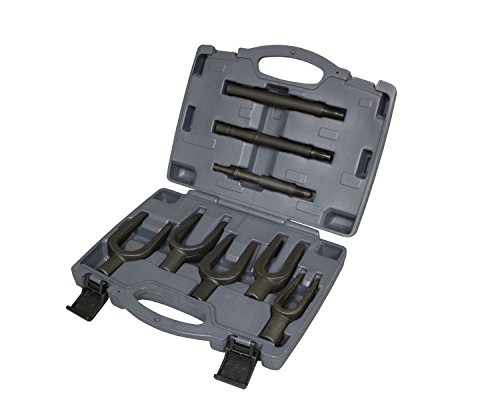
Before you begin, make sure you have all the tools you’ll need. These typically include a socket wrench or hex key set, a measuring cup, a syringe or pump, and the correct type and amount of fork oil for your specific bike.
Step 2: Remove the fork caps
Start by removing the fork caps. Depending on your bike, this may require a socket wrench or hex key. Be sure to consult your bike’s manual or a trusted mechanic for the correct procedure specific to your bike. With the fork caps removed, you’ll have access to the fork oil.
Step 3: Drain the old oil
To fill your forks with fresh oil, you’ll first need to drain the old oil. This can typically be done by turning the forks upside down and compressing them to release the oil. It’s important to follow the manufacturer’s instructions or consult a professional mechanic for the correct procedure for your specific forks.
Step 4: Measure and fill the new oil
Once the old oil has been drained, it’s time to measure and fill the forks with fresh oil. Consult your bike’s manual or the manufacturer’s specifications to determine the correct volume of oil to use. Carefully pour the oil into a measuring cup, then use a syringe or pump to fill the forks to the appropriate level. Take care to avoid overfilling, as this can negatively affect performance.
Step 5: Reassemble and test
With the fresh oil in place, reassemble the fork caps and ensure they are tightened securely. Once everything is back together, cycle the forks a few times to distribute the oil evenly. Take your bike for a test ride to ensure the fork performance is optimal and make any necessary adjustments.
By regularly checking and filling the oil in your bike’s forks, you can maintain optimal performance and extend their overall lifespan. If you’re unsure or uncomfortable performing this maintenance yourself, it’s always best to consult a qualified mechanic for assistance.
Step-by-Step Guide: How to Fill Oil in Forks
Proper maintenance of your bike’s forks is essential for ensuring smooth and safe rides. One critical aspect is regularly filling the forks with oil. Here is a step-by-step guide on how to fill oil in forks:
Step 1: Ensure that you have the right tools and materials for the job, including the correct type and amount of fork oil specified by your bike manufacturer.
Step 2: Locate the fork oil drain screws or bolts on your bike’s forks. These are typically situated at the bottom of the forks.
Step 3: With your bike on a stand or center stand, loosen and remove the drain screws or bolts using the appropriate tools. Be careful not to lose any gaskets or washers.
Step 4: Allow the old oil to completely drain out from the forks. You can manually compress the fork tubes or gently bounce the front end of the bike to facilitate the draining process.
Step 5: Once the old oil has drained, clean the drain screws or bolts and their surrounding areas. This will prevent any dirt or debris from contaminating the new oil.
Step 6: Measure and pour the specified amount of fresh fork oil into each fork tube. It is recommended to use a funnel to avoid spills or overfilling.
Step 7: Reinstall the drain screws or bolts and tighten them to the manufacturer’s recommended torque specification. Ensure that any gaskets or washers are properly seated.
Step 8: Clean up any spills or drips and wipe down the forks to maintain a tidy appearance.
Step 9: With the forks refilled, it is necessary to bleed any air trapped within the system. Consult your bike’s manual for the specific procedure.
Step 10: Test the forks’ performance by gently compressing the front end of the bike and checking for any leaks or abnormalities. If everything looks and feels good, your forks are ready for the next ride!
Note: If you are unsure about any step or lack the necessary tools, it is recommended to consult a professional bike mechanic.
Tools and Materials Needed
Before you begin filling oil in your forks, make sure you have the following tools and materials:
- A container to hold the fork oil (usually a graduated cylinder or a measuring cup with milliliter markings)
- Fork oil of the correct viscosity and volume (refer to your motorcycle’s manual for the specific oil type and amount)
- An appropriate wrench or socket to remove the fork caps
- A clean cloth or rag to wipe off any spilled oil or debris
- A funnel or syringe to assist with pouring the oil into the forks
- A suspension oil seal driver or a PVC pipe (if you are replacing the fork seals)
- A torque wrench to tighten the fork caps to the recommended torque
Having these tools and materials ready will ensure that you can complete the task efficiently and accurately. It is important to use the correct type and volume of fork oil specified by the manufacturer to maintain the optimal performance of your forks.
Preparation and Safety Measures
Before starting the process of filling oil in your forks, it is important to gather all the necessary tools and equipment. Make sure you have the following items ready:
- A suitable oil for your fork type
- An oil measuring cylinder
- A clean and lint-free cloth
- A suitable wrench or socket set
- A fork seal driver or a suitable tool for removing the dust seals
- A piston-locking tool (if required by your fork model)
It is recommended to wear safety gloves and goggles to protect yourself from potential oil spills and any debris that may fall during the process.
Step 1: Preparation
First, ensure that your bike is on a stable surface and the front wheel is off the ground. This will provide better access to the fork and prevent any accidental movement.
Step 2: Detaching the Fork
If necessary, remove any components that are blocking access to the fork. This may include the front brake caliper, fender, or any other parts obstructing the fork tubes.
Once the fork is exposed, use the appropriate wrench or socket set to loosen and remove the fork caps. Be cautious as the fork caps may be under pressure, especially if the forks have not been serviced in a long time.
Step 3: Draining the Oil
With the fork caps removed, place the oil measuring cylinder under the fork to catch the oil. Gently pump the fork legs to release the oil. Repeat this process until the majority of the oil has been drained. Make sure to dispose of the old oil properly according to local regulations.
After draining the oil, use a clean cloth to wipe the inner tubes and remove any debris or dirt that may have accumulated.
Important: This process may differ depending on the fork brand and model. It is always advisable to consult the manufacturer’s instructions or a professional mechanic before proceeding.
Remember to take your time and follow safety precautions to ensure a successful and safe oil-filling process for your forks.
Filling Oil in Forks
Forks are an important component of a bicycle’s suspension system, and proper maintenance is crucial for optimal performance. One essential task is regularly filling oil in the forks. Here is a step-by-step guide on how to do it.
Step 1: Gather the Required Materials
Before starting, ensure you have the necessary materials. You will need:
- Fork oil
- An oil measuring bottle
- A clean cloth
- A tray or bucket to collect any spilled oil
Step 2: Prepare the Forks
To begin, make sure your bicycle is stable and secure. Remove the front wheel to have easy access to the forks. Clean the outside of the forks using a clean cloth, ensuring there is no dirt or debris that could end up inside during the oil filling process.
Step 3: Drain the Old Oil
Next, remove the caps from the top of the forks. They may be secured with screws or a simple push-and-twist mechanism. Once the caps are removed, the old oil can be drained. To do this, slowly pump the forks up and down until no more oil comes out. Collect the used oil in a tray or bucket.
Step 4: Measure and Add New Oil
Using the oil measuring bottle, fill it with the recommended amount of fork oil according to your bicycle’s specifications. Carefully pour the oil into the forks, ensuring that it goes into the correct chamber. Repeat this process for both forks.
Step 5: Reassemble and Test
After the oil has been added, replace the caps on the forks securely. Make sure they are properly tightened to prevent any leakage. Reinstall the front wheel and check that everything is securely in place. Finally, test the forks by compressing them a few times to distribute the new oil evenly.
Following these steps will help ensure that your bicycle’s forks are properly filled with oil, contributing to a smoother and more enjoyable riding experience. Regular maintenance and oil changes are important for the longevity and performance of your bike’s front suspension system.
| Materials |
|---|
| Fork oil |
| An oil measuring bottle |
| A clean cloth |
| A tray or bucket |