Carbon forks are a popular choice among cyclists due to their lightweight and durable construction. Whether you’re upgrading your current forks or replacing a damaged set, fitting carbon forks correctly is crucial for safety and optimal performance.
Before you begin, it’s important to note that fitting carbon forks can be a task best left to professionals if you’re not confident in your mechanical abilities. However, with the right tools and knowledge, you can successfully fit carbon forks on your own.
Firstly, make sure you have all the necessary tools at hand, including a torque wrench, a set of hex wrenches, and a threadless headset installation tool. Additionally, gather any specific instructions or documentation that came with your carbon forks, as different manufacturers may have their own guidelines.
When fitting carbon forks, always begin by removing the existing forks. Loosen the stem bolts to detach the handlebars from the stem, then unscrew any bolts securing the stem to the top of the headset. Once the stem is free, carefully slide it off the fork steerer tube.
Next, loosen the preload bolt on the top cap of the headset. This will release tension on the bearings and allow you to remove the top cap. Take note of any spacers or washers underneath the top cap, as these will need to be replaced in the correct order.

With the top cap removed, the fork should be free to slide out of the frame’s head tube. Slowly slide the carbon forks out, taking care not to damage the crown or dropouts. Inspect the fork steerer tube for any signs of damage or excessive wear, as this could affect the performance of the new forks.
Before installing the new carbon forks, apply a thin layer of carbon assembly paste to the inside of the head tube. This will help prevent any creaking or slipping of the forks once they are installed. Place any necessary spacers or washers on the new fork steerer tube, following the same order as before.
Now, carefully slide the new carbon forks into the head tube, making sure they are aligned correctly. Gently tighten the top cap onto the steerer tube, taking care not to overtighten and damage the carbon. Use a torque wrench to tighten the stem bolts to the manufacturer’s recommended torque settings.
Once everything is securely in place, double-check that the handlebars are aligned with the front wheel and that there is no excessive play or tightness in the forks. If everything looks and feels right, take your bike for a test ride to ensure that the new carbon forks are performing as expected.
Fitting carbon forks may seem like a daunting process, but with the right tools and a methodical approach, it can be a rewarding DIY project. However, if you’re unsure at any point or encounter any difficulties, don’t hesitate to seek professional assistance. Your safety and the performance of your bike are paramount.
Choosing the Right Carbon Forks
When it comes to choosing carbon forks for your bike, there are several factors you should consider. The right carbon forks can greatly improve your riding experience, providing better handling, increased comfort, and reduced weight. Here are a few key points to keep in mind:
1. Compatibility
Before purchasing carbon forks, make sure they are compatible with your bike frame. Consider the specific requirements of your bike, such as the axle type, steerer tube diameter, and brake compatibility. Having the right fit will ensure optimal performance and safety.
2. Riding Style
Consider your riding style and the type of terrain you plan to ride on most frequently. Carbon forks come in various designs, each offering different levels of stiffness and compliance. If you’re a competitive road cyclist, you may prefer a stiffer fork for optimal power transfer. On the other hand, if you enjoy long-distance endurance rides, a more compliant fork may provide better shock absorption.
3. Weight
Weight is a critical factor to consider when choosing carbon forks. Carbon fiber is known for its lightweight properties, so opting for carbon forks can significantly reduce the overall weight of your bike. However, keep in mind that lighter forks often come at a higher price point. Find the right balance between weight and your budget.
Remember to do thorough research before making a purchase. Read reviews, consult with experts, and consider your specific needs and preferences. By choosing the right carbon forks, you can enhance your riding experience and take your cycling to the next level.
Considerations for Carbon Fork Sizing
When it comes to fitting carbon forks, it’s crucial to consider a few key factors. Proper sizing is essential for ensuring optimal performance and safety. Here are some important considerations to keep in mind:
- Wheel size: Carbon forks come in different sizes to accommodate various wheel sizes. Make sure to choose a fork that matches the size of your wheels to ensure a proper fit.
- Steer tube length: The length of the steer tube determines the height of your handlebars. Measure the length from the top of the headset to the top of the steer tube and choose a fork with a steer tube that matches this measurement.
- Rake: The rake of a fork refers to the curvature of the fork blades. It affects the handling and stability of your bike. Consider your riding style and preferences when choosing a fork with the appropriate rake.
- Weight: Carbon forks are known for their lightweight properties, but there can still be variations in weight depending on the specific model. Consider the weight of the fork and how it will affect the overall weight of your bike.
- Brake compatibility: Ensure that the carbon fork you choose is compatible with your braking system. Different forks may have different brake mounting options, such as caliper brakes or disc brakes.
It’s always a good idea to consult with a professional bike fitter or your local bike shop when fitting carbon forks. They can provide expert advice and assistance in choosing the right fork size for your specific bike and riding needs. Remember, proper sizing is crucial for your biking experience, so take the time to find the perfect carbon fork that fits you and your bike perfectly.
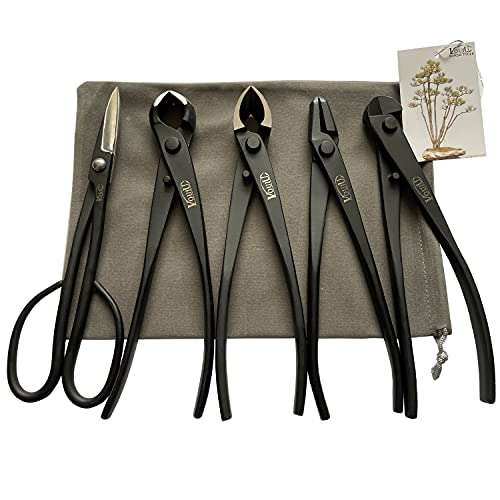
Tools and Materials Needed
When it comes to fitting carbon forks, you will need a few tools and materials to ensure that the process goes smoothly. Here are the essentials:
1. Carbon Prep
- Carbon prep is a special carbon fiber assembly compound that helps prevent slipping and provides additional grip when fitting carbon forks. It is essential to have this compound on hand before starting the fitting process.
2. Torque Wrench
- A torque wrench is necessary to accurately tighten the bolts on the carbon forks. It is important to use the correct torque specification provided by the manufacturer to avoid damaging the forks.
3. Allen Keys
- Allen keys in various sizes will be needed to loosen and tighten the bolts on the stem, headset, and brake system. Make sure you have the appropriate sizes for your specific bike components.
4. Threadlocker
- Threadlocker is a type of adhesive that helps prevent loosening of bolts due to vibration. It is advisable to use threadlocker when fitting carbon forks to ensure that everything stays secure.
5. Grease
- Grease should be applied to the threads of the bolts, as well as any areas of contact between the carbon forks and other components. This helps reduce friction and allows for easier fitting and adjustments.
6. Bike Stand or Workbench
- A bike stand or workbench is useful for securing the bike while working on the carbon forks. This will provide stability and make the fitting process much easier.
By having these tools and materials ready, you will be well-prepared to fit carbon forks onto your bike correctly and safely.
Step-by-Step Guide to Fitting Carbon Forks
Carbon forks are a popular choice for cyclists looking for a lightweight and high-performance upgrade to their bikes. However, fitting carbon forks requires careful attention to detail to ensure safety and proper functionality. Follow this step-by-step guide to successfully fit carbon forks to your bike.
Step 1: Gather the Necessary Tools
Before starting the installation process, make sure you have all the necessary tools and equipment at hand. This typically includes a torque wrench, Allen keys, a carbon assembly paste, a headset press, and a crown race setter.
Step 2: Remove the Current Fork
To begin, you’ll need to remove the current fork from your bike. Start by loosening the stem bolts and removing the handlebars. Next, loosen the headset top cap and remove any spacers or washers. Finally, use a headset press to remove the fork from the frame.
Step 3: Prepare the Carbon Fork
Before installing the carbon fork, it’s important to prepare it properly. Apply a thin layer of carbon assembly paste to the inside of the steerer tube and the bottom of the crown race. This will help create a stronger bond and prevent slippage.
Step 4: Install the Carbon Fork
Next, carefully insert the carbon fork into the frame’s head tube. Ensure that the bottom of the steerer tube sits properly on the crown race. Use a crown race setter to press it firmly into place.
Step 5: Adjust the Headset
Once the fork is installed, you’ll need to adjust the headset to ensure proper alignment and smooth steering. Tighten the headset cap until there is no play in the headset, but be careful not to overtighten it. The fork should rotate freely without any binding or resistance.
Step 6: Reattach Handlebars
With the headset adjusted, reattach the handlebars to the stem and tighten the bolts securely. Make sure the bars are aligned properly and tighten all bolts to the manufacturer’s recommended torque settings.
Step 7: Test and Inspect
Before taking your bike for a ride, it’s essential to test and inspect the newly fitted carbon forks. Check for any signs of movement or play in the headset and make any necessary adjustments. Additionally, double-check all bolts and connections to ensure they are tightened to the correct specifications.
By following this step-by-step guide, you can confidently fit carbon forks to your bike and enjoy the benefits of improved performance and reduced weight. However, if you are unsure or uncomfortable performing the installation yourself, it’s always best to seek professional assistance to ensure safety and optimal functionality.
Tips and Precautions for Proper Installation
When it comes to fitting carbon forks, proper installation is crucial for ensuring the safety and functionality of your bike. Here are some tips and precautions to keep in mind:
1. Read the Manufacturer’s Instructions
Before you begin the installation process, carefully read and understand the manufacturer’s instructions. Each carbon fork may have specific installation requirements or recommendations that need to be followed. Following the instructions will help you avoid any potential issues or damage.
2. Use the Right Tools
Make sure you have the appropriate tools for fitting carbon forks. Typically, you will need a torque wrench with the correct torque settings. Using the wrong tools or incorrect torque can lead to over-tightening or under-tightening, which can result in damage to the fork or cause it to come loose during use.
3. Check for Compatibility
Before purchasing a carbon fork, ensure that it is compatible with your bike frame and other components. Consider factors such as steerer tube diameter, axle type, brake type, and tire clearance. Installing an incompatible fork can lead to poor performance or even pose a safety risk.
4. Inspect the Fork
Prior to installation, thoroughly inspect the carbon fork for any signs of damage or defects. Look for cracks, delamination, or any other abnormalities. If you notice any issues, do not proceed with the installation and contact the manufacturer for further guidance.
5. Apply Carbon Assembly Paste
When fitting carbon forks, it’s important to properly lubricate the contact surfaces to prevent slippage and provide a secure fit. Apply carbon assembly paste to the steerer tube and any other contact points as per the manufacturer’s instructions. Be sure to only use products specifically designed for use with carbon components.
6. Properly Tighten the Components
During installation, ensure that all components are tightened to the manufacturer’s specifications. Over-tightening can lead to damage, while under-tightening can cause the fork to come loose. Refer to the manufacturer’s instructions for the correct torque values for each component.
7. Test and Recheck
Once you have completed the installation, carefully test the fork to ensure that it is secured properly. Wiggle the handlebars and apply pressure to the front end of the bike to check for any movement or looseness. It is also a good idea to recheck the tightness of the components after a few rides to ensure everything remains secure.
| Tip | Precaution |
|---|---|
| Read the manufacturer’s instructions | Inspect for damage or defects |
| Use the right tools | Apply carbon assembly paste |
| Check for compatibility | Properly tighten the components |
| Test and recheck |