


Fitting triple clamp forks to your bike is a great way to improve its handling and overall performance. Triple clamp forks, also known as upside-down forks, offer increased rigidity and better front-end suspension compared to conventional forks. Whether you’re looking to upgrade your bike or replace a damaged fork, fitting triple clamp forks requires careful attention to detail and a few basic tools.
Firstly, it’s important to ensure that the triple clamp forks you choose are compatible with your bike’s frame and wheel size. Check the manufacturer’s specifications and make sure the fork’s axle-to-crown measurement matches your bike’s geometry. Additionally, consider factors such as offset and steering angle to ensure the fork will provide the desired handling characteristics.
Before fitting the new forks, it’s crucial to prepare your bike. Start by removing the front wheel, brake caliper, and any other components attached to the fork. Clean the fork steerer tube and check for any signs of wear or damage. If necessary, replace the headset bearings and ensure they are properly greased.
Once the bike is prepared and the new triple clamp forks are ready, it’s time to fit them to your bike. Begin by sliding the fork steerer tube through the headset, making sure it is centered. Tighten the headset top cap to remove any play but avoid overtightening, as it can cause binding. Install the stem and handlebars, adjusting them to your preferred position. Finally, reattach the front wheel and brake caliper, making sure everything is properly aligned and tightened.
After fitting the triple clamp forks, it’s important to properly set up the suspension. Consult the manufacturer’s recommendations for adjusting the fork’s rebound and compression damping. Test the bike’s suspension and make any necessary adjustments to achieve the desired performance and comfort.
In conclusion, fitting triple clamp forks can significantly improve your bike’s handling and overall riding experience. By following the proper steps and taking the time to ensure compatibility and correct installation, you can enjoy the benefits of these high-performance forks on your bike.
What is a triple clamp fork?
A triple clamp fork, also known as a triple tree or triple clamp assembly, is a component used in motorcycle suspension systems. It is primarily found on off-road motorcycles and sport bikes.
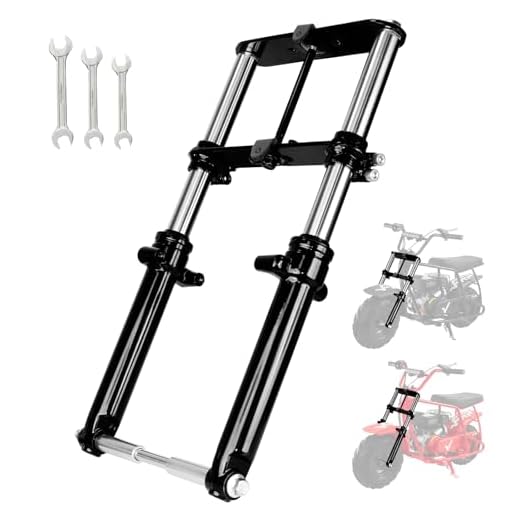
The triple clamp fork consists of three major parts:
- Upper Triple Clamp: This is the top part of the fork that connects to the motorcycle’s frame. It is typically made of aluminum or steel and houses the handlebars and various control components.
- Lower Triple Clamp: This is the bottom part of the fork that attaches to the front wheel. It is usually made of aluminum or steel and provides stability and support to the fork assembly.
- Stem: This is the central component that connects the upper and lower triple clamps. It acts as a pivot point, allowing the fork assembly to move up and down, providing suspension travel.
The triple clamp fork assembly plays a crucial role in the motorcycle’s handling and stability. It helps absorb impacts from bumps and uneven surfaces, keeping the rider in control and reducing fatigue. The triple clamp design allows for precise steering inputs and provides a solid connection between the handlebars and the front wheel.
Proper installation and maintenance of the triple clamp fork are essential for optimal performance and safety. This involves aligning the fork properly, tightening the clamp bolts to the recommended torque specifications, and regularly inspecting for any signs of wear or damage.
Step 1: Gather the necessary tools and materials
Before you start fitting triple clamp forks, it’s important to gather all the necessary tools and materials. Here’s a list of what you’ll need:
Tools:
- Adjustable wrench
- Torque wrench
- Socket set
- Allen wrench or hex key set
- Thread-locking compound
- Grease
Materials:
- New triple clamp forks
- Replacement handlebar
- Rubber mallet
- Clean cloth
Note: Make sure to choose triple clamp forks and a replacement handlebar that are compatible with your specific motorcycle model.
Having all the necessary tools and materials ready will ensure a smooth and efficient fitting process. It’s always a good idea to double-check your tools and ensure they are in good working condition before getting started.
List of tools and materials needed
Before you begin fitting triple clamp forks, make sure you have the following tools and materials on hand:
| Tools | Materials |
| Socket wrench set | Triple clamp forks |
| Allen wrench set | Handlebar |
| Torque wrench | Triple clamp bolts |
| Fork oil | Top triple clamp |
| Fork seal driver | Bottom triple clamp |
| Hammer | Steering stem |
| Seal cleaning tool | Fork oil seals |
| Fork spring compressor | Fork oil dust seals |
| Spanner | Triple clamp pinch bolts |
Having these tools and materials ready will ensure a smooth and efficient fitting process for your triple clamp forks.
Step 2: Remove the old fork
Before you can install the new triple clamp forks, you’ll need to remove the old fork from your motorcycle. Follow these steps to ensure a safe and effective removal:
Step 1: Secure your motorcycle
Park your motorcycle on a level surface and engage the kickstand to ensure it doesn’t tip over during the removal process. If necessary, use additional blocks or chocks to stabilize the bike.
Step 2: Disconnect the brake caliper
Locate the brake caliper and remove any bolts or fasteners holding it in place. Carefully detach the caliper from the old fork, making sure not to damage the brake line. Secure the caliper to a nearby handlebar or frame to prevent it from hanging freely.
Step 3: Loosen the triple clamp bolts
Using the appropriate wrench or socket, loosen the triple clamp bolts securing the old fork in place. This will allow you to separate the fork from the triple clamp and remove it from the motorcycle.
Step 4: Remove the old fork
Gently pull the old fork out of the triple clamp, being mindful of any wires or cables that may still be attached. Set the old fork aside in a safe location.
Now that you’ve successfully removed the old fork, you’re ready to proceed with installing the new triple clamp forks. Refer to Step 3 for more information on this process.
How to safely remove the old fork
When replacing triple clamp forks, it is important to follow the proper steps to ensure a safe and successful removal of the old fork. Here is a step-by-step guide:
- Preparation: Before beginning, make sure you have all the necessary tools and equipment, such as a socket wrench, hex keys, and a stand to support the bike.
- Secure the bike: Place the bike on a sturdy stand or lift to ensure stability during the removal process.
- Loosen the bolts: Begin by using a socket wrench to loosen the upper and lower triple clamp bolts. Make sure to loosen them evenly to avoid any misalignment or damage.
- Remove the front wheel: Remove the front axle and carefully slide out the front wheel from the forks. Set it aside in a secure location.
- Loosen the fork pinch bolts: Loosen the fork pinch bolts located at the bottom of the triple clamp. This will allow the forks to slide out more easily.
- Remove the fork: With all the bolts loosened, carefully slide out the old fork from the triple clamp. Be cautious of any attached cables or wires that may need to be disconnected prior to removal.
- Inspect the fork: Take this opportunity to inspect the old fork for any signs of damage or wear. If necessary, clean the fork before proceeding with the installation of the new fork.
By following these steps, you can safely remove the old fork from your triple clamp setup. Remember to take your time and be cautious during the process to avoid any accidents or damage. Once the old fork is removed, you can proceed to install the new fork using the appropriate instructions for your specific make and model.
Step 3: Install the new fork
Now that you have removed the old fork, it’s time to install the new one. Make sure you have all the necessary tools and parts before you begin.
1. Start by sliding the new fork into the triple clamp. Make sure it is lined up correctly and fully seated.
2. Use the appropriate tools to tighten the clamp bolts on the triple clamp. Make sure to tighten them evenly and securely. This will help ensure the fork is properly installed and won’t come loose while riding.
3. Once the clamp bolts are tightened, check the fork alignment. The fork should be centered and straight. Adjust as necessary using the appropriate tools.
4. Double-check all the bolts and connections to make sure everything is tightened properly. This includes any additional brackets or hardware that may be required for your specific fork.
5. Finally, give the fork a test run to make sure it is functioning correctly. Ride the bike in a safe area, checking for any unusual noises or handling issues.
With the new fork properly installed and tested, you can now enjoy your bike with improved suspension performance.
Instructions for installing the new fork
Installing a new fork on your bike is a relatively straightforward process, but it requires careful attention to detail. Follow these steps to ensure a successful installation:
1. Gather the necessary tools and materials
Before you start, make sure you have all the tools and materials you’ll need for the installation. This may include a set of wrenches, a torque wrench, a fork crown race setting tool, and the new fork itself. Refer to the manufacturer’s instructions or consult a bike mechanic for specific recommendations.
2. Remove the old fork
Start by removing the old fork from your bike. Begin by loosening the top cap on the stem and removing the stem itself. Once the stem is removed, take off the headset spacer and the top cap. Carefully slide the fork out of the head tube. Be sure to keep track of any washers or spacers that may come off with the fork.
3. Prepare the new fork
Before installing the new fork, make sure it is clean and free of any dirt or debris. Check that all the necessary headset bearings and dust seals are properly installed on the fork. Additionally, if your new fork requires a crown race, use a crown race setting tool to press it onto the fork.
4. Install the new fork
Insert the new fork into the head tube of your bike. Make sure it is aligned properly with the frame and that the steerer tube is inserted fully. Reinstall any washers or spacers that were removed during the removal process. Next, tighten the headset by using the top cap and stem. Use a torque wrench to tighten the bolts to the manufacturer’s specifications.
5. Check for proper alignment and stiffness
After installing the new fork, double-check that it is aligned properly with the frame. This can be done by looking at the gap between the head tube and the fork crown. Additionally, test the stiffness of the fork by applying pressure to the handlebars and rocking the bike back and forth. The fork should feel solid and not have any play or movement.
Following these instructions will help ensure a successful installation of your new fork. If you are unsure or uncomfortable performing the installation yourself, it is always best to consult a professional bike mechanic.


