When it comes to maintaining your motorcycle, one of the most important tasks is replacing the fork seals. Over time, these seals can wear out and start to leak, which can negatively affect the performance of your bike. While it’s recommended to use a seal driver for this job, not everyone has access to one. Luckily, there are alternative methods you can use to install fork seals without a driver.
Step 1: Remove the Old Seals
Before installing new fork seals, you’ll need to remove the old ones. Start by removing the fork tubes from the bike’s triple trees. You may need to consult your bike’s manual for specific instructions on how to do this. Once the fork tubes are removed, use a seal pick or small flathead screwdriver to carefully pry out the old seals. Be gentle to avoid damaging the fork tubes.
Step 2: Clean the Fork Tubes
After removing the old seals, it’s important to thoroughly clean the fork tubes. Any dirt or debris left on the tubes can cause premature seal failure. Use a clean rag and some fork oil to wipe down the tubes, making sure to remove any residue. Inspect the tubes for any signs of damage or pitting that may need to be addressed before installing the new seals.
Step 3: Install the New Seals
Now it’s time to install the new fork seals. While a seal driver provides the most precise and even pressure, you can achieve a similar result by using a PVC pipe or socket that matches the outer diameter of the seal. Place the seal on top of the tube and carefully tap it into place using the pipe or socket. Make sure the seal is seated properly and evenly around the tube.
Note: It’s important to apply a thin layer of fork oil on the seal before installation to ensure smooth movement and prevent dry spots.
By following these steps, you can successfully install fork seals without a driver. However, it’s worth noting that using a seal driver is still the recommended method, as it provides a more precise and controlled installation. If you plan on performing regular maintenance on your bike, investing in a seal driver is a wise choice to ensure the longevity and performance of your fork seals.
Step-by-step Guide to Installing Fork Seals
Installing fork seals can seem like a daunting task, but with the right tools and a step-by-step guide, it can be accomplished with ease. Follow these instructions to get your fork seals installed in no time:
Step 1: Begin by removing the front wheel and forks from the bike. This will make it easier to work on the seals.
Step 2: With the forks removed, drain the fork oil by removing the drain screws located at the bottom of each fork leg. Let the oil drain completely before proceeding.
Step 3: Once the forks are empty, remove the fork caps and springs. This will give you access to the old seals.
Step 4: Carefully remove the old seals by prying them out with a seal puller or a flathead screwdriver. Be cautious not to damage the fork tubes during this process.
Step 5: After the old seals are removed, clean the fork tubes thoroughly. Remove any debris or old seal remnants that may be present.
Step 6: Apply a small amount of clean fork oil to the outer edge of the new seals. This will lubricate the seal and make it easier to slide onto the fork tube.
Step 7: Gently slide the new seal onto the fork tube, making sure it sits evenly and securely in place. Use a seal driver or a PVC pipe of the correct diameter to push the seal down until it is fully seated.
Step 8: Repeat the process for the other fork tube.
Step 9: Once both seals are installed, carefully reassemble the forks by putting the fork springs and caps back into place. Make sure everything is tightened properly.
Step 10: Fill the forks with the recommended amount of fork oil, as specified by the manufacturer. Reinstall the drain screws and tighten them securely.
Step 11: Finally, reattach the forks and front wheel to the bike. Double-check that everything is securely fastened and aligned correctly.
Following these steps will ensure a proper installation of your fork seals. Remember to take your time and pay attention to detail to achieve the best results. If you are unsure about any step, it is always recommended to consult a professional or refer to your bike’s manual for more specific instructions.
Preparation for Fork Seal Installation
Before beginning the fork seal installation process, it is important to gather all the necessary tools and materials. Here is a list of items you will need:
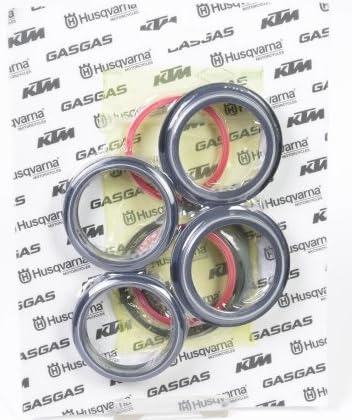
Fork Seal Kit: Ensure you have the correct fork seal kit for your specific motorcycle make and model. This kit typically includes the fork seals, dust seals, and any necessary O-rings or other small components.
Fork Oil: You will need to drain the existing fork oil before installing the new seals. Make sure you have the appropriate fork oil for your motorcycle’s specifications. Refer to your motorcycle’s service manual for the recommended oil weight.
Fork Oil Level Tool: This tool will help you accurately measure the correct amount of fork oil to be added after the seals are installed. It is important to have the correct oil level for optimal fork performance.
Fork Slider Cleaning Tools: Before installing the new seals, clean the inside of the fork sliders thoroughly. Use a clean cloth or a suitable cleaning solvent to remove any dirt, debris, or old seal remnants.
Seal Installation Tool: While it is possible to install fork seals without a dedicated driver tool, it is highly recommended to use one to ensure proper alignment and prevent damage to the new seals. The tool will help evenly distribute the force and provide a controlled installation.
Shop Manual and Instructions: Familiarize yourself with the specific steps and procedures outlined in your motorcycle’s shop manual or the instructions provided with the fork seal kit. This will ensure you follow the correct process and avoid any mistakes.
Clean and Organized Workspace: Clear a suitable area to work on your fork seals. Ensure you have enough space to lay out the necessary tools and components. A clean and organized workspace will make the installation process smoother and prevent accidental damage or loss of small parts.
Following these preparation steps will ensure a smooth and successful fork seal installation process.
Removing the Old Fork Seals
Before installing new fork seals without a driver, you need to remove the old seals. Here’s a step-by-step guide on how to do it:
- Start by removing the front wheel of your motorcycle to gain better access to the forks.
- If your bike has an axle pinch bolt, loosen and remove it.
- Next, loosen the lower triple clamp bolts and slide the fork legs out of the triple clamps.
- With the fork legs removed, locate the fork seal on the lower part of each leg. It is usually housed inside a metal or plastic retaining ring.
- Use a small screwdriver or seal pick to carefully pry out the retaining ring and remove it.
- Once the retaining ring is removed, you can now remove the old fork seal. Gently insert a thin flathead screwdriver between the seal and the fork leg and carefully pry it out. Be cautious not to damage the fork leg or the seal mating surface.
- Repeat the process for the other fork leg.
Now that you have successfully removed the old fork seals, you can proceed with installing the new seals without a driver. Remember to clean the fork legs thoroughly and inspect them for any damage or wear before installing the new seals.
Installing the New Fork Seals
Once you have removed the old fork seals and cleaned the fork tubes, it’s time to install the new fork seals. Follow these steps to properly install the new seals:
1. Start by coating the new fork seals with fresh fork oil. This will lubricate the seals and help them slide smoothly into place.
2. Carefully place the new seal onto the top of the fork tube, making sure it is evenly aligned.
3. Use your fingers to press the seal into place, applying even pressure around the entire circumference of the seal.
4. Next, use a seal driver tool or a PVC pipe with a diameter slightly larger than the seal to drive the seal into its final position. This will ensure that the seal is properly seated.
5. Tap the seal driver tool gently with a mallet or hammer until the seal is fully seated. Be careful not to apply too much force, as this can damage the seals.
6. Once the seal is fully seated, wipe away any excess fork oil that may have seeped out during installation.
7. Repeat the same process for the other fork tube.
8. Finally, check the fork seals for any signs of leaks or damage. If everything looks good, you can proceed with reassembling your fork assembly.
Remember to refer to your motorcycle’s service manual for specific instructions and torque specifications.
By following these steps, you can successfully install new fork seals without the need for a fork seal driver tool.