Installing a new mountain bike fork can greatly improve your riding experience and enhance the performance of your bike on rough terrain. Whether you’re upgrading or replacing a damaged fork, it’s important to follow the correct installation process to ensure safety and optimal functionality.
Before beginning the installation, gather all the necessary tools, including a torque wrench, Allen wrenches, and a headset press. Make sure to double-check the compatibility of the new fork with your bike’s frame and wheel size. Additionally, consider the type of suspension system the fork utilizes, such as air or coil, and prepare accordingly.
To start the installation, remove the front wheel of your bike and loosen the stem bolts to release the handlebars. Carefully disconnect the brake cables and remove any components attached to the current fork, such as the crown race and star nut. Clean the headset area thoroughly and inspect for any signs of damage or wear.
Next, insert the crown race onto the new fork’s steerer tube using a headset press, ensuring it is securely in place. Apply grease to the inside of the head tube and the new fork’s steerer tube to facilitate a smooth installation and prevent any creaking. Slowly slide the fork into the head tube and tighten the headset bearings, making sure to achieve proper preload.

Once the fork is securely in place, reinstall any components that were removed, such as the star nut and brake cables. Align the handlebars and tighten the stem bolts to the manufacturer’s recommended torque specifications. Finally, reattach the front wheel, making sure it is centered and secure.
With the new MTB fork installed, take the time to adjust the suspension settings to match your riding style and preferences. Experiment with the compression and rebound adjustments to find the optimal balance of comfort and performance. Remember to regularly maintain and service your fork to prolong its lifespan and ensure optimal performance on the trails.
Requirements for Installing MTB Fork
Before installing an MTB fork, make sure you have the following tools and materials:
Tools:
- Adjustable wrench
- Hex wrench set
- Socket wrench
- Torque wrench
- Fork oil
Materials:
- MTB fork
- Steerer tube
- Headset
- Stem
- Handlebars
- Front wheel
- Brake hose or cable
In addition to these tools and materials, it’s important to have a workspace with adequate lighting and a clean and stable surface to work on. Before starting the installation, familiarize yourself with the specific instructions provided by the manufacturer of your MTB fork, as installation processes can vary.
Remember to always wear protective eyewear and gloves while working on your bike, and if you’re not confident in your mechanical skills, it’s recommended to have a professional perform the installation.
| Tool | Function |
|---|---|
| Adjustable wrench | To loosen and tighten nuts and bolts |
| Hex wrench set | To adjust and tighten hex bolts |
| Socket wrench | To remove and install components |
| Torque wrench | To apply the correct amount of torque to bolts |
| Fork oil | To lubricate the fork and ensure smooth operation |
Having these tools and materials ready before starting the installation will help ensure a successful and safe process. Once you have everything prepared, you can move on to the next steps of installing your MTB fork.
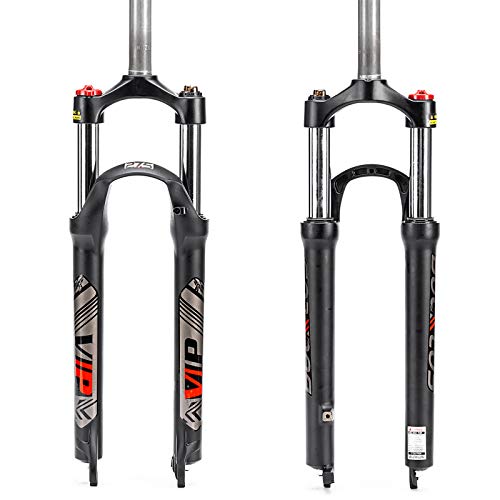
Choosing the Right Fork for Your MTB
When it comes to enhancing your mountain biking experience, choosing the right fork for your MTB is essential. The fork plays a crucial role in determining your ride quality, comfort, and handling on the trails. Here are a few factors to consider when selecting a fork for your MTB:
1. Suspension Type
The first decision you need to make is whether you want a rigid fork or a suspension fork. Rigid forks do not have any suspension and are lighter and more efficient for smooth trails. On the other hand, suspension forks are equipped with either a coil spring or an air spring to absorb shocks and bumps, providing enhanced control and comfort over rough terrains.
2. Travel
The travel of a fork refers to the amount of vertical movement it provides when encountering obstacles. Forks with longer travel can handle rougher terrains better, while forks with shorter travel offer smoother rides on less technical trails. Consider your riding style and the type of trails you’ll be primarily riding on when choosing the travel of your fork.
3. Wheel Size
Ensure that the fork you choose is compatible with the wheel size of your MTB. The most common wheel sizes for MTBs are 26-inch, 27.5-inch, and 29-inch. Using a fork that is not designed for your wheel size can negatively affect your bike’s handling and safety.
4. Axle Type
There are two main types of axle systems for MTB forks: quick-release (QR) and thru-axle. Quick-release axles are lighter and easier to remove, making wheel changes and maintenance more convenient. Thru-axles, on the other hand, provide increased stiffness and stability, resulting in improved handling and responsiveness.
5. Budget
Last but not least, consider your budget when selecting a fork. The price range for MTB forks varies greatly depending on the brand, materials, and features. Determine how much you’re willing to spend and look for forks within your budget that meet your requirements.
By considering these factors and doing thorough research, you can choose the right fork for your MTB that will complement your riding style and improve your overall experience on the trails.
Preparing Your MTB for Fork Installation
Before you install the new fork on your mountain bike (MTB), it’s important to properly prepare your bike for the installation. This will help ensure a smooth and successful installation process.
Clean Your Bike
Start by thoroughly cleaning your bike to remove any dirt, grime, or debris that may interfere with the fork installation. Use a mild detergent and water to gently clean the frame, forks, and other components. Pay extra attention to the area where the new fork will be installed.
Gather the Necessary Tools
Make sure you have all the necessary tools for the installation. This may include a torque wrench, Allen keys, a crown race setter, a headset press, and any specific tools required by the manufacturer of your fork. Having all the tools you need on hand will make the installation process much easier.
Inspect Your Bike
Before installing the new fork, take some time to inspect your bike for any signs of damage or wear. Check the frame, fork, and other components for any cracks, dents, or corrosion. If you notice any issues, it’s important to address them before proceeding with the installation.
Remove the Old Fork
Once your bike is clean and free of damage, you can proceed with removing the old fork. Follow the manufacturer’s instructions or consult a professional if you’re unsure how to remove the fork safely. Take your time and be careful during this step to avoid any damage to your bike or yourself.
By properly preparing your MTB for fork installation, you’ll help ensure a successful and safe installation process. Take the time to clean your bike, gather the necessary tools, inspect your bike for any damage, and carefully remove the old fork. This will set you up for a smooth installation of your new fork and ultimately enhance your overall riding experience.
Removing the Old Fork from Your MTB
Before installing a new fork on your mountain bike (MTB), you will need to remove the old fork. Here are the steps to help you remove the old fork:
Step 1: Gather the Necessary Tools
Before you begin, make sure you have the following tools:
- Hex wrench or Allen key set
- Adjustable wrench
- Hammer
- Pliers
- Work stand or bike rack
Step 2: Prepare Your Bike
Place your MTB in a work stand or on a bike rack to secure it in an upright position. This will make it easier to work on the fork.
Step 3: Remove the Front Brake
Use the Allen key or hex wrench to loosen the bolts that attach the front brake caliper to the fork. Once the bolts are loosened, remove the brake caliper and set it aside.
Step 4: Disconnect the Cables and Hose
Locate the cables and hose that are connected to the fork. Use pliers to disconnect the cables from their respective attachments. If your MTB has hydraulic brakes, you will also need to disconnect the hose from the brake lever.
Step 5: Loosen the Stem Bolts
Use the Allen key or hex wrench to loosen the stem bolts that secure the handlebars to the fork. Once the bolts are loosened, you should be able to lift the stem and handlebars off the fork.
Step 6: Remove the Front Wheel
Use the quick-release lever or an adjustable wrench to loosen the front wheel axle. Once it is loose, remove the front wheel from the fork and set it aside.
Step 7: Remove the Fork
Once all the above steps are completed, you are ready to remove the old fork. Use the hammer to gently tap the fork steerer tube downward until it slides out of the head tube. Be careful not to damage the frame or other components while doing this.
After the old fork has been removed, you can continue with the installation of your new fork onto your MTB.
Installing the New MTB Fork
Installing a new mountain bike fork is a crucial step in upgrading your bike’s performance and enhancing your riding experience. Follow the steps below to properly install your new MTB fork:
- First, ensure that you have all the necessary tools and equipment for the installation, including a hex wrench, a torque wrench, and any specific tools recommended by the fork manufacturer.
- Begin by removing the front wheel of your mountain bike. Loosen the quick-release skewer or unscrew the thru-axle, then slide the wheel out of the dropouts.
- Next, remove the brake caliper from the fork. Depending on the type of brakes you have, you may need to loosen or remove the mounting bolts. Carefully detach the caliper from the fork and set it aside.
- Using the appropriate size hex wrench, remove the stem cap and loosen the stem bolts. This will allow you to remove the handlebars and stem from the fork. Carefully slide them off the fork and set them aside.
- With the handlebars and stem removed, you can now detach the old fork from the frame. Loosen the headset cap and remove it, then slide the fork out of the head tube. Be careful not to damage the frame or any cables that may be attached to the fork.
- Prepare the new MTB fork for installation by applying a thin layer of grease to the crown race and steerer tube. This will help prevent any squeaking or creaking sounds when riding.
- Carefully insert the new fork into the head tube of your mountain bike frame. Make sure it is properly aligned and fully seated in the frame. Reinstall the headset cap and tighten it securely.
- Reattach the handlebars and stem to the fork, making sure they are properly aligned and tightened. Use a torque wrench to tighten the bolts to the manufacturer’s recommended specifications.
- Reinstall the brake caliper onto the new fork. Tighten the mounting bolts securely and make sure the caliper is properly aligned with the rotor.
- Finally, reinstall the front wheel by sliding it into the fork dropouts and tightening the quick-release skewer or thru-axle. Make sure the wheel spins freely and is centered between the fork legs.
Once you have completed these steps, your new MTB fork should be properly installed and ready for use. Double-check all the bolts and connections for tightness and take your bike for a test ride to ensure everything is working correctly. Enjoy your improved riding experience with your new fork!
Proper Adjustment and Testing of the MTB Fork
Once you have successfully installed your new MTB fork, it is important to properly adjust and test it to ensure optimal performance and safety. Follow the steps below to achieve the best results:
Step 1: Set the Sag
The sag is the amount the fork compresses under your body weight while in a riding position. To set the sag:
- Put on all your riding gear and get on your bike in your normal riding position.
- Have someone measure the distance between the dust seal and the bottom of the seal collar.
- Adjust the sag by adding or removing air pressure from the fork’s air spring, or by adjusting the preload on a coil spring fork, until the sag is between 20-30% of the fork’s total travel.
Step 2: Rebound Damping
The rebound damping controls how quickly the fork returns to its extended position after being compressed. To adjust the rebound damping:
- Begin with the rebound knob turned fully clockwise (slowest rebound).
- Take your bike for a short ride over rough terrain, paying attention to how the fork feels.
- If the fork feels too slow and is not returning to its extended position quickly enough, gradually turn the rebound knob counterclockwise (faster rebound).
- If the fork feels too fast and is bouncing back too quickly, gradually turn the rebound knob clockwise (slower rebound).
- Continue testing and adjusting until you find the optimal rebound setting for your riding style and preference.
Step 3: Compression Damping
The compression damping controls how the fork absorbs impacts and manages the fork’s stability. To adjust the compression damping:
- Start with the compression damping set to the middle position.
- Ride your bike on a variety of terrains, including steep descents and rough trails.
- If the fork feels too soft and dives excessively under braking or feels unstable, increase the compression damping by turning the knob clockwise.
- If the fork feels too harsh and does not compress enough, decrease the compression damping by turning the knob counterclockwise.
- Test and adjust until you find the optimal compression damping setting for your riding style and terrain.
Remember to always test your fork adjustments on a variety of terrains and in different riding conditions to ensure it performs optimally in all situations. Make small adjustments and take note of how they impact the fork’s performance. With proper adjustment and testing, your MTB fork will provide a smooth and controlled ride, enhancing your overall biking experience.