

Installing a new fork on your road bike is a great way to upgrade its performance and improve your riding experience. Whether you’re replacing an old fork or installing a suspension fork for the first time, it’s important to follow the proper steps to ensure a safe and secure installation. In this guide, we will walk you through the process, step by step, so you can confidently install your new road bike fork.
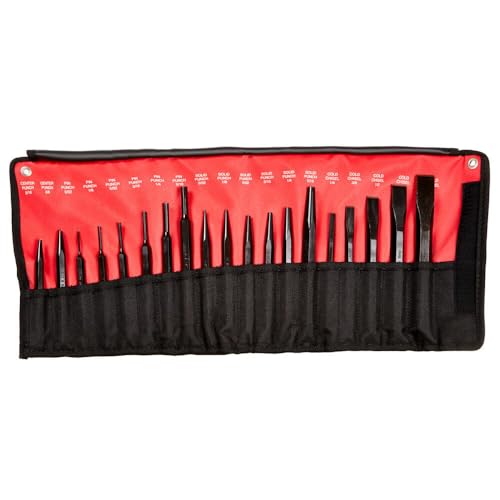
Before you begin, make sure you have all the necessary tools and equipment. You will need a set of hex wrenches, a torque wrench, a crown race installer, a crown race setter, and a fork cutting guide. It’s also a good idea to have a work stand or a stable surface to hold your bike while you work.
The first step is to remove the old fork from your bike. Start by loosening the stem bolts and removing the handlebars. Next, unscrew the top cap and remove the fork from the steerer tube. Take note of the position of any spacers or washers, as you will need to replicate this when installing the new fork.
Once the old fork is removed, it’s time to prepare the new fork for installation. Start by cutting the steerer tube to the appropriate length, using a fork cutting guide to ensure a straight and even cut. Then, install the crown race onto the fork’s crown. This can be done using a crown race installer or by tapping it gently into place with a rubber mallet.
What is a road bike fork and why it is important
A road bike fork is a crucial component of a road bike’s front end. It is the part that connects the front wheel to the rest of the bike frame. The fork is typically made of lightweight and durable materials such as carbon fiber or aluminum, and it is designed to provide stability, control, and smoothness while riding on the road.
The road bike fork plays a vital role in several aspects of the bike’s performance. Firstly, it helps absorb road vibrations and impacts, ensuring a more comfortable and controlled ride. This is particularly important when riding on uneven or rough surfaces, as the fork helps to minimize the impact of bumps and other obstacles.
Secondly, the road bike fork is responsible for steering and handling. It provides a stable and responsive front end, allowing the rider to control the bike with precision. A well-designed fork will enhance the bike’s agility and make it easier to navigate corners, curves, and other obstacles on the road.
Additionally, the road bike fork affects the overall weight and balance of the bike. By using lightweight materials and optimizing its design, manufacturers can reduce the fork’s weight, which in turn contributes to a lighter overall bike. This can improve the bike’s acceleration and climbing ability, making it more efficient on the road.
Lastly, a road bike fork also contributes to the bike’s aesthetics. Many riders choose forks that match the style and design of their bike, helping to enhance its overall appearance. Forks come in a variety of colors and finishes, allowing riders to customize their bikes to their personal preferences.
| Key Benefits of a Road Bike Fork |
|---|
| 1. Absorbs road vibrations and impacts |
| 2. Provides stability, control, and smoothness |
| 3. Enhances steering and handling |
| 4. Contributes to the bike’s overall weight and balance |
| 5. Improves bike’s acceleration and climbing ability |
| 6. Adds to the bike’s aesthetics and customization options |
Types of Road Bike Forks
When it comes to road bike forks, there are several different types to choose from. Each type has its own advantages and considerations, so it’s important to understand the differences before making a decision.
1. Rigid Forks
Rigid forks, also known as straight forks, are the most basic type of road bike fork. They do not have any suspension or damping capabilities, making them lightweight and efficient. Rigid forks provide precise steering and are ideal for smooth surfaces and racing conditions. However, they do not offer any shock absorption, so they may not be suitable for rough terrains or long rides.
2. Suspension Forks
Suspension forks are equipped with a suspension system that absorbs shocks and vibrations, providing a smoother ride. They are especially beneficial for rough or uneven terrains, as they improve comfort and control. Suspension forks can be adjusted to suit different riding styles and preferences. However, they tend to be heavier and less efficient than rigid forks, which may impact performance on smooth surfaces or during climbs.
3. Carbon Fiber Forks
Carbon fiber forks are made from a lightweight and strong material that offers excellent vibration dampening properties. These forks absorb road vibrations, resulting in a more comfortable and smoother ride. Carbon fiber forks also have a high strength-to-weight ratio, making them durable and efficient. However, they tend to be more expensive than other types of forks.
4. Aero Forks
Aero forks, also known as aerodynamic forks, are designed to minimize wind resistance and improve overall bike performance. These forks have a sleek and streamlined shape that reduces drag, allowing riders to cut through the air more efficiently. Aero forks are commonly used in time trials and triathlon events, where every fraction of a second matters. However, they may sacrifice some comfort and handling capabilities compared to other types of forks.
5. Gravel Forks
Gravel forks, as the name suggests, are specifically designed for gravel riding and off-road adventures. These forks have a wider tire clearance and often feature mounts for fenders or racks. Gravel forks are built to handle rough terrains, providing riders with stability and control. They may incorporate suspension systems or have additional features to improve comfort and durability. However, they may be heavier and less efficient than other types of forks, affecting speed and performance on smooth surfaces.
When choosing a road bike fork, consider your riding style, terrain, and preferences to determine which type will best suit your needs. Consulting with a bike specialist or experienced riders can also provide valuable insights and recommendations.
Suspension forks
Suspension forks are a popular choice among road bike enthusiasts who want to enhance their riding experience. These forks help absorb shocks and bumps on the road, providing a smoother and more comfortable ride. Here are some key points to consider when installing a suspension fork on your road bike:
1. Compatibility
Before purchasing a suspension fork, it is crucial to ensure that it is compatible with your road bike frame. Measure the steerer tube diameter, axle width, and fork length to ensure a proper fit. Additionally, check if your bike frame has the necessary mounting points for a suspension fork.
2. Tools and equipment
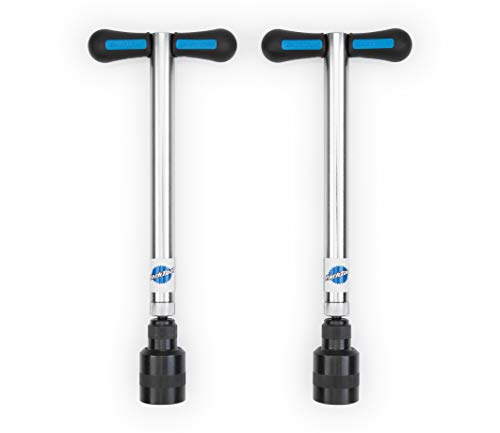
You will need a few tools and equipment to install a suspension fork, including a crown race installation tool, star nut setter, torque wrench, and a set of hex wrenches. Make sure you have all the necessary tools before you begin the installation process.
3. Preparation
Start by removing the front wheel, brake caliper, and any accessories attached to the existing fork. Clean the fork crown and headset bearings to ensure a smooth installation process. Also, make sure to read the manufacturer’s instructions for any specific preparation steps or requirements.
4. Installation
Begin by installing the crown race onto the suspension fork’s steerer tube. Use the crown race installation tool to ensure a proper fit. Next, insert the suspension fork into the head tube, making sure the steerer tube is aligned with the headset bearings.
Tighten the headset top cap onto the steerer tube until it makes contact with the upper headset bearing. Use a torque wrench to tighten it to the manufacturer’s recommended torque specification. Install the star nut on the inner side of the steerer tube and use a star nut setter to ensure it is properly seated.
Finally, install the front wheel, brake caliper, and any other accessories that were removed earlier. Double-check all the bolts and fasteners for proper tightness before taking your road bike for a test ride.
Note: It is important to consult a professional bike mechanic or refer to the manufacturer’s instructions for specific guidance on installing a suspension fork, as the process may vary depending on the bike model and fork type.
Rigid Forks
A rigid fork is a type of fork that does not have any suspension. It is made from a single piece of metal or carbon fiber and is designed to be lightweight and stiff. Rigid forks are commonly used on road bikes to improve the bike’s handling and performance on smooth surfaces.
Installing a rigid fork on your road bike can be a relatively straightforward process. Here are the steps to follow:
1. Measure the steerer tube:
Before installing the rigid fork, you need to make sure that the steerer tube on the fork is the correct length for your bike’s head tube. Measure the length of the steerer tube, ensuring that it is long enough to extend above the top of the head tube when installed.
2. Remove the old fork:
To install the new rigid fork, you first need to remove the old fork. Start by removing the front brake caliper and then loosening the stem and removing it from the steerer tube. Once the stem is removed, you can take out the old fork by loosening the headset and sliding it out from the bottom of the head tube.
3. Install the new fork:
Before installing the new rigid fork, make sure that the headset and bearings are clean and properly greased. Gently slide the new fork into the head tube from the bottom, making sure that it is aligned properly. Once the fork is in place, reattach the stem, tighten the headset, and reinstall the front brake caliper.
4. Adjust the headset:
After installing the new rigid fork, you need to adjust the headset to ensure that there is no play or binding. To do this, tighten the headset cap just enough to remove any play but still allow for smooth rotation of the fork. Test the fork to make sure that it moves freely and smoothly without any binding.
By following these steps, you can successfully install a rigid fork on your road bike. Remember to always consult the manufacturer’s instructions for specific guidance on your particular fork and bike model.
Materials Used in Road Bike Forks
Road bike forks are an essential part of a road bike’s front suspension system. They are responsible for absorbing shocks and vibrations from the road surface, providing a smoother and more comfortable ride for the cyclist. These forks are typically made from various materials, each with its own unique properties and characteristics.
Here are some of the common materials used in road bike forks:
| Material | Description |
|---|---|
| Carbon fiber | Carbon fiber forks are lightweight and offer excellent vibration dampening properties. They are known for their strength, stiffness, and responsiveness, making them a popular choice among professional riders. |
| Aluminum alloy | Aluminum alloy forks are lightweight and provide good strength and durability. They are often less expensive compared to carbon fiber forks, making them a popular choice for recreational and entry-level road bikes. |
| Steel | Steel forks are durable and offer a smooth and comfortable ride. They can dampen road vibrations effectively, but they are generally heavier compared to carbon fiber and aluminum alloy forks. |
It’s important to choose a road bike fork material that suits your riding style, budget, and performance requirements. Carbon fiber forks are commonly used in high-performance road bikes, while aluminum alloy forks are popular in budget-friendly options. Steel forks, on the other hand, are often found on classic and touring road bikes where comfort and durability are prioritized over weight savings.
No matter which material you choose, it’s essential to properly install and maintain your road bike fork to ensure optimal performance and safety. Following the manufacturer’s instructions and seeking professional assistance if needed is always recommended.
Carbon forks
Carbon forks are a popular choice among road cyclists due to their lightweight and stiff construction. Installing a carbon fork requires careful handling and attention to detail to ensure proper alignment and to prevent any damage to the fork or bike frame.
Before installing a carbon fork, it’s important to make sure that the fork is compatible with your bike’s frame and that you have the necessary tools for the installation. You will need a torque wrench, a headset press, and a crown race installation tool.
Step 1: Begin by removing the existing fork from your bike. This typically involves loosening the stem bolts and removing the stem and handlebars. You may also need to remove any brake calipers that are attached to the fork.
Step 2: Inspect the bike frame and fork for any signs of damage or wear. Check for any cracks or dents in the carbon fork, as this can compromise its structural integrity.
Step 3: Grease the inside of the head tube and the steerer tube of the carbon fork. This will help prevent corrosion and allow for easier installation and removal in the future.
Step 4: Align the crown race with the bottom of the steerer tube and use a crown race installation tool to press it into place. Be careful not to apply excessive force, as this can damage the carbon fork.
Step 5: Insert the fork into the head tube, making sure that the steerer tube is properly aligned with the head tube. Use a headset press to press the fork into place, applying even pressure on both sides.
Step 6: Secure the stem onto the steerer tube, tightening the stem bolts to the manufacturer’s recommended torque specification. Make sure the stem is aligned properly with the front wheel.
Step 7: Reattach the handlebars and any brake calipers that were removed earlier. Double-check all bolts and fasteners to ensure that they are tightened to the appropriate torque.
Remember to always consult the manufacturer’s instructions and guidelines for the specific carbon fork you are installing, as the installation process may vary slightly. If you are unsure or uncomfortable with any step of the installation process, it is recommended to seek assistance from a professional bike mechanic.
Aluminum forks
If you have an aluminum road bike fork, the installation process may be slightly different than if you have a carbon fork. Aluminum forks are generally less expensive and more durable than carbon forks, making them a popular choice for many cyclists.
Here are the steps to install an aluminum road bike fork:
-
Prepare the fork:
Before starting the installation process, make sure you have all the necessary tools and components. Inspect the fork for any damage or wear, and clean it thoroughly with a mild detergent and a soft cloth. It’s also a good idea to check the steerer tube for any burs or rough spots that may interfere with the headset installation.
-
Remove the old fork:
If you are replacing an existing fork, you’ll need to remove it first. Loosen the stem bolts and remove the headset cap. Slide the stem and handlebars off the steerer tube, and then remove any spacers or other components from the top of the steerer tube. Finally, loosen and remove the top cap and compression bolt from the headset.
-
Install the new fork:
Place the new aluminum fork into the head tube, making sure that the steerer tube is properly aligned with the frame. Slide the stem back onto the steerer tube and tighten the stem bolts to the manufacturer’s recommended torque specifications. Place any spacers or other components back onto the steerer tube, and then tighten the top cap and compression bolt to secure the headset.
-
Check the alignment and tighten:
Once the fork is installed, check the alignment to ensure that it is straight and centered. Adjust the stem and handlebars if necessary. Finally, tighten all the bolts to the proper torque specifications, paying special attention to the stem bolts, headset cap, and compression bolt.
With these steps, you should be able to successfully install an aluminum road bike fork. If you are unsure or uncomfortable with any part of the installation process, it’s always best to consult a professional bike mechanic.
Steel forks
Steel forks are a popular choice among road bike enthusiasts for their durability and strength. They provide a smooth and stable ride, absorbing vibrations from the road for a more comfortable cycling experience. If you are looking to install a steel fork on your road bike, here are some steps to guide you through the process.
Step 1: Gather the necessary tools
Before you begin, make sure you have the appropriate tools on hand. You will need a torque wrench, allen keys, a headset press, a crown race setter, and grease.
Step 2: Remove the old fork
Start by loosening the stem bolt and removing the handlebar, stem, and spacers. Then, remove the front wheel from the fork dropouts. Use the appropriate tool to unscrew and remove the crown race from the old fork.
Step 3: Prepare the new steel fork
Clean the new steel fork thoroughly and apply a thin layer of grease to the crown race seat. Install the headset onto the fork, making sure it is aligned properly. Use the headset press to press the cups into place.
Step 4: Install the new fork
Insert the new steel fork into the head tube of your road bike and tighten the stem bolt. Make sure the fork is positioned correctly before tightening the bolt to the recommended torque.
Note: It is important to follow the manufacturer’s instructions and torque specifications when installing the fork to ensure proper alignment and prevent damage.
Step 5: Reassemble the bike
Reattach the handlebar, stem, and spacers onto the new fork. Check that everything is properly tightened and aligned. Finally, insert the front wheel into the fork dropouts and secure it in place.
Congratulations! You have successfully installed a steel fork on your road bike. Remember to always perform a thorough safety check before heading out for a ride.