


Bracelets are a popular accessory that can add style and flair to any outfit. If you’re looking for a fun and easy DIY project, making a fishtail bracelet with a fork is a great option. This creative technique allows you to create a unique bracelet using just a few simple materials.
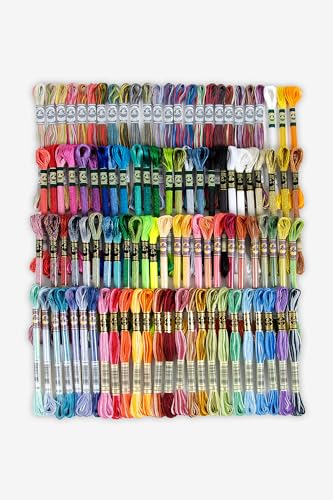
To make a fishtail bracelet with a fork, you’ll need a fork (of course), some colorful embroidery thread, and a pair of scissors. The fork will serve as a knitting loom, making it easy and convenient to weave the threads into a beautiful bracelet. This technique is especially great for beginners who are new to bracelet making.
To start, cut a piece of embroidery thread that is about twice the length of your desired bracelet. Fold the thread in half and place it through one of the tines of the fork. Then, take the two loose ends and tie a knot around the base of the fork to secure the thread in place.
Once you have your first thread secured, you can start weaving the fishtail pattern. Take a second thread in a different color and fold it in half. Loop the folded end around the back of the fork and bring it through the space between the first and second tines. Then, bring the loose ends of the second thread through the loop created by the folded end and tighten the knot. Repeat this process with a third thread, alternating colors to create a pattern.
Continue weaving the pattern by bringing the folded end of each new thread through the previous loop and tightening the knot. As you weave, you will start to see the fishtail pattern emerge. Keep weaving until you reach your desired bracelet length, and then tie a knot to secure the thread. Trim any excess thread, and your fishtail bracelet is complete!
This DIY project is a fun and creative way to make a unique bracelet using just a fork and some embroidery thread. With a little bit of practice, you’ll be able to create beautiful fishtail bracelets in no time. So grab a fork and get started on your bracelet-making adventure today!
What is a fishtail bracelet?
A fishtail bracelet is a type of bracelet that is made using a weaving technique called the fishtail pattern. It gets its name from the pattern it creates, which resembles the scales of a fish. The fishtail bracelet is typically made from elastic bands or threads that are woven together to create a stretchable and stylish accessory.

To make a fishtail bracelet, you will need to gather materials such as elastic bands or threads in different colors, a fork or a loom, and a hook or a clip to secure the bracelet. The process involves creating a series of knots and loops using the bands or threads, which are then woven together to form the fishtail pattern. The bracelet can be made in different sizes and styles, depending on your preference.
Fishtail bracelets are popular among both children and adults due to their versatility and ease of customization. They can be made using a wide range of colors and patterns, allowing you to express your personal style and creativity. Fishtail bracelets can also be worn alone or stacked with other bracelets to create a layered look.
| Advantages | Disadvantages |
|---|---|
| Easy to make | Can be time-consuming |
| Customizable | May stretch over time |
| Versatile accessory | Can break if not handled carefully |
In conclusion, a fishtail bracelet is a popular accessory that can be made using a weaving technique called the fishtail pattern. It is a versatile and customizable accessory that can be created in different sizes and styles. Whether you are looking to express your personal style or create a fun DIY project, the fishtail bracelet is a great choice.
Why use a fork?
Using a fork to make a fishtail bracelet is a great way to create a unique and stylish piece of jewelry. Forks are readily available in most households, making them a convenient and easily accessible tool for this DIY project. Additionally, using a fork provides a stable base for making tight and consistent weave patterns. The prongs of the fork can act as a guide, ensuring that your bracelet turns out neat and professional-looking. Furthermore, using a fork allows for greater precision and control, making it easier to create intricate designs. So, next time you want to make a fishtail bracelet, grab a fork and get creative!
Step 1: Materials needed
Before you can start making a fishtail bracelet with a fork, you will need the following materials:
A fork:
- Choose a standard-sized fork with four prongs.
Elastic bands:
- You will need a variety of colored elastic bands to create your fishtail bracelet.
- Choose bands that are specifically made for bracelet making, as they are more durable.
A clip or c-clip:
- This will be used to secure the ends of your bracelet together.
Once you have gathered these materials, you will be ready to move on to the next step of creating your fishtail bracelet.
Gather the necessary supplies
Before you can start making a fishtail bracelet with a fork, you will need to gather the following supplies:
1. Fork
Make sure you have a standard-sized fork with four tines. This will be used as a tool to create the bracelet.
2. Elastic bands
You will need a variety of elastic bands in different colors to create the design of your fishtail bracelet. Choose colors that you like or that match your personal style.
3. S-clip
An S-clip or C-clip is essential to secure the ends of the bracelet together. This clip will prevent the bracelets from unraveling and keep it securely on your wrist.
4. Scissors
Scissors will be needed to cut the elastic bands to the desired lengths.
5. Work surface
Find a comfortable and clean work surface where you can easily create your fishtail bracelet with the fork. This can be a table or desk.
Once you have gathered all the necessary supplies, you will be ready to start making your fishtail bracelet with a fork.
Step 2: Set up
Before you start creating your fishtail bracelet, you need to gather all the necessary materials and set up your workspace. Here’s what you’ll need:
Materials:
- A fork
- Elastic bands in different colors
Workspace:
Choose a clean and flat surface to work on, like a table or a desk. Make sure that you have enough space to place your materials and work comfortably.
Place the fork on the surface with the prongs facing up. This will serve as a makeshift loom for creating the fishtail bracelet.
Take the elastic bands and keep them within reach. You can organize them by color or size to make it easier to select the ones you need.
Now that your materials and workspace are ready, you can move on to the next step and start making your fishtail bracelet!
Prepare the fork and bracelet strands
Before you begin making your fishtail bracelet, you will need to gather a few supplies and prepare the fork and bracelet strands.
- First, find a fork that has four prongs. This will help you create the fishtail pattern easily.
- Next, choose the color of embroidery floss or string that you want to use for your bracelet. You can choose multiple colors to create a colorful pattern or stick to one color for a simple design.
- Measure and cut four strands of the embroidery floss or string, each about 1.5 times the length of your wrist. This will ensure you have enough length to create the bracelet and tie it off at the end.
Once you have your fork and bracelet strands ready, you can move on to the next steps of making your fishtail bracelet.
Step 3: Creating the fishtail
Once you have completed the first two steps of creating your fishtail bracelet with a fork, you are ready to move on to the actual weaving process. This step involves carefully interlacing the rubber bands to create the fishtail pattern.
Materials needed:
- A fork with wide tines
- Rubber bands in different colors
- A small c-clip or a rubber band
Instructions:
To create the fishtail pattern, follow these steps:
| Step | Instructions |
| 1 | Hold the fork with the tines pointing up and place the first rubber band across the two outer tines. |
| 2 | Take another rubber band of a different color and loop it around the first rubber band. Cross it over the two middle tines of the fork. |
| 3 | Pull the ends of the second rubber band through the loop formed by the first rubber band. This creates a knot-like structure with the second rubber band. |
| 4 | Repeat steps 2 and 3 with different colored rubber bands until the bracelet reaches the desired length. Remember to always cross the rubber bands over the middle tines. |
| 5 | When you have finished weaving the fishtail pattern, slide the bracelet off the fork. |
| 6 | Secure the bracelet by attaching a small c-clip or by tying a rubber band at the end. |
With these simple steps, you can easily create a beautiful fishtail bracelet using just a fork and rubber bands. Enjoy the process and have fun experimenting with different color combinations!


