
Are you interested in exploring the sounds of tuning forks? One way to enhance the acoustic properties of a tuning fork is by creating a resonator box. A resonator box can help amplify and refine the sound produced by the tuning fork, making it easier to hear and appreciate its unique tones. In this article, we will guide you through the process of making your own tuning fork resonator box, allowing you to unlock a new dimension of sound exploration.
A resonator box is a simple yet effective way to improve the sound quality of a tuning fork. It consists of a hollow box that is specially designed to amplify and resonate the vibrations produced by the tuning fork. By creating a resonating chamber, the box enhances the volume and richness of the tuning fork’s sound, creating a more immersive auditory experience.
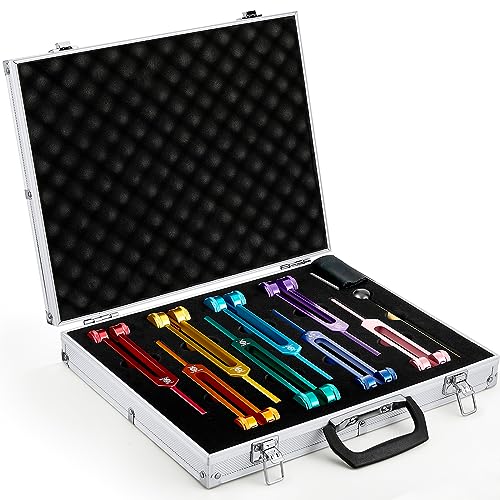
To make a tuning fork resonator box, you will need a few basic materials and tools. First, you will need a sturdy, wooden box with an open top. The size of the box will depend on the size of your tuning fork, but as a general guide, the box should be large enough to comfortably fit the tuning fork with some extra space for vibrations to reverberate. You will also need some sound-absorbing material, such as foam or felt, to line the inside of the box. This material will help minimize unwanted echoes and improve the sound clarity.
Once you have gathered the necessary materials, begin by preparing the wooden box. Remove any existing partitions or dividers inside the box to create a single, open chamber. Then, line the inside of the box with the sound-absorbing material. Cut the material to fit the inner walls and bottom of the box, ensuring a snug and secure fit. The goal is to create a soft, cushioned environment that will enhance the resonance and dampen any unwanted vibrations.
Next, carefully place the tuning fork inside the resonator box. Position it in the center of the box, making sure it is not in contact with the walls. This will enable the vibrations to reverberate freely within the chamber. Once the tuning fork is in place, gently tap it on a hard surface to initiate the vibrations. Listen closely as the sound resonates and fills the box, experiencing the enhanced tonal qualities and increased volume provided by the resonator box.
By making your own tuning fork resonator box, you can enrich your sound exploration and appreciation. Experiment with different materials and sizes to find the perfect combination that suits your tuning fork. Whether you are a musician, a sound enthusiast, or simply curious about the world of acoustics, this DIY project will allow you to enhance the sonic experience of tuning forks and unlock new auditory possibilities.
Creating a Tuning Fork Resonator
To create a tuning fork resonator, you will need the following materials:
- A tuning fork
- A resonator box
- A hammer and nails or screws
- A saw
- Sandpaper
- Wood glue
First, start by constructing the resonator box. Cut four pieces of wood to the desired size and shape for the box. It is important to ensure that the box dimensions fit the tuning fork. Sand the edges of the wood to smooth them.
Next, use wood glue to join the pieces of wood together, forming a box shape. Hold the pieces in place with clamps until the glue dries. Reinforce the corners of the box with nails or screws for additional stability.
Once the box is constructed, carve out a hole in the top of the box that will allow the tuning fork to be inserted. The hole should be slightly smaller than the width of the tuning fork’s stem to provide a snug fit.
Finally, place the tuning fork inside the resonator box, making sure it fits securely in the hole. When the tuning fork is struck, the sound waves will resonate inside the box, creating a louder and more sustained sound.
Remember to test and adjust the resonator box as needed to achieve the desired sound quality. Experiment with different materials and box shapes to find the best combination for your tuning fork resonator.
Choosing the Right Materials
When making a tuning fork resonator box, it is important to choose the right materials to ensure the best sound quality and resonance. Here are some factors to consider when selecting the materials:
1. Wood
Wood is the most commonly used material for making resonator boxes. It is chosen for its acoustic properties and ability to amplify sound. Hardwoods like oak, maple, or mahogany are popular choices due to their durability and resonance.
2. Density
The density of the material is crucial in determining the sound quality. Heavier materials tend to produce a deeper and richer tone, while lighter materials create a brighter and more vibrant sound. Consider the type of sound you want to achieve and select a material with the right density accordingly.
3. Vibration Transfer
The material should have good vibration transfer properties, meaning it can effectively transmit sound waves from the tuning fork to the surrounding air. Materials like metal and glass are known for their excellent vibration transfer, while some types of wood may dampen vibrations. Consider the specific requirements of your tuning fork resonator and choose a material that will maximize the transfer of vibrations.
4. Durability
Since the tuning fork resonator box may be subject to frequent use and handling, it is important to choose a material that is durable and can withstand the test of time. Materials like hardwoods or strong metals are recommended to ensure longevity and resistance to wear and tear.
Overall, the choice of materials for a tuning fork resonator box depends on a combination of factors such as desired sound quality, vibration transfer, durability, and personal preference. Experimenting with different materials may help you find the perfect combination for your specific needs.
Measuring and Cutting the Materials
Before you begin assembling the resonator box, you will need to measure and cut the materials. Here are the steps to follow:
Step 1: Gather the Necessary Materials
Make sure you have all the materials required for the resonator box. You will need:
- A wooden board
- A tuning fork
- Nails or screws
- A saw
- A ruler or measuring tape
Step 2: Measure and Mark the Cuts
Using the ruler or measuring tape, measure and mark the dimensions for the resonator box on the wooden board. The size will depend on the tuning fork you have and the desired resonance.
Step 3: Cut the Pieces
Using the saw, carefully cut along the marked lines to create the individual pieces for the resonator box. Make sure to follow the measurements precisely for the best results.
Once you have measured and cut the materials, you are ready to proceed with the assembly of the tuning fork resonator box.
Assembling the Resonator Box
To assemble the resonator box for your tuning fork, you will need the following materials and tools:
- A sturdy wooden box or container
- A drill with a drill bit the same diameter as your tuning fork
- A file or sandpaper
- A soft foam or rubber padding
- A strong adhesive or glue
- Acoustic insulation material
Follow these steps to assemble your resonator box:
Step 1: Prepare the Box
Choose a sturdy wooden box or container that is large enough to fit your tuning fork comfortably. Make sure it is deep enough to allow for proper resonance. If needed, you can use a drill and file to adjust the size of the box to fit your tuning fork.
Step 2: Create a Padding
To prevent any damage to your tuning fork, create a soft padding by cutting foam or using a rubber material to line the inside of the box. This will also help to dampen any unwanted vibrations.
Step 3: Attach the Tuning Fork
Using a strong adhesive or glue, securely attach the tuning fork to the bottom of the box. Make sure it is centered and secure to ensure optimum resonance.
Step 4: Insulate the Box
Line the inside of the box with acoustic insulation material to enhance the resonance and create a more controlled sound. You can use foam or other soundproofing materials for this purpose.
Once you have completed these steps, your resonator box is ready to use! Simply strike your tuning fork to initiate the vibration, and the box will amplify and enhance the sound.
Tuning the Fork and Testing the Resonator
Once you have assembled your tuning fork resonator box, it’s time to tune the fork and test the resonator’s performance. Follow these steps to ensure that your tuning fork resonator box is working effectively:
- Start by gently striking the tuning fork against a hard surface, such as a wooden block. This will set the fork in motion.
- Hold the vibrating fork near the opening of the resonator box. Align the prongs of the fork with the opening, ensuring a close fit.
- Listen carefully for any changes in the sound produced by the fork. If the resonator box is working correctly, you should notice a significant amplification of the sound.
- Experiment with different positions and angles of the fork within the resonator box to find the sweet spot where the amplification is highest.
- Take note of the resonant frequency produced by the fork when it is inside the resonator box. This can be measured using a frequency counter.
- Compare the resonant frequency with the expected resonant frequency of the fork. Adjust the length or thickness of the resonator box if necessary to achieve the desired resonant frequency.
Testing the resonator involves checking its ability to enhance the sound produced by the tuning fork. Use a decibel meter to measure the sound intensity without the resonator box and then compare it with the sound intensity produced when the fork is inside the resonator box. Ideally, the resonator box should cause a noticeable increase in sound intensity.
| Configuration | Sound Intensity (dB) |
|---|---|
| Fork Alone | 85 dB |
| Fork Inside Resonator Box | 95 dB |
As demonstrated by the test results in Table 1, the resonator box amplifies the sound produced by the tuning fork, resulting in a noticeable increase in sound intensity. This confirms the successful tuning of the fork and the effectiveness of the resonator box.
Final Thoughts and Tips
Creating a tuning fork resonator box can be a fun and rewarding DIY project. Here are some final thoughts and tips to keep in mind:
1. Choose the right materials
When selecting materials for your resonator box, make sure to choose ones that are durable and can produce a clear and vibrant sound. Opt for materials like wood, metal, or hard plastic.
2. Use proper measurements
Make sure to accurately measure the length and diameter of the tuning forks to ensure a precise fit inside the resonator box. This will help to optimize the resonance and produce a better sound.
3. Experiment with different designs
Don’t be afraid to try out different designs and shapes for your resonator box. You can create multiple boxes with different dimensions and materials to see how it affects the sound. This can be a fun way to explore and find the perfect resonator box for your tuning forks.
4. Consider adding padding
To protect your tuning forks and prevent them from getting damaged, consider adding padding inside the resonator box. This can be done by lining the interior with soft materials like foam or fabric. It will also help to dampen any unwanted vibrations or rattling noises.
5. Properly secure the tuning forks
Make sure to securely fasten the tuning forks inside the resonator box to prevent them from falling out or shifting during use. You can use adhesive, screws, or brackets to hold them in place. This will ensure that the sound is consistent and the forks are protected.
6. Test and adjust
Once you’ve assembled your tuning fork resonator box, take the time to test it out and make any necessary adjustments. Experiment with different striking techniques and listen carefully to the sound produced. If needed, you can make small modifications to improve the resonance and overall performance.
7. Enjoy the process
Building a tuning fork resonator box is not only about the final product, but also about the joy of creating something with your own hands. Enjoy the process and have fun experimenting with different designs and materials. Let your creativity and curiosity guide you, and you’ll be rewarded with a unique and beautiful resonator box for your tuning forks.
| Author: | Your Name |
| Date Published: | November 15, 2022 |


