

If you’re looking for a creative and unique way to express your artistic side, making fork sculptures might be just the thing for you. Fork sculptures are a form of art that involves manipulating forks into various shapes and designs, creating beautiful and eye-catching pieces. Whether you’re an experienced sculptor or a beginner looking to try your hand at something new, this art form is accessible to everyone.
In this article, we’ll guide you through the process of making fork sculptures, providing you with step-by-step instructions and helpful tips to ensure your success. You’ll discover how to choose the right forks for your project, techniques for shaping and bending the utensils, and ideas for creating stunning designs.
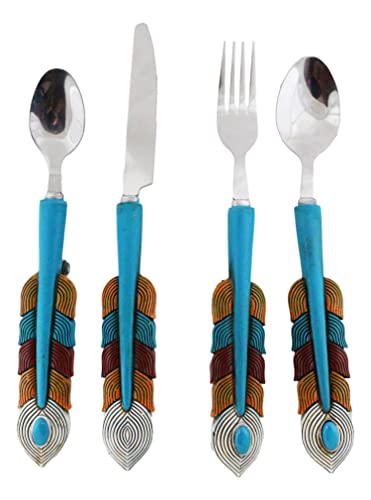
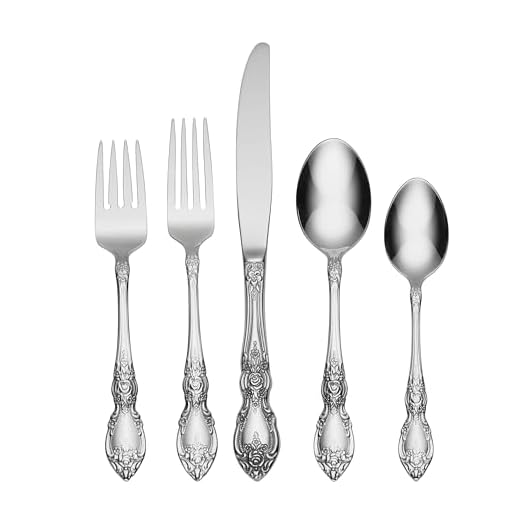
One of the first things you’ll need to consider is the type of forks you’ll be using for your sculptures. While any fork can be used, vintage forks or those with unique designs can add an extra touch of charm to your creations. Look for forks with interesting shapes or patterns that will make your sculptures stand out.
Next, you’ll need to learn the techniques for shaping the forks. This can be done using pliers or your hands. By gently bending and curving the prongs and handles, you can create a variety of shapes such as animals, plants, or abstract designs. Experiment with different angles and directions to achieve the desired effect.
Finally, let your creativity soar and start designing your fork sculptures. Look for inspiration from nature, art, or even everyday objects. You can create a bouquet of flowers, a family of birds, or a unique geometric pattern. Let your imagination guide you as you transform ordinary forks into extraordinary pieces of art.
What are fork sculptures?
Fork sculptures are a unique and creative form of art where artists use forks, spoons, and other utensils to create sculptures. These sculptures are made by bending and shaping the utensils into various shapes and forms, often resembling animals, creatures, or abstract designs.
The process of making fork sculptures involves carefully manipulating the metal forks and spoons, using various tools like pliers and hammers to bend and shape them into desired forms. Artists often start with a basic idea or sketch and then work on bringing that concept to life using the utensils.
Fork sculptures can be made using both new and old utensils. Some artists prefer to use vintage or antique silverware for a more rustic and unique look, while others may choose to work with new stainless steel utensils for a modern and sleek appearance.
Creating fork sculptures requires a high level of skill and attention to detail. Artists must have a good understanding of the properties of metal and how to work with it in order to achieve the desired shapes and textures. They also need to have a creative eye and be able to envision how the utensils can be transformed into unique and visually appealing sculptures.
Fork sculptures can be displayed as standalone pieces of art, or they can be incorporated into other artistic projects, such as mixed media or installation art. They can be showcased in galleries, museums, outdoor spaces, or even in private collections.
Overall, fork sculptures offer a fascinating and innovative way to repurpose everyday utensils into stunning works of art. They showcase the creativity and skill of the artist, as well as provide a unique and visually interesting experience for viewers.
Materials needed for making fork sculptures
Creating fork sculptures is a fun and creative way to repurpose old cutlery. To get started, you will need the following materials:
Forks
You will need a variety of forks to create your sculptures. Look for forks with interesting patterns or designs on the handles, as these can add visual interest to your final piece. You can gather forks from thrift stores, garage sales, or ask friends and family if they have any extra forks they are willing to part with.
Pliers
Pliers are an essential tool for bending and shaping the forks. You will need a pair of pliers with a narrow tip to grip and manipulate the forks. It’s recommended to use pliers with a comfortable grip to make the process easier.
Wire cutters
Wire cutters are essential for cutting and trimming the forks if needed. They allow you to remove any excess length or unwanted parts of the forks to achieve the desired shape for your sculpture. Make sure to use wire cutters suitable for cutting metal.
Work surface
Choose a sturdy work surface that can withstand the pressure applied when bending and shaping the forks. A wooden table or a thick sheet of plywood is ideal for this purpose. Avoid working on delicate surfaces that may get scratched or damaged in the process.
Protective gear
When working with metal, it’s important to protect yourself. Wear safety glasses to shield your eyes from any flying debris or sharp edges. You may also want to wear work gloves to protect your hands from potential cuts or scrapes.
Optional materials
Depending on your artistic vision, you may also want to have some additional materials on hand. These could include paints, brushes, and other decorative items to enhance the final appearance of your fork sculptures. Don’t be afraid to get creative and experiment with different materials to personalize your creations.
Once you have gathered all the necessary materials, you are ready to start creating your fork sculptures. Remember to have fun and let your imagination guide you as you transform ordinary forks into unique works of art!
Step-by-step guide to making fork sculptures
If you’re feeling creative and want to try something unique, making fork sculptures is a great option. With just a few simple materials and a bit of patience, you can create stunning pieces of art that will impress everyone. Follow these steps to make your own fork sculptures:
|
Step 1: Gather the necessary materials:
|
Step 2: Put on your gloves to protect your hands from any sharp edges. |
|
Step 3: Using the pliers, bend and manipulate the forks to create your desired shapes. You can bend the prongs, curve the handles, or twist the entire fork to your liking. Experiment with different techniques and angles to achieve unique results. |
Step 4: Combine multiple forks together by intertwining the prongs or melting the ends using a heat source. This will allow you to create larger and more intricate sculptures. |
|
Step 5: Take your time and be patient. Sculpting with forks can be a delicate process, so take breaks if you feel tired or frustrated. |
Step 6: Once you are satisfied with your sculpture, carefully examine it for any sharp edges. Use the pliers to smooth out any areas that may cause injury. |
|
Step 7: Show off your fork sculptures! Display them on a shelf, table, or even frame them as wall art. Your unique creations will surely spark conversations and admiration. |
Step 8: Feel free to experiment and get creative with different types of cutlery, such as spoons or knives. Each utensil offers unique possibilities for your sculptures. Trending Now
Vintage Silverware Wall Art Set Charming kitchen décor with cutlery design
This three-piece canvas wall art set brings a vintage touch to your kitchen. Expertly printed and ready to hang, it adds elegance to your home.
|
Tips and tricks for creating unique fork sculptures
Creating fork sculptures can be a fun and creative way to repurpose old utensils. With a little bit of time and effort, you can transform ordinary forks into unique works of art. Here are some tips and tricks to help you get started:
1. Choose the right forks:
When selecting forks for your sculpture, look for ones that have interesting shapes or designs. Vintage forks can add a unique touch to your artwork. Make sure that the forks are made of a material that is easy to manipulate, such as stainless steel.
2. Prepare your tools:
Before you start working on your sculpture, gather all the necessary tools. You will need pliers, wire cutters, and a vice grip. These tools will help you manipulate the forks and create different shapes and angles.
3. Bend and shape the forks:
Once you have your forks and tools ready, you can start bending and shaping them to create your desired sculpture. Use the pliers to bend the tines of the forks and create interesting shapes. The vice grip can help you hold the forks in place while you manipulate them.
4. Experiment with different techniques:
Don’t be afraid to experiment with different techniques and styles. Try bending the forks in different directions, twisting them, or combining multiple forks to create more complex sculptures. With practice, you will develop your own unique style.
5. Add embellishments:
To make your fork sculptures even more unique, consider adding embellishments. You can attach beads, buttons, or other small decorative items to the forks using thin, flexible wire. This will add an extra layer of visual interest to your artwork.
6. Display your creations:
Once you have finished creating your fork sculptures, find a way to display them. You can mount them on a wooden base or frame, or simply place them on a shelf or table. Experiment with different arrangements and angles to showcase your artwork.
Remember, creating fork sculptures is all about having fun and expressing your creativity. Don’t be afraid to think outside the box and try new ideas. With time and practice, you will become more skilled at creating unique fork sculptures that are truly one-of-a-kind.
Inspiration for Fork Sculpture Designs
Creating fork sculptures can be a fun and creative way to repurpose old and unused utensils. There are numerous inspiring designs that you can draw inspiration from to create your own unique and eye-catching fork sculptures. Here are some ideas to get you started:
1. Nature-Inspired Designs
One popular theme for fork sculptures is nature. You can create sculptures that resemble various plants, animals, or natural elements like trees, flowers, or birds. For example, you can bend the fork tines to resemble the petals of a flower or the branches of a tree. Such designs can bring a touch of natural beauty to any space.
2. Abstract and Geometric Designs
If you prefer a more contemporary look, you can explore abstract and geometric designs for your fork sculptures. This style allows for more creativity and experimentation. You can bend the forks into interesting shapes, angles, and patterns, creating visually striking sculptures that can become great conversation pieces.
Remember to consider how the light reflects on your sculpture and how shadows can enhance its overall appearance.
Pro tip: Research different abstract and geometric art styles to discover unique design ideas and techniques that can inspire your fork sculptures.
Emphasizing texture: Experiment with different techniques to add texture to your fork sculptures. You can use tools to create hammer-like marks or create variations in spacing between the tines to add dimension and visual interest to your designs.
3. Functional Sculptures
Another interesting approach to fork sculptures is to create functional pieces. For example, you can create a fork sculpture that acts as a key holder or a decorative utensil holder. These types of designs not only serve a practical purpose but also add a touch of uniqueness and charm to your living space.
Keep in mind that it’s crucial to use strong, durable adhesive or welding techniques depending on the materials you’re working with to ensure the functionality and stability of your sculptures.
Remember, the key to creating beautiful fork sculptures is to let your imagination run wild and experiment with different designs and techniques. Don’t be afraid to take risks and push your creative boundaries. Happy sculpting!


