


Peeling prawns can be a messy and daunting task, especially if you don’t have the right tools. But fear not, with just a fork and spoon, you can easily peel prawns like a pro! Whether you’re preparing a fancy seafood dish or simply enjoying a shrimp cocktail, this simple technique will make peeling prawns a breeze.
Step 1: Preparing Your Tools
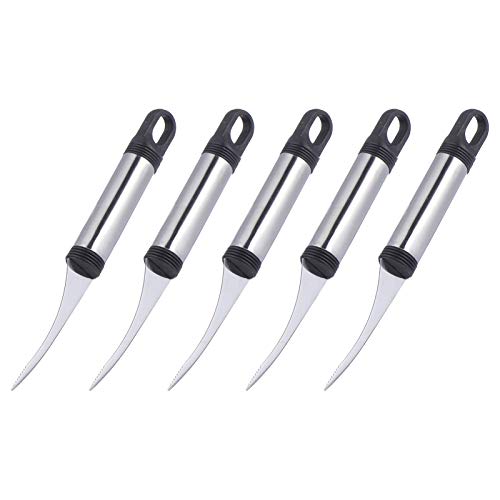
Before getting started, make sure you have a fork and spoon on hand. The fork will be used to hold the prawn in place, while the spoon will be used to remove the shell. Opt for a fork with long tines and a spoon with a slightly curved edge for better control.
Step 2: Removing the Head
Hold the prawn securely using the fork, making sure to grip its head. With your other hand, firmly grasp the prawn’s body. Gently twist the head counterclockwise until it detaches from the body. Discard the head and set the prawn aside.
Step 3: Separating the Shell
Starting from the underside of the prawn, use the spoon to go under the shell and lift it away from the body. Work your way towards the top of the prawn, continuing to use the spoon to loosen and remove the shell. Be careful not to damage the delicate flesh of the prawn while peeling.
Step 4: Removing the Tail
Once the shell is completely removed, hold the prawn by its tail using the fork. With your other hand, gently pinch the base of the tail and pull it away from the body. The tail should easily detach, leaving you with a perfectly peeled prawn.
Step 5: Enjoying Your Peeled Prawns
Now that your prawn is peeled, you can use it in any recipe you desire. Whether you want to fry, grill, steam, or boil your prawns, they’re ready to be cooked to perfection. Don’t forget to save the prawn shells for making a delicious seafood stock!
Peeling prawns doesn’t have to be a hassle. With a fork and spoon, you can quickly and easily remove the shells, allowing you to enjoy the succulent flesh with ease. So, next time you’re faced with a plate of prawns, remember this simple technique and impress your friends and family with your prawn peeling skills.
Step-by-Step Guide on Peeling Prawns with Fork and Spoon
Peeling prawns can be a daunting task, but with the right tools and techniques, it can be done easily. In this step-by-step guide, we will show you how to peel prawns using just a fork and spoon.
- Start by holding the prawn firmly with your non-dominant hand. Take your fork and insert it into the first segment of the shell, between the head and body.
- Gently twist the fork to separate the shell from the body. Be careful not to remove the entire shell at once, as you want to keep the tail intact.
- Once the first segment of the shell is removed, use your spoon to remove the greyish-black vein running along the back of the prawn. This vein is the digestive tract and is not pleasant to eat.
- Continue to peel the shell off the prawn’s body, segment by segment, using your fork and spoon. Be sure to remove any remaining veins as you go along.
- Once you have removed all the segments of the shell, give the prawn a quick rinse under cold water to remove any excess shell or vein remnants.
- Your prawn is now completely peeled and ready to be cooked or used in your desired recipe.
Peeling prawns with a fork and spoon may take some practice, but with time, you will become more proficient. Remember to take your time and be gentle to avoid damaging the prawn’s delicate flesh.
Now you can enjoy your peeled prawns in a delicious dish of your choice!
Gather the necessary utensils and ingredients
Before you can begin peeling prawns with a fork and spoon, you’ll need to gather a few essential utensils and ingredients. Here’s what you’ll need:
- Prawns: Make sure you have fresh prawns on hand. You can buy them already peeled or with their shells intact.
- Fork: You’ll need a fork to help you pry open the prawn shells and remove the meat.
- Spoon: A spoon can be useful in scooping out the prawn meat once it’s been separated from the shell.
- Bowl of water: Having a bowl of water nearby will help you rinse off any shells or residue from the prawns.
- Optional ingredients: You may want to have some lemon wedges or a dipping sauce ready to accompany your peeled prawns.
Once you have all these items ready, you’ll be well-prepared to start peeling prawns with a fork and spoon!
Hold the prawn firmly with the spoon
Once you have a firm grip on the prawn with the fork, use a spoon to hold it firmly in place.
Position the spoon so that the curved end is facing up and the prawn is resting against it. This will help to stabilize the prawn while you peel away the shell.
Make sure to hold the prawn close to the head end with the spoon, as this is the part that you will peel first.
By holding the prawn firmly with the spoon, you will have better control and be able to peel away the shell more easily and effectively.
Tip:
It may take some practice to get the hang of holding the prawn with the spoon, but with a little patience and persistence, you’ll be peeling prawns like a pro in no time!
Once you have mastered holding the prawn with the spoon, you can move on to the next step in the peeling process.
Next Step: Peel the shell
With the prawn securely held in place with the spoon, you can now use your other hand to peel away the shell. Gently grasp the shell with your fingers and pull it away from the prawn.
Work your way down the prawn, peeling off the shell section by section, until you reach the tail. The tail can be left on for presentation purposes or removed depending on your personal preference.
Remember to take your time and be careful not to damage the prawn meat while peeling. With practice, you’ll become more skilled at peeling prawns quickly and efficiently.
| Step | Description |
|---|---|
| 1 | Hold the prawn firmly with the spoon |
| 2 | Peel the shell |
Use the fork to cut through the shell
When peeling prawns, it can be helpful to use a fork to cut through the shell. This technique allows you to easily remove the shell without damaging the delicate flesh of the prawn.
Step 1: Hold the prawn with one hand
Start by holding the prawn with one hand and picking up a fork with the other hand.
Step 2: Insert the fork into the shell
Insert one of the tines of the fork into the shell of the prawn, near the head. Make sure to angle the fork slightly downward so that it cuts through the shell smoothly.
 |
| Example of inserting the fork into the prawn shell |
Step 3: Cut through the shell
Gently push the fork forward while applying slight pressure to cut through the shell. Move the fork along the length of the prawn, keeping it close to the shell at all times. Be careful not to push too hard and damage the prawn meat.
Step 4: Repeat on the other side
Once you have cut through one side of the shell, repeat the process on the other side. Insert the fork into the shell near the tail this time, and cut through the shell using the same technique as before.
 |
| Example of cutting through the prawn shell with the fork |
By using a fork to cut through the shell, you can easily peel prawns without damaging the meat. This technique is especially useful when you want to keep the prawn intact for presentation purposes.
Remove the head and shell using the spoon
Once you have chosen your prawns and prepared your fork and spoon, it’s time to start peeling. The first step is to remove the head and shell, and you can easily do this using the spoon.
Step 1: Hold the prawn with the tail facing up
Hold the prawn with one hand, ensuring that the tail is facing up. This will make it easier to remove the head and shell.
Step 2: Insert the spoon under the shell
Take the spoon in your other hand and carefully insert it under the shell, close to where the head is. Gently push the spoon beneath the shell and move it along the length of the prawn.
Step 3: Lift the shell off
Once the spoon is fully inserted and you have moved it along the prawn, lift the spoon upwards to remove the shell. Go slowly and be gentle to avoid damaging the prawn meat.
Step 4: Remove the head
After the shell is removed, use the spoon to detach the head from the prawn. Simply slide the spoon underneath the head and lift it off.
And there you have it! You have successfully removed the head and shell of the prawn using just a spoon. Now you can continue with other preparations, such as deveining or marinating the prawns, depending on your recipe.
Devein the prawn with the help of the fork
Once you have peeled the shell off the prawn, you will need to devein it. The “vein” refers to the dark digestive tract that runs along the back of the prawn. While consuming prawns with the digestive tract intact is not harmful, some people prefer to remove it for aesthetic or culinary reasons.
To devein the prawn, take a fork and insert one of its tines into the back of the prawn where the vein is located. Gently lift the vein up and pull it out of the prawn using the fork. Be careful not to break the vein as you remove it, as this can lead to a messier process.
Using a fork instead of a knife can make deveining prawns easier as it allows for better control and precision. Make sure to rinse the prawn under cold water after deveining to remove any residual veins or debris.
If you prefer to use a spoon for deveining, you can also use the curved side of the spoon to scoop out the vein. Simply press the curved side against the prawn’s back and gently swipe it along the length of the prawn to remove the vein.
Deveining prawns is an optional step, but it can improve the appearance of the prawns and make them more enjoyable to eat. Plus, removing the digestive tract can also result in a milder flavor.


