
Do you own a bike with air forks? If so, then it’s important to know how to properly pump them up. Air forks are a key component of a mountain bike’s suspension system, and maintaining the correct air pressure is crucial for optimal performance on the trails.
Before you begin, it’s important to note that different bike models and fork brands may have slightly different procedures for pumping up the air forks. Therefore, always consult your bike’s manual or contact the manufacturer for specific instructions. However, these general guidelines will give you a good starting point.
Step 1: Gather the necessary tools
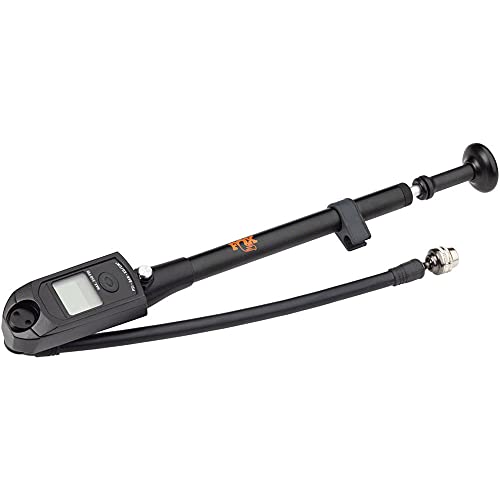
First, you’ll need a shock pump with a built-in pressure gauge. Regular pumps for tires won’t work for air forks. Additionally, make sure your bike is positioned securely on a stand or on the ground with the front wheel off the floor.
Step 2: Release any air pressure
If you’ve previously pumped up your air forks or the pressure is too high, release some air by pressing the release valve on the air fork. This ensures that you’re starting with the correct pressure.
Step 3: Check the recommended pressure
Consult your bike’s manual or the manufacturer’s website to find the recommended pressure for your specific fork model and your weight. This information is usually given in pounds per square inch (PSI) or bar. Note that the front and rear forks may have different recommended pressures.
Step 4: Attach the shock pump
Screw the shock pump onto the air valve of your fork. Make sure it’s securely attached to prevent any air leaks during the pumping process.
Step 5: Pump up the air fork
Slowly pump the shock pump to add air to the fork. Keep an eye on the pressure gauge and stop pumping when you reach the desired pressure. Be sure not to overinflate the fork, as this can lead to a harsh ride and potentially damage the fork.
Step 6: Test the fork
Once you’ve pumped up the air fork to the desired pressure, put the front wheel back on your bike and take it for a short test ride. Pay attention to how the fork feels and adjust the pressure if needed.
Step 7: Maintenance
Remember to regularly check the air pressure of your forks and adjust it as needed. Air forks lose pressure over time, so it’s important to keep them properly inflated for optimal performance.
By following these steps and maintaining the correct air pressure, you’ll ensure that your air forks are performing their best on the trails, providing you with a smooth and controlled ride.
What are air forks
Air forks, also known as air suspension forks, are a type of suspension system commonly used in bicycles and motorcycles. They use compressed air as a spring to absorb impacts and provide a smooth ride over rough terrain.
Unlike traditional coil spring forks, air forks allow riders to adjust the spring rate and preload to match their weight and riding style. This adjustability makes air forks a popular choice among riders who want a personalized suspension setup.
One of the main advantages of air forks is their lightweight design. Compared to coil spring forks, air forks are lighter, which can improve the overall performance and handling of the bike or motorcycle.
To pump up air forks, you will need a high-pressure pump with a gauge. The specific pressure requirements for your air forks can usually be found in the owner’s manual or on the manufacturer’s website. It’s important to follow these guidelines to ensure optimal performance and prevent damage to the forks.
In conclusion, air forks are a versatile suspension system that allows riders to customize their suspension setup and improve the performance of their bikes or motorcycles. By understanding how to properly pump up air forks, riders can easily maintain and adjust their suspension to suit their individual needs.
Advantages of Air Forks
Air forks, also known as air suspension forks, offer several advantages over traditional coil suspension forks. Here are some of the key benefits:
- Adjustability: Air forks allow for easy adjustment of the fork’s sag, rebound, and overall stiffness. This means that riders can quickly and easily customize the feel and performance of their forks to suit their individual riding style and terrain.
- Lightweight: Air forks are generally lighter than their coil counterparts, making them a popular choice for riders who value weight savings. The lighter weight can contribute to an overall lighter bike and improved handling.
- Progressive Performance: Air forks typically offer a more progressive performance curve compared to coil forks. This means that as the fork compresses, the resistance increases gradually, providing a more controlled and predictable suspension feel.
- Tunable: With air forks, it is possible to fine-tune the suspension characteristics by adjusting the air pressure. This allows riders to achieve the desired amount of plushness or firmness based on their preferences and riding conditions.
- Consistency: Air forks are less affected by temperature changes during long rides compared to coil forks. This means that the suspension performance remains more consistent throughout the ride, allowing for better control and confidence.
Overall, air forks offer a high degree of adjustability, lightweight construction, progressive performance, tunability, and consistency, making them a popular choice among MTB riders looking to optimize their suspension performance.
Preparation
Before you start pumping up your air forks, it is important to ensure that you have all the necessary tools and equipment. Here are the steps you need to follow:
Step 1: Gather the required tools
Make sure you have the following tools handy:
- A high-quality fork pump
- A pressure gauge
- Any adapters required for your specific fork
Step 2: Check the manufacturer’s recommendations
Check the user manual or the manufacturer’s website to find the recommended air pressure range for your specific forks. This information is crucial to ensure optimal performance and prevent damage.
Step 3: Choose a suitable location
Find a clean and well-ventilated area for the air pumping process. Avoid dusty or dirty environments as this can negatively affect your fork’s performance.
Step 4: Prepare the fork
Before you start pumping air, make sure your fork is in the correct position. It is advisable to turn off the compression damping to remove any resistance and allow efficient air filling.
Note: If you are unsure about any of the steps or if you are a beginner, it is recommended to seek professional assistance or refer to the manufacturer’s guidelines.
Check the pressure
Before you start pumping up your air forks, it is important to check the pressure to ensure optimal performance. Here are the steps to follow:
Step 1: Get a reliable pressure gauge
Purchase a high-quality pressure gauge specifically designed for air forks. This will help ensure accurate readings and prevent any potential damage.
Step 2: Locate the air valve
Locate the air valve on your fork. It is usually positioned on the top of the left fork leg. Make sure the valve cap is securely tightened to prevent any air leakage.
Step 3: Remove any air pressure
If there is any existing air pressure in the fork, you will need to release it by depressing the air valve. Use caution and make sure to slowly release the pressure to avoid sudden air release.
Step 4: Determine the recommended pressure
Refer to your bike’s user manual or manufacturer’s website to find the recommended air pressure for your specific fork model. This information is usually given in PSI (pounds per square inch) or BAR (atmospheric pressure).
Step 5: Check the current pressure
Connect the pressure gauge to the air valve firmly and read the current pressure. It is important to make sure the pressure in the fork matches the recommended pressure. If not, you will need to add or release air accordingly.
Step 6: Adjust the pressure
If the pressure is too low, use a fork pump to add air by inserting it onto the air valve and pumping until the desired pressure is reached. If the pressure is too high, carefully depress the air valve to release some air and reduce the pressure.
Step 7: Recheck the pressure
After adjusting the pressure, recheck it using the pressure gauge to ensure it matches the recommended pressure. Repeat the previous step if necessary until the desired pressure is achieved.
By following these steps and regularly checking the pressure of your air forks, you can ensure optimal performance and a smooth riding experience.
Adjust the sag
Adjusting the sag on your air forks is important to ensure optimal performance and comfort while riding. Sag refers to the amount of suspension travel that is used when the rider is on the bike. To adjust the sag on your air forks, follow these steps:
- First, set the air pressure in your forks to the recommended pressure for your weight. You can find this information in your bike’s owner’s manual or on the manufacturer’s website.
- Next, put on your riding gear and get on your bike in a normal riding position.
- Have someone measure the distance between a fixed point on your bike (such as the bottom of the handlebars) and a fixed point on the front wheel (such as a point on the fender).
- While seated on the bike, bounce up and down a few times to settle the suspension.
- Have the person measuring the sag recheck the distance between the fixed points on your bike.
- If the sag measurement is too high, release some air pressure from your forks.
- If the sag measurement is too low, add some air pressure to your forks.
- Continue adjusting the air pressure until the sag measurement is within the recommended range.
Adjusting the sag may take some trial and error, but it is worth it to find the perfect balance for your riding style and weight. Once you have adjusted the sag, you will notice improved control and comfort on your bike.
Pumping up air forks
Properly pumping up your air forks is crucial for a smooth and controlled ride. Follow these steps to ensure you get the most out of your suspension:
Step 1: Preparation
Before you start, make sure you have the correct air pressure gauge and a shock pump compatible with air forks. Additionally, check the manufacturer’s recommendations for the correct air pressure for your fork.
Step 2: Release Air Pressure
First, release any remaining air pressure from the fork by using the bleed valve or releasing air through the Schrader valve. This step is important to ensure accurate pressure readings.
Step 3: Attach Pump
Attach the shock pump to the valve on the air fork. Make sure it is securely connected to prevent air leakage during the pumping process.
Step 4: Initial Pumping
Pump the fork a few times to fill the positive air chamber, allowing the fork to extend fully after each pump. This helps to distribute the lubrication and air evenly throughout the fork.
Step 5: Pressure Adjustment
Refer to the manufacturer’s recommendations for the proper air pressure. Use the pump gauge to adjust the pressure accordingly. It is generally recommended to start with a lower air pressure and add more as needed for your riding style and weight.
Step 6: Fine Tuning
Once you have set the initial air pressure, go for a short ride to test the fork’s performance. Pay attention to how the fork feels and adjust the air pressure as needed. Fine-tuning the pressure will help you find the optimal setting for your riding preferences.
Step 7: Maintenance
Regularly check your air pressure to ensure it remains within the recommended range. Changes in temperature and riding conditions can affect the pressure, so it’s essential to adjust accordingly for optimal performance.
Following these steps will help you properly pump up your air forks and ensure a comfortable and efficient ride. Remember to consult your bike’s manual or contact the manufacturer for any specific instructions or recommendations.
Attach the pump
Before you start pumping up your air forks, you need to make sure that you have the right pump for the job. Air forks require a specific type of pump with a high-pressure gauge. Once you have the correct pump, follow these steps to attach it:
- Identify the valve on your air forks. It is usually located on the top of one of the fork legs.
- Remove the cap from the valve by unscrewing it counterclockwise.
- Check the pressure of your air forks using a pressure gauge.
- Attach the pump securely to the valve by pressing it onto the valve until it clicks into place.
- Tighten the pump onto the valve by turning it clockwise.
Once the pump is securely attached, you are ready to start pumping up your air forks. Make sure to follow the manufacturer’s instructions for the recommended pressure level for your specific forks. Take your time and pump up the forks gradually, checking the pressure frequently as you go.
Important Tips
- Always consult the owner’s manual or contact the manufacturer if you are unsure about attaching the pump or the recommended pressure level.
- Make sure there are no leaks in either the pump or the valve before starting to pump up the forks.
- Keep a close eye on the pressure gauge while pumping to ensure that you reach the desired pressure without exceeding it.
Conclusion
Attaching the pump to your air forks is an important step in the process of maintaining and tuning your suspension. With a properly attached pump, you will be able to accurately adjust the pressure in your air forks and optimize your riding experience.
Add air pressure
To pump up air forks properly, you need to add the correct amount of air pressure. Follow these steps:
- Start by checking the recommended air pressure for your specific fork. You can usually find this information in the manufacturer’s manual or on their website.
- Locate the air valve on the fork. It is usually located on the top cap or the side of the fork leg.
- Remove the valve cap and attach the pump’s nozzle to the valve.
- Pump air into the fork using a shock pump. Make sure to use smooth and even strokes to prevent overinflating.
- Check the air pressure regularly using a pressure gauge. Stop inflating when you reach the recommended pressure.
- Once you have reached the desired pressure, carefully remove the pump nozzle and reinstall the valve cap.
- Bounce the fork on its travel a few times to allow the air to distribute evenly throughout the fork.
- Recheck the air pressure and make any necessary adjustments.
Remember to always follow the manufacturer’s guidelines and recommendations when adding air pressure to your forks. Proper air pressure is essential for optimal performance and safety.


