Mountain biking is an exhilarating sport that demands a lot from both the rider and their equipment. If you ride regularly, you may notice that your mountain bike forks start to show signs of wear and tear over time. Refurbishing your forks can help restore their performance and prolong their lifespan, ensuring a smoother and more enjoyable ride.
Refurbishing mountain bike forks involves disassembling and cleaning the internals, replacing worn-out parts, and reassembling everything to factory specifications. While it may seem like a daunting task, it can be a rewarding DIY project that saves you money and allows you to better understand your bike’s mechanics.
Before you begin, it’s important to gather the necessary tools and components. You’ll need basic tools like Allen wrenches, a socket wrench, and a torque wrench, as well as fork-specific tools such as a suspension fork pump and seal kit. Additionally, it’s crucial to consult your bike manufacturer’s documentation or seek professional advice to ensure you have the correct parts and follow the recommended procedures.
Once you have everything you need, the first step is to remove the fork from your bike. This typically involves loosening the stem and removing the handlebars, then removing the front wheel and brake caliper. With the fork removed, you can then proceed to disassemble the fork’s lower and upper halves, taking care to clean each part thoroughly and inspect for any signs of damage or wear.
Step 1: Disassembling the Forks
Before you begin refurbishing your mountain bike forks, it is important to disassemble them properly. This allows you to inspect each component individually and clean them thoroughly.
Follow these steps to disassemble your mountain bike forks:
1. Gather the necessary tools
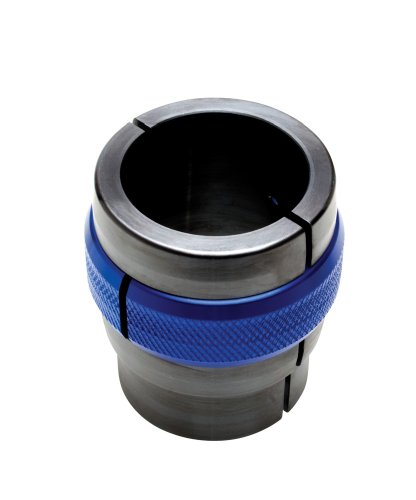
Make sure you have all the tools required for disassembling your bike forks. This may include hex wrenches, socket wrenches, pliers, and a suspension fork seal kit.
2. Remove the front wheel
Suspend your bike securely or prop it against a wall. Loosen the quick-release mechanism or unscrew the axle nuts to remove the front wheel. Set it aside in a safe place.
3. Loosen the fork crown bolts
Use the appropriate hex wrench or socket wrench to loosen the fork crown bolts that secure the fork legs to the frame. This will allow you to remove the fork without damaging the frame.
4. Remove the fork from the frame
Gently slide the fork out of the frame, being careful not to scratch or damage any parts. Pay attention to any spacers or washers that may come off during the removal process.
5. Detach the suspension components
If your mountain bike forks have suspension components like a damper or spring, follow the manufacturer’s instructions to detach them from the fork legs. This will allow you to clean and service them separately.
| Tool | Usage |
|---|---|
| Hex wrenches | To loosen and remove bolts |
| Socket wrenches | To loosen and remove bolts |
| Pliers | To hold and manipulate small parts |
| Suspension fork seal kit | To replace worn out seals |
Once you have successfully disassembled your mountain bike forks, you can move on to the next step of the refurbishing process.
Step 2: Cleaning and Inspecting the Forks
Before you start refurbishing your mountain bike forks, it is important to thoroughly clean and inspect them. This will ensure that any dirt, grime, or damage is identified and addressed before moving forward.
To begin, use a mild detergent and warm water to clean the external parts of the forks. Gently scrub away any dirt or mud using a soft-bristled brush. Be sure to pay attention to hard-to-reach areas such as the crown and lowers. Rinse the forks thoroughly with water and use a clean cloth to dry them completely.
Next, inspect the forks for any signs of damage or wear. Look for dents, scratches, or cracks in the stanchions, lowers, and crown. Additionally, check the seals and dust wipers for any signs of leakage or damage. If you notice any issues, it is important to address them before moving forward with the refurbishment.
After inspecting the forks, it is a good idea to lubricate the stanchions with a light coating of fork oil. This will help prevent dirt and debris from building up and ensure smooth operation. Apply the oil evenly along the length of the stanchions and wipe off any excess.
Step 3: Replacing Worn Components
After inspecting the mountain bike forks and identifying any worn components, it is crucial to replace them before continuing with the refurbishment process. This step ensures that the forks function optimally and provide a smooth riding experience.
1. Remove the Forks
Begin by removing the forks from the mountain bike. Refer to the manufacturer’s instructions or seek guidance from a professional if you are unsure how to safely remove the forks.
Ensure that you have the necessary tools, such as a hex key or socket wrench, to dismantle the forks.
2. Disassemble the Forks
Carefully disassemble the forks, paying attention to the order in which each component is removed. Take note of any damaged or worn parts that need replacing.
Common components that may need to be replaced include:
Seals and bushings: Overtime, seals and bushings may wear down, leading to reduced performance. Replace them with new ones to restore optimal functionality.
Stanchions: Check for scratches, rust, or other signs of damage on the stanchions. If they are compromised, it is advisable to replace them to prevent further issues.
Springs and dampers: Inspect the springs and dampers for any signs of wear or malfunction. Replace them if necessary to ensure proper suspension.
Crown and steerer tube: Examine the crown and steerer tube for any cracks or damage. If present, these components should be replaced to maintain structural integrity.
3. Install New Components
Once the worn components have been identified, proceed to install new ones. Follow the manufacturer’s instructions for each component to ensure proper installation.
Grease any necessary parts, such as bushings or seals, before assembling the forks.
Tighten all bolts and screws to the recommended torque specifications to avoid over-tightening or under-tightening.
4. Reassemble the Forks
Carefully reassemble the forks, making sure to follow the correct order of components. Double-check that all parts are securely tightened to prevent any potential issues during use.
Once the forks have been reassembled and all components properly replaced, you can proceed with the remaining steps to complete the refurbishment process.
Step 4: Reassembling and Testing the Forks
Once you have completed the necessary cleaning and servicing of the mountain bike forks, it is time to reassemble them. Follow these steps to ensure proper reassembly:
- Start by inserting the lowers back onto the uppers. Apply a small amount of suspension oil or grease to the stanchions before sliding them into the lowers.
- Tighten the lower bolts or screws securely, making sure they are evenly tightened to prevent any leaks.
- Next, place the spring and damper back into their respective locations inside the fork. Align them correctly and ensure they are fully seated.
- Reinstall the rebound and compression adjuster knobs onto the fork. Make sure they are screwed on tightly but be careful not to overtighten.
- Now, insert the steerer tube back into the frame’s head tube and secure it with the stem bolts. Make sure the handlebars are aligned correctly and tighten the bolts evenly.
- Once everything is reassembled, it is crucial to test the forks to ensure they are working properly. Bounce the front end of the bike up and down while applying the front brake to check for any unusual sounds or movements.
- If everything feels and sounds normal, take the bike for a short test ride. Pay attention to the forks’ performance over bumps and rough terrain. If there are any problems, go back and double-check the assembly or seek professional help.
Congratulations! You have successfully refurbished your mountain bike forks. Remember to regularly maintain and service your forks to keep them in top condition and ensure a smooth and safe ride.