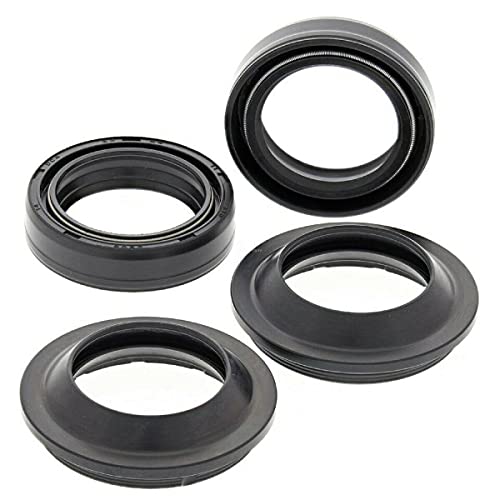
Anyone who has worked on their own mountain bike suspension knows that removing fork wiper seals can be a challenging task. Wiper seals are an essential component of the fork, as they help keep dirt, water, and debris out of the fork’s internal components, ensuring smooth operation and prolonging the life of the suspension.
However, over time, wiper seals can wear out or become contaminated, leading to decreased performance and potential damage to the fork. When this happens, it is important to know how to remove the old wiper seals and replace them with new ones.
To remove fork wiper seals, you will need a few tools: a small flathead screwdriver, a pick set, a seal puller, and a clean cloth. First, start by taking off the front wheel and loosening the lower pinch bolts to allow the fork legs to separate.
Next, use the small flathead screwdriver to gently pry up the edge of the wiper seal, being careful not to damage the fork or the seal itself. Once the edge is lifted, use the pick set or the seal puller to carefully pull the seal out of the fork leg. If necessary, use a clean cloth to wipe away any dirt or debris that may have accumulated in the fork leg.
With the old wiper seal removed, you can now proceed to install the new seal. Make sure to apply a small amount of suspension oil to the new seal and carefully slide it into place, pressing it down evenly until it is fully seated. Once the new seal is in place, reassemble the fork legs, making sure to tighten the lower pinch bolts and reinstall the front wheel.
Removing fork wiper seals can be a delicate and time-consuming process, but with the right tools and a little patience, it can be done. By regularly inspecting and replacing your fork wiper seals, you can ensure the longevity and optimal performance of your mountain bike suspension.
How to Remove Fork Wiper Seals
Fork wiper seals are a crucial component of your bike’s suspension system. Over time, they can wear out or become damaged, leading to decreased performance and potential leaks. If you notice oil around your fork seals or experience diminished suspension performance, it may be time to replace the wiper seals. Here is a step-by-step guide on how to remove fork wiper seals:
Tools and Materials You Will Need:
- Socket wrench
- Hex wrench
- Flathead screwdriver
- Liquid cleaner or degreaser
- Clean cloth or rag
Step 1: Prepare Your Bike
Before you begin, find a suitable workspace and ensure your bike is securely positioned. If necessary, you can use a bike stand to hold it in place.
Step 2: Remove the Fork from the Bike
Use your socket wrench to loosen the bolts that hold the fork in place. Once the bolts are loose, carefully remove the fork from the bike, taking care not to damage any other components.
Step 3: Remove the Dust Seals
Use a flathead screwdriver to gently pry off the dust seals that cover the fork wiper seals. Be careful not to scratch or damage the fork tubes while doing this. Once the dust seals are removed, set them aside.
Step 4: Remove the Circlips
Locate the circlips on the inner part of the fork. Use a flathead screwdriver to gently pry them out of their grooves. Take note of their position for later reassembly.
Step 5: Remove the Wiper Seals
With the circlips removed, you can now remove the old wiper seals. Carefully push them up and off the fork tubes, taking care not to scratch or damage the tubes in the process. If they are stuck, you can use a flathead screwdriver to carefully pry them off.
Step 6: Clean the Fork Tubes
Use a liquid cleaner or degreaser to thoroughly clean the fork tubes. Remove any dirt, grime, or old oil that may have accumulated. Be sure to clean both the upper and lower parts of the tubes.
Step 7: Install the New Wiper Seals
Take your new wiper seals and carefully slide them onto the fork tubes. Make sure they are aligned properly and sit flat against the tubes. You can use a small amount of clean fork oil to lubricate the seals and facilitate their installation.
Step 8: Reassemble the Fork
Reinstall the circlips in their original positions on the fork. Then, carefully press the dust seals back onto the fork tubes, ensuring they are firmly seated. Finally, reinstall the fork back onto your bike, tightening the bolts securely with your socket wrench.
By following these steps, you can successfully remove and replace the fork wiper seals on your bike. Remember to exercise caution and take your time to avoid any damage to the fork tubes or other components. Regularly maintaining your fork seals will help ensure optimal suspension performance and extend the lifespan of your bike’s suspension system.
Preparation for Fork Wiper Seal Removal
Before you begin the process of removing fork wiper seals, it’s important to properly prepare and gather all the necessary tools and equipment. This will help ensure a smooth and efficient removal process, minimizing the risk of any damage or difficulties. Follow these steps to prepare for fork wiper seal removal:
1. Gather the Required Tools
Make sure you have all the necessary tools before you start the removal process. This may include:
- Socket wrench set
- Allen wrench set
- Fork oil
- Shop rags or paper towels
- Grease
- Fork oil seal driver
- Fork oil seal bullet
- Fork oil level gauge or syringe
2. Secure the Bike
It’s important to secure the bike before you begin the fork wiper seal removal. This will prevent any accidents or injuries during the process. Use a bike stand or other stable support to lift and hold the bike in place.
3. Remove the Forks
In order to access and remove the fork wiper seals, you will need to remove the forks from the bike. Follow the manufacturer’s instructions or consult a repair manual for your specific bike model to properly remove the forks.
Typically, this involves loosening the bolts or screws that hold the forks in place, removing any attachments or brackets, and sliding the forks out of the bike frame.
4. Clean the Forks
Before removing the fork wiper seals, it’s important to clean the forks to ensure they are free from any dirt or debris. Use a clean cloth or paper towel to wipe down the forks, removing any visible dirt or grime. This will help prevent any contaminants from interfering with the seal removal process.
5. Inspect the Forks
Take a close look at the forks to inspect for any signs of wear or damage. Look for any cracks, scratches, or dents that may affect the functionality of the forks. If you notice any significant damage, it may be necessary to repair or replace the forks before proceeding with the seal removal.
In addition, check the fork tubes for any signs of oil leakage. If you notice any oil residue on the forks, it could indicate a problem with the fork seals, and it may be necessary to replace them.
By following these preparation steps, you will be ready to proceed with the fork wiper seal removal process. Taking the time to properly prepare and gather all the necessary tools will help ensure a successful and efficient removal process, allowing you to maintain and prolong the life of your bike’s forks.
Tools Needed for Fork Wiper Seal Removal
Removing fork wiper seals requires specific tools to ensure proper installation and minimize the risk of damage. The following tools are recommended for this task:
- Fork Seal Driver: This tool is essential for installing the new fork wiper seals correctly. It ensures an even and consistent pressure during installation.
- Fork Oil: Before removing the old wiper seals, it is essential to have fresh fork oil on hand. This will be needed for lubricating the new wiper seals during installation.
- Fork Cleaning Solution: To thoroughly clean the fork tubes and ensure a clean and smooth surface for the new wiper seals, a fork cleaning solution is recommended. This can help remove any dirt, grime, or debris that may be present.
- Allen Keys: Depending on the type of fork assembly, you may need Allen keys of various sizes to remove the bolts securing the fork tubes and wiper seals.
- Soft-Faced Mallet: A soft-faced mallet is useful for gently tapping the fork tubes to help dislodge the old wiper seals.
- Circlip Pliers: If your fork assembly has circlips holding the wiper seals in place, circlip pliers are necessary for their removal.
- Clean Rags: Having clean rags on hand is vital for wiping away any excess fork oil, as well as for cleaning the fork tubes and other components.
By having these tools available, you can make the process of removing fork wiper seals easier and more efficient. It is essential to follow proper procedures and instructions when working on fork components to ensure safety and functionality.
Step-by-Step Guide to Removing Fork Wiper Seals
Removing fork wiper seals may seem like a daunting task, but with the right tools and technique, it can be a relatively simple process. In this step-by-step guide, we will walk you through the process of removing fork wiper seals to help you maintain and service your fork.
Tools you will need:
- Fork seal driver
- Seal pick or small flathead screwdriver
- Suspension oil
- Shop towels or rags
Step 1: Preparation
Start by securing your bicycle in a workstand or on a stable surface to ensure stability during the process. Clean the fork stanchions thoroughly to prevent any debris from entering the fork seals.
Step 2: Remove the Dust Seal
Using a seal pick or small flathead screwdriver, gently pry open the dust seal from the fork lower leg. Be careful not to damage the dust seal or the fork stanchions. Once the dust seal is loosened, you can easily remove it by hand.
Step 3: Remove the Wiper Seal
With the dust seal removed, you will have access to the wiper seal. Insert the fork seal driver into the gap between the wiper seal and the fork lower leg. Slowly and evenly apply pressure to the seal driver to push out the wiper seal. Be cautious not to damage the fork lower leg in the process.
Step 4: Clean and Inspect
After removing the wiper seal, thoroughly clean the exposed fork stanchion and lower leg using suspension oil and shop towels. Take this opportunity to inspect the fork seals and replace them if necessary. Look out for any signs of cracking, tearing, or worn-out sections.
Step 5: Reinstallation
Before installing new fork wiper seals, apply a small amount of suspension oil to the fork stanchions and dust seal. Carefully slide the new wiper seal over the fork stanchions until it sits flush with the fork lower leg. Take care not to damage the seal during installation.
Step 6: Final Steps
Once the wiper seal is in place, reinstall the dust seal by pressing it evenly into the fork lower leg until it sits securely. Wipe off any excess suspension oil and give the fork a final inspection to ensure everything is in place.
By following this step-by-step guide, you can successfully remove fork wiper seals and keep your fork in optimal working condition. Remember to always consult your fork manufacturer’s instructions and guidelines for specific maintenance and service procedures.
| Tool | Description |
|---|---|
| Fork seal driver | A tool used for pushing out wiper seals |
| Seal pick or small flathead screwdriver | Used to remove dust seals |
| Suspension oil | Lubricant for fork stanchions |
| Shop towels or rags | To clean fork stanchions and lower leg |
Tips for Successful Fork Wiper Seal Removal
Removing fork wiper seals can be a tricky task, but with the right techniques and tools, it can be done successfully. Here are some tips to help you with the removal process:
1. Gather the necessary tools: Before you start, make sure you have all the tools you need for the job. This may include a seal removal pick, a small flathead screwdriver, and a rubber mallet. Having the right tools will make the process much easier.
2. Clean the area around the seals: Before you begin removing the fork wiper seals, it’s important to clean the area thoroughly. This will help prevent any dirt or debris from getting into your forks during the removal process.
3. Use caution when removing the old seals: When removing the old fork wiper seals, be careful not to damage any other components. Gently insert the seal removal pick or the flathead screwdriver under the seal and slowly pry it out. If necessary, tap the tool with a rubber mallet to loosen the seal.
4. Inspect the seals and replace if necessary: Once you have removed the old seals, inspect them for any signs of damage or wear. If the seals are in poor condition, it’s best to replace them with new ones. This will ensure optimal performance of your forks.
5. Install the new seals carefully: When installing the new fork wiper seals, make sure they are properly aligned. Gently push them into place using your fingers or a seal installation tool. Take your time and make sure the seals are seated securely.
6. Test the forks before riding: After you have successfully replaced the fork wiper seals, it’s important to test your forks before taking your bike out for a ride. This will help ensure that the seals are working properly and that your forks are performing as they should.
By following these tips, you can successfully remove fork wiper seals and maintain the optimal performance of your forks. Remember to always take your time and work carefully to avoid any damage to your bike.
Common Mistakes to Avoid during Fork Wiper Seal Removal
When removing fork wiper seals, it is important to be careful and avoid making these common mistakes:
1. Using the Wrong Tools
Using the wrong tools can damage the fork wiper seals and other components of the fork. It is essential to use the correct tools specified by the manufacturer or recommended for fork wiper seal removal. Common tools required for this task include a seal pick, a seal driver, and a fork seal bullet.
2. Applying Excessive Force
Applying excessive force during fork wiper seal removal can lead to damaging the fork stanchions or other crucial parts of the fork. It is essential to apply gentle and even pressure when removing the wiper seals. Using a seal pick or a fork seal bullet can help with gently prying out the seal without exerting excessive force.
3. Neglecting to Clean the Fork Stanchions
Before removing the fork wiper seals, it is important to thoroughly clean the fork stanchions to prevent debris or dirt from entering the fork internals. Wiping the stanchions with a clean cloth or using an appropriate cleaning solution can help remove any dirt or grime buildup.
4. Rushing the Removal Process
Rushing the fork wiper seal removal process can lead to mistakes or damage. It is important to take your time and follow the manufacturer’s instructions or a trusted guide when removing the wiper seals. This will ensure a smooth and successful removal process without any mishaps.
5. Not Replacing the Wiper Seals
After removing the old fork wiper seals, it is crucial to replace them with new ones. Neglecting to replace the seals can result in oil leaks, reduced fork performance, and potential damage to the fork internals. Always ensure to use high-quality replacement wiper seals that are compatible with your fork model.
Avoiding these common mistakes during fork wiper seal removal will help ensure a smooth and successful process while maintaining the performance and longevity of your fork.
Final Thoughts on Fork Wiper Seal Removal
Removing fork wiper seals can be a challenging task that requires patience and careful attention to detail. However, with the right tools and technique, it can be accomplished successfully. Here are a few key points to remember:
1. Proper Preparation:
Before attempting to remove fork wiper seals, it is crucial to gather all the necessary tools and materials. This includes a seal pick, an appropriate-sized socket or wrench, and a clean work area. Taking the time to prepare will ensure a smoother and more efficient process.
2. Methodical Approach:
When removing fork wiper seals, it is important to work in a methodical manner. Start by loosening the lower bolt on the fork leg and then carefully slide the seal pick between the fork stanchion and the wiper seal. Gently pry and rotate the seal pick to release the seal from its housing. Repeat this process around the circumference of the seal until it is completely free.
Remember to be patient and take your time during the removal process. Rushing or applying excessive force can damage the fork components and lead to costly repairs.
3. Clean and Inspect:
Once the fork wiper seal is removed, take the time to thoroughly clean the fork leg and inspect the seal mating surfaces for any signs of wear or damage. Wiping the components with a clean cloth and inspecting them under good lighting will help identify any issues that need attention.
If any damage or excessive wear is detected, it may be necessary to replace the fork wiper seal or seek professional assistance. Ignoring these issues can compromise the performance and safety of your fork.
Final Words
Removing fork wiper seals is a task that requires careful attention to detail. By following the proper steps and taking the time to prepare and inspect the components, you can successfully remove the seals and maintain the performance of your fork. Remember to work methodically and be patient throughout the process, and don’t hesitate to seek professional help if needed. With the right approach, you can complete this task effectively and ensure the longevity of your fork.