If you are an avid cyclist, you know the importance of having a properly functioning bicycle. One crucial component that affects your ride quality is the cycle fork. The cycle fork, also known as the front suspension fork, helps absorb shocks and impacts from the road or trail, providing a smoother and more comfortable ride. However, over time, the cycle fork may require repairs due to wear and tear or damage. In this article, we will guide you through the process of repairing shockwave cycle forks.
Step 1: Identifying the Problem
The first step in repairing shockwave cycle forks is to identify the problem. Start by inspecting the fork for any signs of damage or wear. Look for cracks, dents, or bent parts. Check if the fork is leaking oil, as this could indicate a damaged seal. Additionally, listen for any unusual sounds when compressing or rebounding the fork. Identifying the problem will help you determine the necessary repairs.
Step 2: Disassembling the Fork
Once you have identified the problem, it is time to disassemble the fork. Start by removing the front wheel and brake caliper. Then, loosen the bolts or quick-release skewer that attaches the fork to the bike’s frame. Carefully remove the crown race and the dust seals, and then use a fork seal driver to push out the old seals. Take note of the order in which you remove the fork’s components, as this will make reassembly easier later on.
Step 3: Repair or Replace Parts
After disassembling the fork, assess the individual components for repair or replacement. If you found any cracks or bent parts, it is best to replace them. You may also need to replace the damaged seals or damaged bushings. Clean all the parts thoroughly with a designated bike cleaner, and make sure all parts are dry before proceeding.
Step 4: Reassembling the Fork
Once all the necessary repairs or replacements have been made, it is time to reassemble the fork. Start by inserting the new seals and bushings using a fork seal driver. Then, carefully reattach the crown race and dust seals. Slide the fork back into the frame, and tighten the bolts or quick-release skewer securely. Finally, reinstall the front wheel and brake caliper.
Step 5: Testing and Adjusting
After reassembling the fork, it is crucial to test and adjust its performance. Compress and rebound the fork several times to ensure it is functioning properly. Listen for any unusual sounds and check for any oil leaks. If necessary, adjust the air pressure or damping settings according to your preference and riding style. Once you are satisfied with the fork’s performance, you are ready to hit the road or trail with confidence!
Please note that repairing shockwave cycle forks may require specialized tools and technical knowledge. If you are unsure or uncomfortable with any step, it is recommended to consult a professional bike mechanic.
Understanding shockwave cycle forks
Shockwave cycle forks are a crucial component of a bicycle’s suspension system. They help to absorb impact from uneven terrain, providing a smoother and more comfortable ride. It is important to understand how these forks work in order to properly repair and maintain them.
Functionality of shockwave cycle forks
Shockwave cycle forks are designed to compress and rebound in response to impacts. They contain an internal spring or air chamber that absorbs the energy from bumps and obstacles. This compression and rebound action helps to reduce the transmission of shocks and vibrations to the rider.
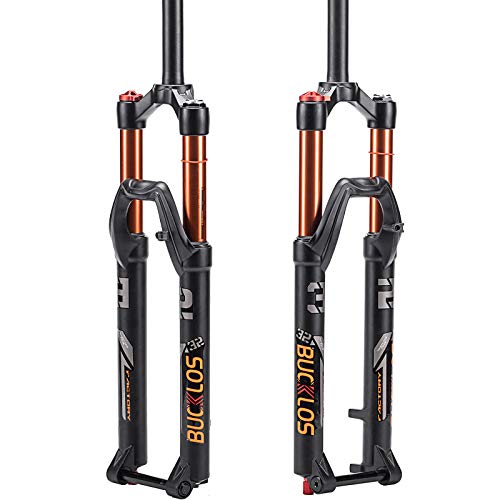
These forks are typically made up of two stanchions that slide within each other. The inner stanchion is connected to the wheel axle, while the outer stanchion is attached to the bicycle frame. When a shockwave cycle fork encounters an impact, the inner stanchion compresses into the outer stanchion, absorbing the force. Once the impact is passed, the fork rebounds to its original position.
Common issues with shockwave cycle forks
Over time, shockwave cycle forks can experience wear and tear, leading to various issues. Some common problems include:
| Issue | Cause | Solution |
|---|---|---|
| Leaking oil | Worn seals or damaged internals | Replace the seals or repair the internals |
| Stiff or unresponsive fork | Buildup of dirt or lack of lubrication | Clean and lubricate the fork |
| Noisy fork | Loose or worn components | Tighten or replace the components |
It is important to regularly inspect and maintain shockwave cycle forks to ensure optimal performance and safety. Following the manufacturer’s guidelines and seeking professional assistance when necessary can help in addressing any issues effectively.
Common problems with Shockwave cycle forks
Shockwave cycle forks are known for their durability and performance, but like any other bicycle component, they can experience certain issues over time. Here are some common problems you may encounter with Shockwave cycle forks:
1. Suspension not working properly
One of the most common issues with Shockwave cycle forks is when the suspension does not work as intended. This can manifest as a lack of travel, the fork not compressing or rebounding correctly, or feeling stiff and not absorbing impacts effectively. There are several potential causes for this problem, including:
| • Damaged or worn-out seals | • Air pressure out of balance |
| • Insufficient lubrication | • Damaged or worn-out bushings |
If you are experiencing issues with the suspension, it is recommended to have a professional bike mechanic inspect and service the forks to diagnose and address the underlying problem.
2. Leaking oil
Another common problem with Shockwave cycle forks is oil leakage. This can be caused by damaged seals, worn-out o-rings, or other issues within the fork’s internal mechanism. If you notice oil residue on the stanchions or dripping from the fork, it is important to address the issue promptly as it can affect the performance and longevity of the forks. A bike mechanic can replace the damaged parts and reseal the fork to prevent further leakage.
3. Loose or noisy components
Over time, the components of Shockwave cycle forks can become loose due to regular use and vibration. Loose components can result in rattling or creaking noises while riding, affecting the overall riding experience. It is advisable to regularly check and tighten all bolts and fasteners to ensure everything is secure. If the problem persists, a bike mechanic can further inspect and diagnose the cause of the noise.
Remember, proper maintenance and regular inspections are crucial to keep your Shockwave cycle forks in optimal working condition. If you are unsure about any issues or feel uncomfortable performing any repairs yourself, always consult a professional bike mechanic for assistance.
Tools needed for repairing shockwave cycle forks
To repair shockwave cycle forks, you will need a few tools to ensure proper disassembly and reassembly. These tools may vary depending on the specific make and model of your shockwave cycle forks, but the following is a general list of tools that are commonly used:
1. Allen wrench set
Allen wrenches are essential for removing and tightening various bolts and screws on the shockwave cycle forks. You will need a set of metric Allen wrenches that correspond to the sizes of the bolts on your forks.
2. Adjustable wrench
An adjustable wrench is useful for gripping and turning larger nuts and bolts. It can be helpful when working with certain components of the shockwave cycle forks that require more torque to remove or install.
3. Fork seal driver
A fork seal driver is a specialized tool used for installing fork seals. It helps ensure that the seals are seated properly and evenly. Fork seal drivers come in different sizes, so you will need one that matches the size of your shockwave cycle forks.
4. Shock pump
A shock pump is necessary for adjusting the air pressure in the shockwave cycle forks. It allows you to fine-tune the fork’s performance by adjusting the air spring. Make sure to check the recommended pressure range for your specific shockwave cycle forks.
5. Grease and lubricants
Greas
Step-by-step guide to repairing shockwave cycle forks
Repairing shockwave cycle forks requires a careful approach and proper tools. Follow these step-by-step instructions to ensure a successful repair:
Step 1: Inspection
Begin by inspecting the shockwave cycle forks thoroughly. Look for any visible damage or signs of wear such as cracks, dents, or leakage. Pay attention to the seals, bushings, and stanchions for any signs of damage.
Step 2: Disassembly
Using the appropriate tools, remove the front wheel and detach the fork from the bicycle. Proceed to disassemble the fork, removing the lower legs and the spring mechanism carefully.
Step 3: Cleaning and Lubrication
Thoroughly clean all the disassembled parts using a mild solvent and a clean cloth. Inspect the seals and bushings for any build-up or damage. Apply a suitable lubricant to all moving parts, including the stanchions and seals.
Step 4: Replacement
If any damaged or worn parts are identified during the inspection, replace them with new, compatible parts. Ensure that all replaced parts are correctly installed and fastened according to the manufacturer’s specifications.
Step 5: Reassembly
Carefully reassemble the shockwave cycle forks, paying attention to the alignment and correct placement of each part. Use the appropriate tools to fasten and secure all the components properly.
Step 6: Adjustments
Once the fork is reassembled, make any necessary adjustments to the spring tension, compression, and rebound settings according to your riding preferences and the manufacturer’s guidelines.
Step 7: Testing
Before riding the bicycle again, conduct a thorough test to ensure that the repaired shockwave cycle forks are functioning correctly. Check for smooth suspension movement, absence of leaks, and proper braking performance.
By following this step-by-step guide, you can successfully repair shockwave cycle forks and restore their optimal performance.
Tips for maintaining shockwave cycle forks
Regular cleaning: Keeping your shockwave cycle forks clean is crucial for their longevity and performance. After every ride, make sure to clean any dirt, mud, or debris from the forks. Use a mild detergent and water solution along with a soft brush or cloth to gently remove any grime.
Lubrication: Proper lubrication is essential for smooth functioning of the shockwave cycle forks. Apply a high-quality lubricant to the stanchions and seals regularly to minimize friction and ensure optimal performance. Be sure to wipe off any excess lubricant.
Inspection: Regularly inspect your shockwave cycle forks for any signs of damage, such as leaks, scratches, or dents. Pay attention to the seals, dust wipers, and bushings. If you notice any issues, it’s important to address them promptly to avoid further damage.
Adjustment: Depending on your riding style and preferences, you may need to adjust the settings of your shockwave cycle forks. Consult the manufacturer’s guidelines for instructions on how to adjust the compression, rebound, and air pressure settings to suit your needs.
Proper storage: When not in use, it’s important to store your shockwave cycle forks properly. Keep them in a dry, cool place, away from direct sunlight and extreme temperatures. Use fork covers or protective sleeves to prevent dust and debris from accumulating on the forks.
Regular servicing: To ensure optimal performance and safety, it’s recommended to have your shockwave cycle forks serviced by a professional at regular intervals. They can inspect and service the internal components, replace worn-out parts, and tune the forks to your specific requirements.
Riding technique: Finally, make sure to adjust your riding technique to minimize impacts and stress on the shockwave cycle forks. Avoid heavy landings, rough terrain, and excessive jumping to prevent unnecessary strain on the forks.
By following these tips, you can help maintain the performance and prolong the lifespan of your shockwave cycle forks.