
If you are an owner of a Honda Blackbird motorcycle and notice that your fork seals are leaking, it’s time to replace them. Fork seals play a crucial role in maintaining the suspension system and keeping your ride smooth and safe. In this guide, we will walk you through step-by-step instructions on how to replace the fork seals on your Honda Blackbird.
Step 1: Preparation
Before starting the replacement process, make sure you have all the necessary tools and materials. You will need a set of fork seal drivers, a seal pick, a fork oil level gauge, replacement fork seals, new fork oil, and a Honda Blackbird service manual for reference. Also, ensure that you have a clean and well-lit workspace to work on your motorcycle.
Step 2: Removing the Forks
To access the fork seals, you will need to remove the front wheel, brakes, and handlebars. Follow the instructions in the service manual to safely remove the forks from your Honda Blackbird. Once the forks are removed, clean off any dirt or debris from the outer tubes to prevent contamination during the seal replacement process.
Step 3: Removing the Old Seals
Using the seal pick, carefully remove the old fork seals from the outer tubes. Be gentle to avoid damaging the tubes or any other components. Inspect the inner tubes for any signs of pitting or damage. If you notice any, it is recommended to replace both the inner and outer tubes for optimal performance.
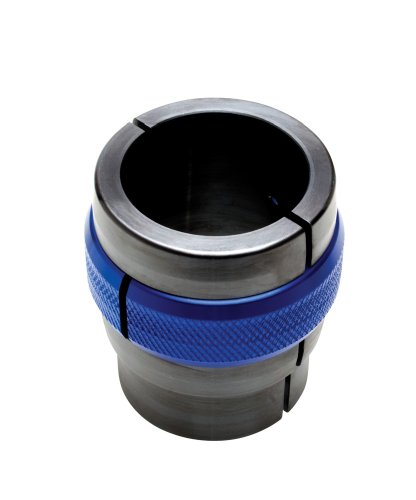
Step 4: Installing the New Seals
Apply a thin layer of fork oil to the new fork seals, then slide them onto the inner tubes. Make sure they are seated properly and evenly. Use a seal driver to gently tap the seals into place, taking care not to damage them. Refer to the service manual for the correct fork oil amount and fill the forks accordingly.
Step 5: Reassembly
Once the new seals are installed and the forks are filled with the correct fork oil, it’s time to reassemble your Honda Blackbird. Follow the reverse order of the disassembly process, ensuring that all components are securely tightened and aligned. Double-check everything to ensure proper installation and functionality.
By following these step-by-step instructions, you can replace the fork seals on your Honda Blackbird and restore the smooth and safe ride you love. However, if you’re not confident in your mechanical abilities, it’s always best to consult a professional mechanic who specializes in motorcycle repairs. Properly functioning fork seals are essential for optimal suspension performance, so it’s worth getting the job done right.
Prepare the necessary tools
Before you start replacing the fork seals on your Honda Blackbird, it’s important to gather all the necessary tools and equipment. Having everything prepared will help make the process smoother and more efficient.
Here are the tools you will need:
| 1. | Fork seal driver |
| 2. | Socket set |
| 3. | Torque wrench |
| 4. | Breaker bar |
| 5. | Hex key set |
| 6. | Circlip pliers |
| 7. | Seal pick |
| 8. | Shop towels |
| 9. | Fork oil |
| 10. | Oil drain pan |
Make sure all the tools are in good working condition and are the correct size for your fork seals. It’s also a good idea to have some extra shop towels on hand for any spills or messes that may occur during the process.
By having all the necessary tools prepared, you can save time and avoid any unnecessary frustrations during the fork seal replacement on your Honda Blackbird.
Gather all the required equipment
Before starting the process of replacing fork seals on your Honda Blackbird, it is important to gather all the necessary equipment and tools. Having everything ready beforehand will help ensure a smooth and efficient process. Here is a list of the essential equipment you will need:
- Socket set
- Torque wrench
- Fork oil
- Fork seal driver
- Fork oil seal
- Fork dust seal
- Sharp knife or seal puller
- Rags or paper towels
- Clean container for draining fork oil
- Allen keys
- Impact wrench (optional)
Make sure to check your owner’s manual or service manual for any additional equipment or specific tools recommended for your Honda Blackbird model. Having all the necessary equipment ready will save you time and prevent any interruptions during the process.
Inspect the condition of your fork seals
Before replacing the fork seals on your Honda Blackbird, it’s important to inspect the condition of the existing seals. This will help you determine whether replacing them is necessary.
Start by cleaning the fork tubes using a soft cloth or a paper towel. Look for any visible signs of oil leakage or residue around the fork seals. If you notice any oil leaking or dirt buildup, it’s likely that your seals need to be replaced.
Next, compress the front suspension by applying pressure to the handlebars and then releasing it. Pay close attention to the forks as they extend back to their original position. If you see any oil residue or a ring of oil forming on the fork tubes, it’s a clear indication that your seals are worn out and need to be replaced.
Another way to check the condition of the fork seals is by feeling the forks for any excessive play or movement while pushing down on the front suspension. If you notice any unusual movement or resistance, it’s a sign that the seals have deteriorated and should be replaced.
Inspecting the condition of your fork seals is crucial to ensure optimal performance and safety of your Honda Blackbird. If you notice any signs of wear or damage during the inspection process, it’s highly recommended to replace the seals as soon as possible to prevent further issues and maintain the integrity of your suspension system.
Drain the fork oil
Before you can replace the fork seals on your Honda Blackbird, you will need to drain the fork oil. Follow these steps:
- First, make sure your motorcycle is securely supported and stable on a center stand or lift.
- Loosen the bolts securing the fork caps using a suitable wrench or socket.
- Carefully remove the fork caps, keeping in mind that there might be some residual pressure.
- With the fork caps removed, attach a drain pan beneath each fork leg to catch the fork oil.
- Compress the fork several times to fully drain the fork oil. You can do this by gently pushing down on the front end of the motorcycle or by using a fork compressor tool.
- Once the fork oil has been drained, remove the drain pan and dispose of the old oil according to local regulations.
By properly draining the fork oil, you can ensure a clean and efficient replacement of the fork seals on your Honda Blackbird.
Remove the front forks
To replace the fork seals on your Honda Blackbird, the first step is to remove the front forks. Follow the steps below to safely detach the forks:
| Step 1: | Secure your motorcycle in an upright position using a center stand or a paddock stand. |
| Step 2: | Remove the front wheel by loosening the axle nut and sliding the wheel out from the fork legs. |
| Step 3: | Find the pinch bolts on the bottom of the fork legs, typically located near the axle area. Loosen these bolts using an appropriate wrench or socket. |
| Step 4: | Once the pinch bolts are loosened, carefully slide the fork legs out of the triple tree or fork clamps. It may be helpful to have an extra set of hands to support the weight of the forks. |
| Step 5: | Repeat the process for the other fork leg. |
Note: It is important to handle the forks with care and avoid dropping them or causing any damage to the tubes or internal components.
With the front forks removed, you can now proceed to the next steps of replacing the fork seals on your Honda Blackbird.
Detach the front wheel
Before you can replace the fork seals on your Honda Blackbird, you need to detach the front wheel. This will provide you with better access to the fork tubes and make the seal replacement process easier. Follow these steps to detach the front wheel:
- Using a suitable wrench or socket, loosen the bolts on both sides of the front axle. Make sure to loosen them completely, but do not remove them just yet.
- Place a motorcycle stand or a suitable substitute under the engine to support the weight of the bike.
- Using the appropriate tools, fully remove the front axle bolts.
- Carefully lower the front wheel until it is clear of the forks and the axle is completely removed.
- Take note of any spacers or washers on the axle and keep them in a safe place for reassembly.
With the front wheel detached, you can now proceed to replace the fork seals on your Honda Blackbird. Make sure to follow the manufacturer’s instructions or consult a service manual for detailed guidance on the seal replacement process.
Disconnect the brake calipers
Before beginning the process of replacing the fork seals on your Honda Blackbird, it is important to disconnect the brake calipers to ensure that they do not interfere with the removal and installation of the forks.
To disconnect the brake calipers, follow these steps:
- Using a wrench or socket, remove the bolts securing the calipers to the front fork.
- Once the bolts are removed, gently slide the calipers off the front fork and set them aside.
- Take care not to damage any of the brake lines or hoses during this process.
By disconnecting the brake calipers, you will have easier access to the front fork and fork seals, allowing for a smoother and more efficient replacement process.
Note: It is important to exercise caution and follow all safety guidelines when working on your motorcycle’s braking system. If you are unsure about any aspect of this process, it is recommended to consult a professional mechanic.


